Laravel 6 Import Export Excel with Heading using Laravel Excel 3.1
Hello, in this tutorial, I’m going to show how to import and export excel sheet with custom headers. I’ll use Laravel Excel 3.1 package for this tutorial.
Table of Contents
- Install Laravel and Basic Configurations
- Install Laravel Excel Package
- Create Migration, Model and Controller
- Insert Dummy/Fake Data
- Create Laravel Excel Import Class
- Create Laravel Excel Export Class
- Create Functions in BookController
- Make a View File
- Register Web Routes
- Run and Test Project
Step 1 : Install Laravel and Basic Configurations
Each Laravel project needs this thing. That’s why I have written an article on this topic. Please see this part from here: Install Laravel and Basic Configurations.
Step 2 : Install Laravel Excel Package
Let’s install the Laravel Excel means maatwebsite/excel package first using this artisan command:
composer require maatwebsite/excelThe Maatwebsite\Excel\ExcelServiceProvider is auto-discovered and registered by default.
Step 3 : Create Migration, Model and Controller
For testing purpose, we are going to create a table called books. To do database tasks, we are going to create a controller and model too. Run this command to create the three things at once:
php artisan make:model Book -mcr# Modify Migration File:
Open the newly created migration file from database/migrations and update the up() method like this:
public function up()
{
    Schema::create('books', function (Blueprint $table) {
        $table->bigIncrements('id');
        $table->string('name');
        $table->string('author');
        $table->timestamps();
    });
}
Run this below command to migrate the migration file:
php artisan migrate# Modify Mode:
Open the Book model from app folder and add a $fillable array like this:
class Book extends Model
{
    /**
     * The attributes that are mass assignable.
     *
     * @var array
     */
    protected $fillable = [
        'name', 'author',
    ];
}
Step 4 : Insert Dummy/Fake Data
In this step, let’s insert a few dummy data in the books table. We have to create a Book factory. Lets’ create:
php artisan make:factory BookFactory --model=BookOpen the BookFactory.php from database/factories folder and paste the below code:
<?php

/** @var \Illuminate\Database\Eloquent\Factory $factory */

use App\Book;
use Faker\Generator as Faker;

$factory->define(Book::class, function (Faker $faker) {
    return [
        'name' => $faker->text(20),
        'author' => $faker->name(),
    ];
});
Now run this command to insert 5 fake data in the books table.
 # open tinker console
php artisan tinker
# insert fake data
factory(App\Book::class, 5)->create();
Step 5 : Create Laravel Excel Import Class
In Laravel Excel 3, they provide the way to built import class. It’s better than other ways.
php artisan make:import BooksImport --model=BookOpen BooksImport.php from app\Imports folder and create model like this:
<?php

namespace App\Imports;

use App\Book;
use Maatwebsite\Excel\Concerns\ToModel;
use Maatwebsite\Excel\Concerns\WithHeadingRow;

class BooksImport implements ToModel, WithHeadingRow
{
    /**
     * @param array $row
     *
     * @return \Illuminate\Database\Eloquent\Model|null
     */
    public function model(array $row)
    {
        return new Book([
            'name' => $row['name'],
            'author' => $row['author'],
        ]);
    }
}
Step 6 : Create Laravel Excel Export Class
In Laravel Excel 3, they also provide the way to built export class. We will use their way. So, let’s create an export class named BooksExport:
php artisan make:export BooksExport --model=BookOpen BooksExport.php from app\Exports folder and paste the below code:
<?php

namespace App\Exports;

use App\Book;
use Maatwebsite\Excel\Concerns\FromCollection;
use Maatwebsite\Excel\Concerns\WithHeadings;

class BooksExport implements FromCollection, WithHeadings
{
    /**
     * @return \Illuminate\Support\Collection
     */
    public function collection()
    {
        return Book::all();
    }

    public function headings(): array
    {
        return [
            'ID',
            'Name',
            'Author',
            'Created At',
            'Updated At',
        ];
    }
}
Step 7 : Create Functions in BookController
Let’s create three functions called index, import and export. Index function to display all books, import to import data and export function to export data in excel format.
Open BookController from app\Http\Controllers and paste this code:
<?php

namespace App\Http\Controllers;

use App\Book;
use App\Exports\BooksExport;
use App\Imports\BooksImport;
use Illuminate\Http\Request;
use Maatwebsite\Excel\Facades\Excel;

class BookController extends Controller
{
    /**
     * Display a listing of the resource.
     */
    public function index()
    {
        $books = Book::all();

        return view('books')->with('books', $books);
    }

    /**
     * Import function
     */
    public function import(Request $request)
    {
        if ($request->file('imported_file')) {
            Excel::import(new BooksImport(), request()->file('imported_file'));
            return back();
        }
    }


    /**
     * Export function
     */
    public function export()
    {
        return Excel::download(new BooksExport(), 'books.xlsx');
    }

}
Step 8 : Make a View File
Go to resources/views directory and create a view file called books.blade.php. Then copy-paste this code:
<!doctype html>
<html lang="{{ str_replace('_', '-', app()->getLocale()) }}">
<head>
    <meta charset="utf-8">
    <meta name="viewport" content="width=device-width, initial-scale=1, shrink-to-fit=no">
    <meta name="csrf-token" value="{{ csrf_token() }}"/>
    <title>Laravel 6 Import Export Excel with Heading using Laravel Excel 3.1 - MyNotePaper</title>
    <link rel="stylesheet" href="https://maxcdn.bootstrapcdn.com/bootstrap/4.0.0/css/bootstrap.min.css">
</head>
<body>
<div class="container">
    <div class="text-center" style="margin: 20px 0px 20px 0px;">
        <a href="https://shouts.dev/" target="_blank"><img src="https://i.imgur.com/hHZjfUq.png"></a><br>
        <span class="text-secondary">Laravel 6 Import Export Excel with Heading using Laravel Excel 3.1</span>
    </div>
    <br/>

    <div class="clearfix">
        <div class="float-left">
            <form class="form-inline" action="{{url('books/import')}}" method="post" enctype="multipart/form-data">
                {{csrf_field()}}
                <div class="form-group">
                    <div class="custom-file">
                        <input type="file" class="custom-file-input" name="imported_file"/>
                        <label class="custom-file-label">Choose file</label>
                    </div>
                </div>
                <button style="margin-left: 10px;" class="btn btn-info" type="submit">Import</button>
            </form>
        </div>
        <div class="float-right">
            <form action="{{url('books/export')}}" enctype="multipart/form-data">
                <button class="btn btn-dark" type="submit">Export</button>
            </form>
        </div>
    </div>
    <br/>

    @if(count($books))
        <table class="table table-bordered">
            <thead>
            <tr>
                <td>ID</td>
                <td>Name</td>
                <td>Author</td>
            </tr>
            </thead>
            @foreach($books as $book)
                <tr>
                    <td>{{$book->id}}</td>
                    <td>{{$book->name}}</td>
                    <td>{{$book->author}}</td>
                </tr>
            @endforeach
        </table>
    @endif

</div>

</body>
</html>
Step 9 : Register Web Routes
We are at the end. Let’s create three web routes:
Route::get('books', 'BookController@index');
Route::post('books/import', 'BookController@import');
Route::get('books/export', 'BookController@export');
Step 10 : Run and Test Project
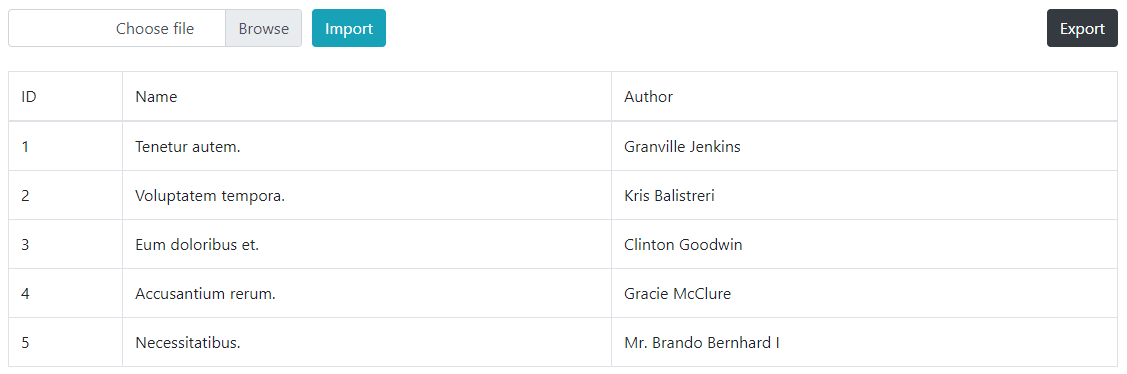
We have completed all the steps. Let run the project and visit books route.
Here’s my output:
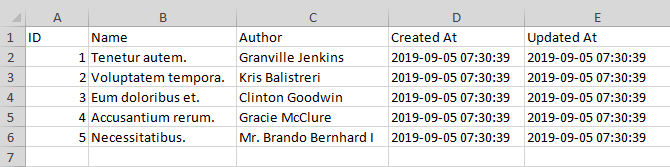
After clicking on the Export button, an excel file called books.xlsx will automatically start to download. I’ve opened books.xlsx and saw like this:
Then I was trying to import the exported books.xlsx file and it was successful.
The tutorial is over. You can download this project from GitHub. Thank you. ?Md Obydullah
Software Engineer | Ethical Hacker & Cybersecurity...
Md Obydullah is a software engineer and full stack developer specialist at Laravel, Django, Vue.js, Node.js, Android, Linux Server, and Ethichal Hacking.