Email Verification in Laravel 5.8
In Laravel, we can easily setup email verification. Today, I’ll share the way to verify email in Laravel.
Table of Contents
Let’s follow these steps:
- Install Laravel and Basic Configurations
- Setup Email Configuration
- Authentication Scaffolding
- Implement MustVerifyEmail
- Configure Auth Route
- Test Email Verification
Step 1 : Install Laravel and Basic Configurations
Each Laravel project needs this thing. That’s why I have written an article on this topic. Please see this part from here: Install Laravel and Basic Configurations.
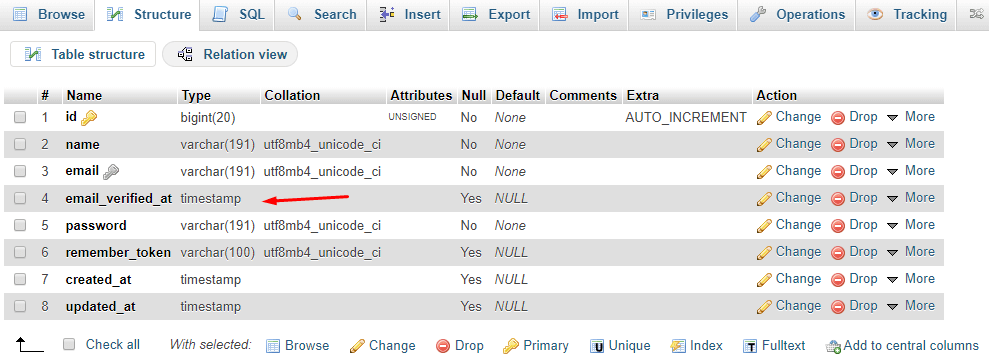
After doing the basic configuration, migrate the tables by this command:
php artisan migrateNow, look at the ‘users’ table. You will find a field named ‘email_verified_at‘.
Step 2 : Setup Email Configuration
Open .env file and enter your email SMTP credentials. I’m using
https://mailtrap.io/ for testing purpose. You can also get demo credentials from mailtrap.
MAIL_DRIVER=smtp
MAIL_HOST=smtp.mailtrap.io
MAIL_PORT=2525
MAIL_USERNAME=null
MAIL_PASSWORD=null
MAIL_ENCRYPTION=null
Step 3 : Authentication Scaffolding
Go to the terminal and type this command:
php artisan make:auth
Navigate to resources/views folder and you will see some blade files included verify.blade.php
Step 4 : Implement MustVerifyEmail
Open User model from app/User.php and implements MustVerifyEmail in User class. So the code will look like:
<?php

namespace App;

use Illuminate\Notifications\Notifiable;
use Illuminate\Contracts\Auth\MustVerifyEmail;
use Illuminate\Foundation\Auth\User as Authenticatable;

class User extends Authenticatable implements MustVerifyEmail
{
    use Notifiable;

    /**
     * The attributes that are mass assignable.
     *
     * @var array
     */
    protected $fillable = [
        'name', 'email', 'password',
    ];

    /**
     * The attributes that should be hidden for arrays.
     *
     * @var array
     */
    protected $hidden = [
        'password', 'remember_token',
    ];

    /**
     * The attributes that should be cast to native types.
     *
     * @var array
     */
    protected $casts = [
        'email_verified_at' => 'datetime',
    ];
}
Step 5 : Configure Auth Route
In this step, we need to add extra parameter inside Auth::routes(). Open routes/web.php and do the change like this:
Auth::routes(['verify' => true]);This enables the new Verification controller with the route actions. You can find the VerificationController.php file in app/Http/Controllers/Auth folder.
To protect the HomeController route, we need to do this in __construct() method:
public function __construct()
{
    $this->middleware(['auth', 'verified']);
}
By this method, we can give access to verified users to any controller.
Step 6 : Test Email Verification
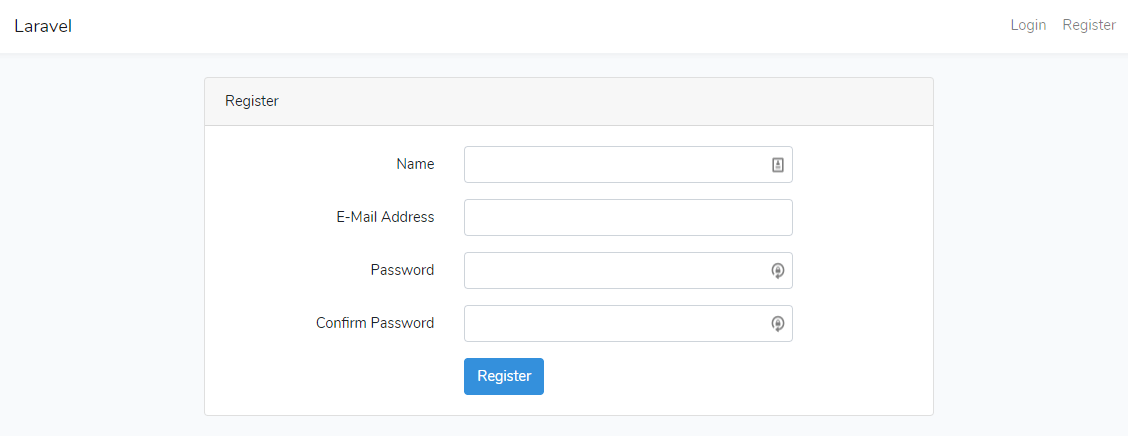
Open a browser and go to your project by entering http://localhost:8000/register. I’m using a custom domain in localhost project. So that I’m opening https://laravel.dev/register (Custom Domain with SSL). Fill up the registration form:
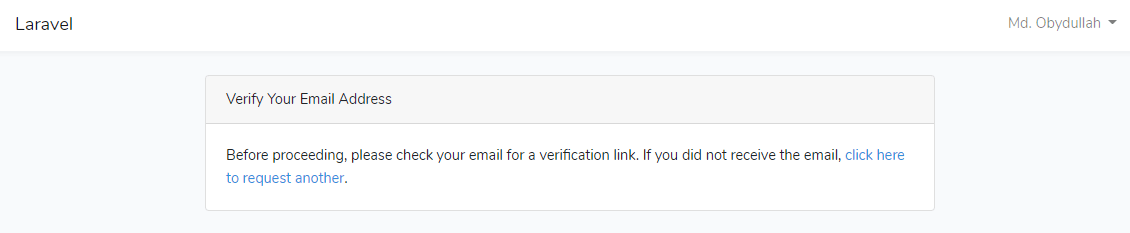
After clicking on Register button, you will see like this:
Now, check your inbox to see the verification email. I’m checking mailtrap’s demo inbox.
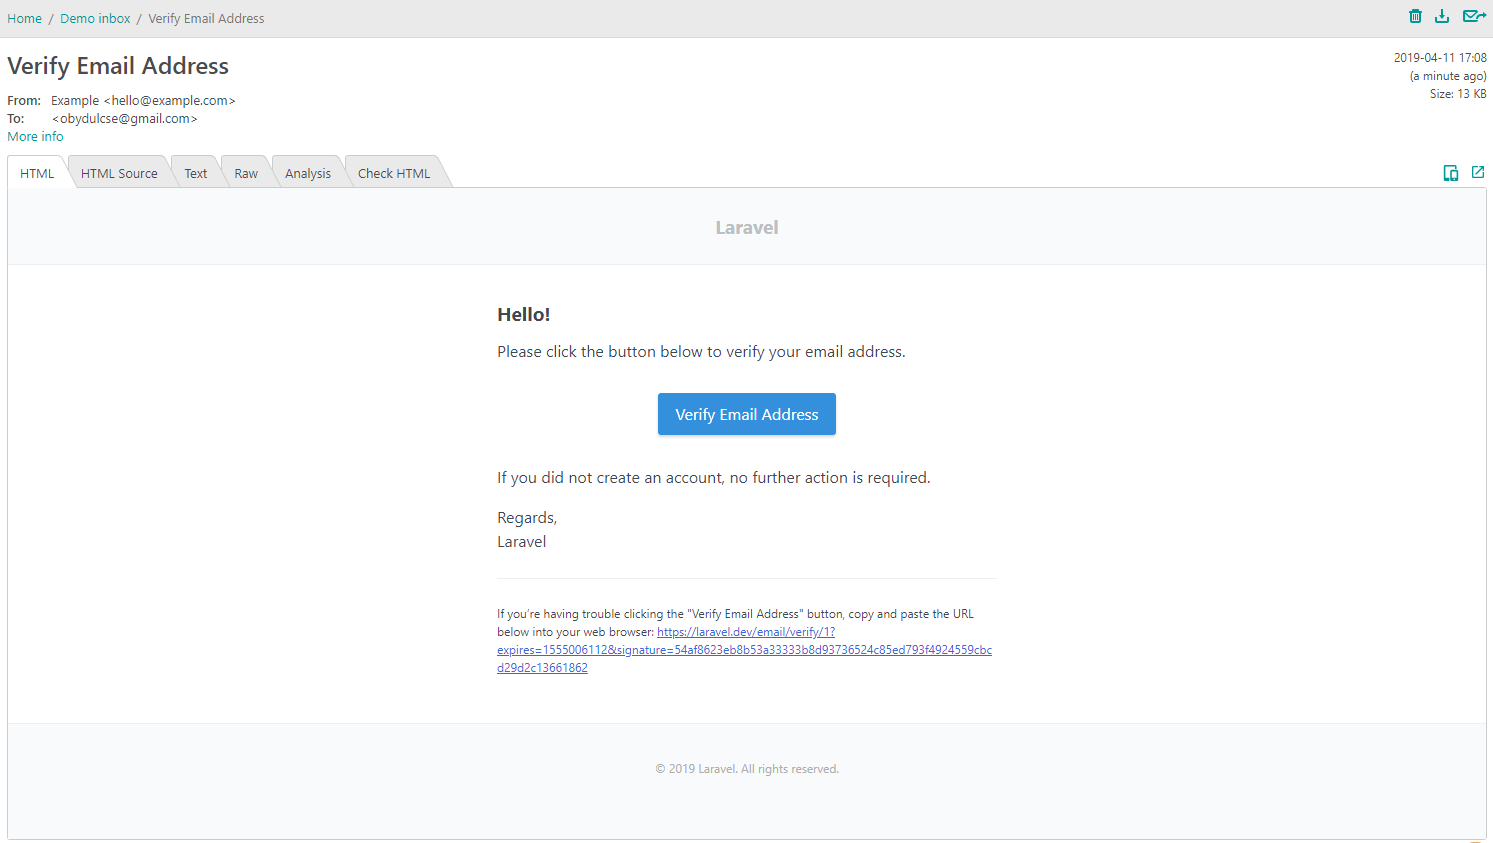
When I clicked on ‘Verify Email Address’, it redirected me to the home page. I have checked the database and saw that the email_verified_at field has been updated.

We are done!
Md Obydullah
Software Engineer | Ethical Hacker & Cybersecurity...
Md Obydullah is a software engineer and full stack developer specialist at Laravel, Django, Vue.js, Node.js, Android, Linux Server, and Ethichal Hacking.