Laravel Login with Facebook
Today, we will discuss the Laravel Facebook login. I’ll use Socialite package for this. Let’s follow these steps:
Note: Facebook, Google recommends to use HTTPS. So that I’ve setup custom domain with HTTPS for my localhost project. My custom domain is https://laravel.dev/. You need to replace this with your domain. Generally, the laravel localhost URL is http://localhost:8000/.
To setup the custom domain with HTTPS, please read this article: How to add Custom Domain and install SSL (HTTPS) on Localhost.
Table of Contents
- Install Laravel and Basic Configurations
- Create Laravel Authentication
- Install & Configure laravel/socialite Package
- Create a Controller
- Register Routes
- Get Facebook Client & Secret ID
- Modify Login Page
- Test Facebook Login
Step 1 : Install Laravel and Basic Configurations
Each Laravel project needs this thing. That’s why I have written an article on this topic. Please see this part from here: Install Laravel and Basic Configurations.
After completing basic configurations, go to database/migrations folder and open create_users_table migration file. We are going to add one field called ‘facebook_user_id’.
public function up()
{
    Schema::create('users', function (Blueprint $table) {
        $table->bigIncrements('id');
        $table->string('facebook_user_id');
        $table->string('name');
        $table->string('email')->unique();
        $table->timestamp('email_verified_at')->nullable();
        $table->string('password');
        $table->rememberToken();
        $table->timestamps();
    });
}
Step 2 : Create Laravel Authentication
Laravel has primary authentication. Run this command to get the
authentication:
php artisan make:auth
Run this command to migrate the tables:
php artisan migrate
Now run the laravel project to see the login, register page:
The login URL is https://your-domain/login
Step 3 : Install & Configure laravel/socialite Package
Fire this command to install laravel/socialite package:
composer require laravel/socialite
Laravel 5.5 uses package auto-discovery, so doesn’t require you to manually add the ServiceProvider. If you don’t use auto-discovery, then register manually:
To register Socialite provider and aliase. Go to config >> app.php and find the providers & add this:
'providers' => [
    // ...
    Laravel\Socialite\SocialiteServiceProvider::class,
]
Find aliases in the file and add this line:
'aliases' => [
    // ...
    'Socialite' => Laravel\Socialite\Facades\Socialite::class,
]
Step 4 : Create a Controller
Let’s create a controller named ‘FacebookAuthController’:
php artisan make:controller FacebookAuthController
Open FacebookAuthController.php from app\Http\Controllers and paste this code:
<?php

namespace App\Http\Controllers;

use Illuminate\Http\Request;
use App\User;
use Socialite;
use Auth;
use Exception;


class FacebookAuthController extends Controller
{
    public function redirectToProvider()
    {
        return Socialite::driver('facebook')->redirect();
    }

    public function handleProviderCallback()
    {
        try {
            $facebookUser = Socialite::driver('facebook')->user();
            $existUser = User::where('email', $facebookUser->email)->first();

            if ($existUser) {
                Auth::loginUsingId($existUser->id);
            } else {
                $user = new User;
                $user->facebook_user_id = $facebookUser->getId();
                $user->name = $facebookUser->getName();
                $user->email = $facebookUser->getEmail();
                $user->password = md5(rand(1, 10000));
                $user->save();
                Auth::loginUsingId($user->id);
            }
            return redirect()->to('/home');
        } catch (Exception $e) {
            return 'error';
        }
    }
}
Step 5 : Register Routes
Open routes>>web.php and register the routes:
<?php

Auth::routes();

Route::get('/facebook-login', 'FacebookAuthController@redirectToProvider');
Route::get('/callback', 'FacebookAuthController@handleProviderCallback');

Route::get('/home', 'HomeController@index')->name('home');
Step 6 : Get Facebook Client & Secret ID
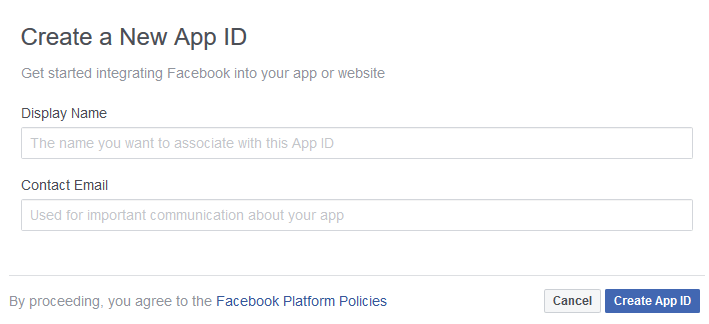
Go to Facebook developers area and create an app.
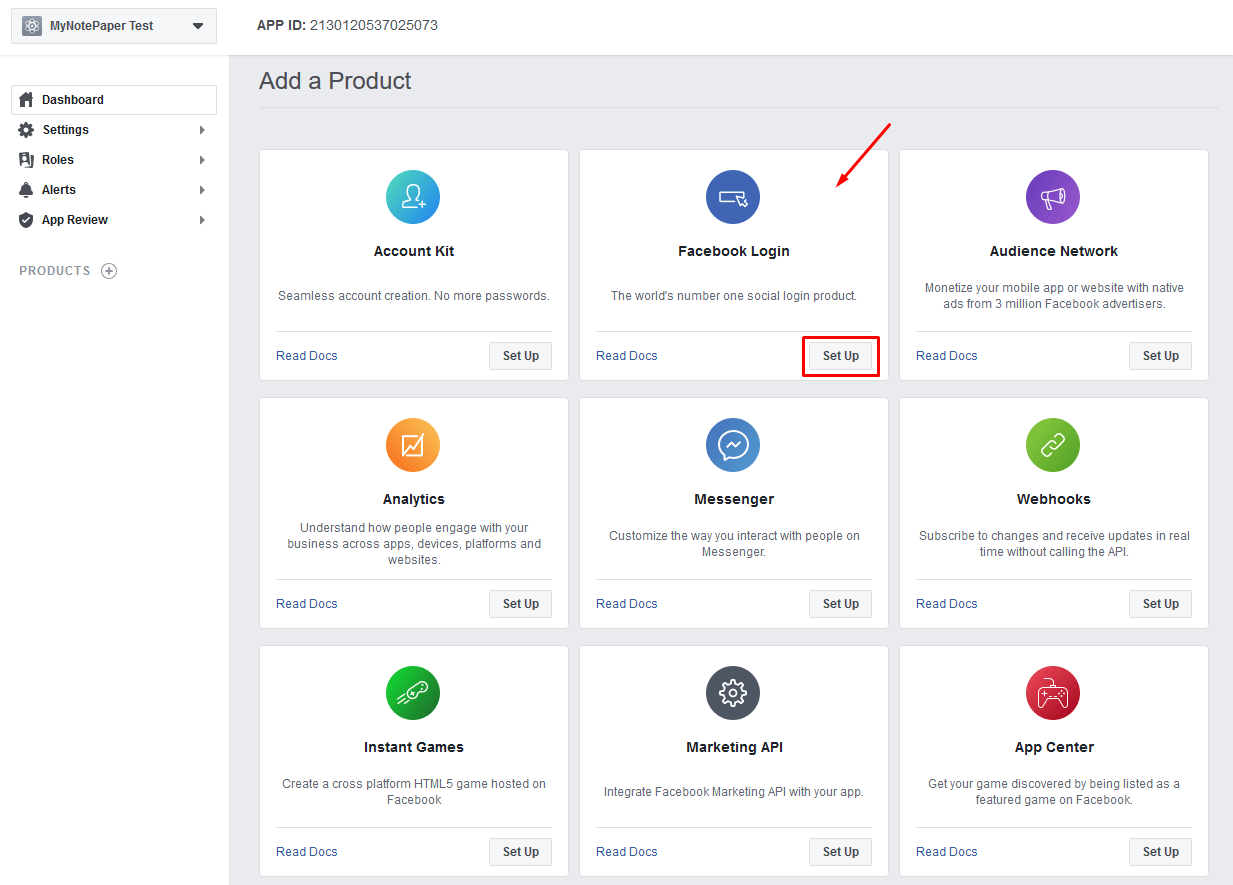
After successfully creating an App ID, you will redirect to the app dashboard. From the dashboard, select the Facebook Login option.
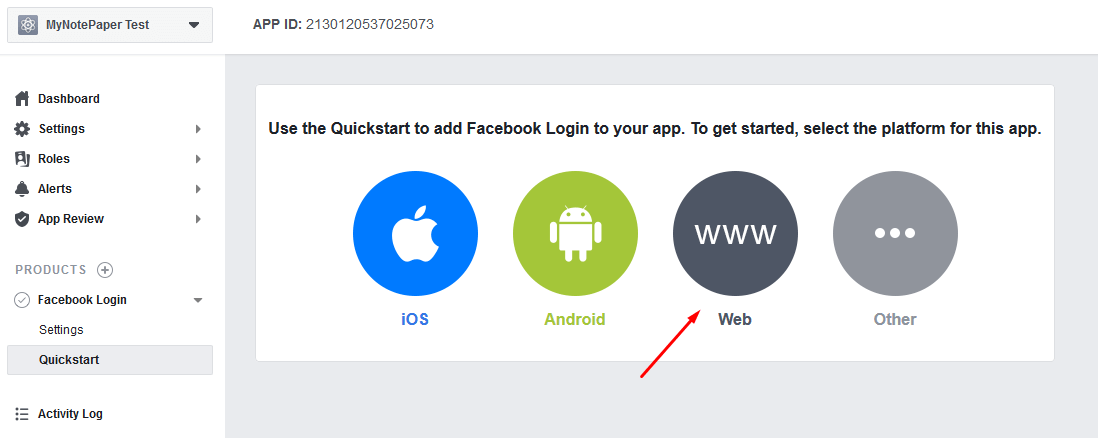
Then select Web.
Now enter your domain name here.
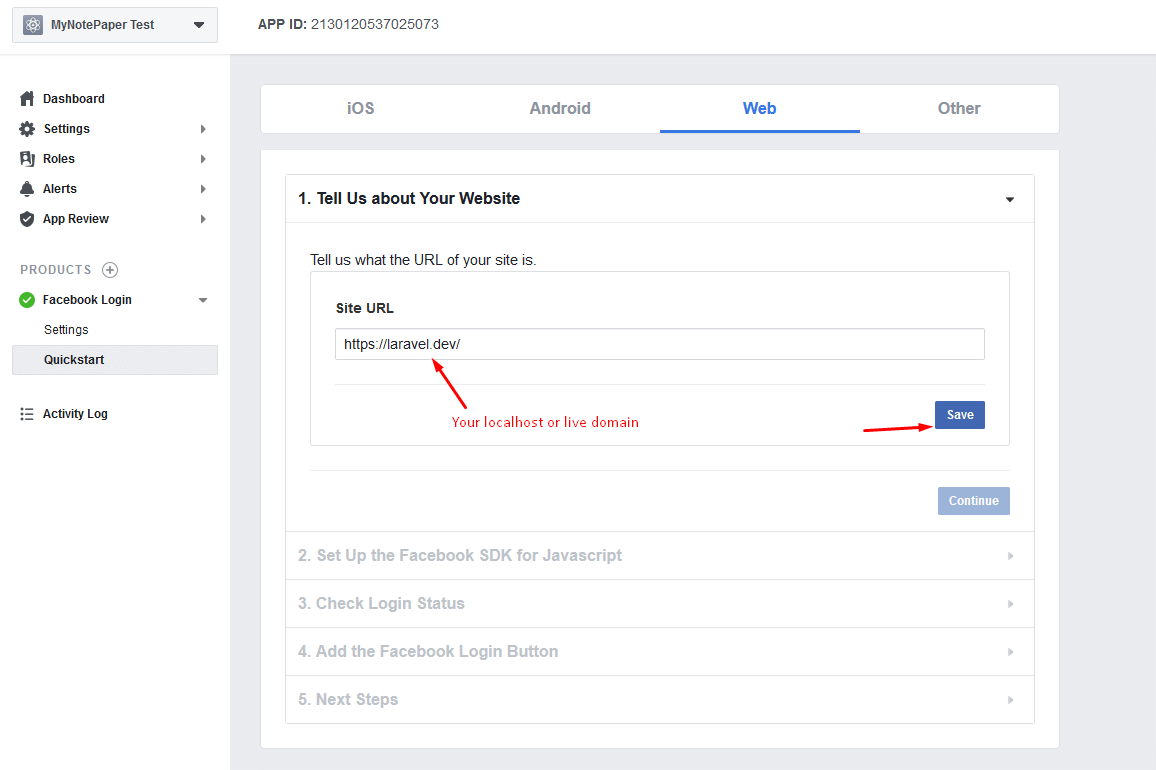
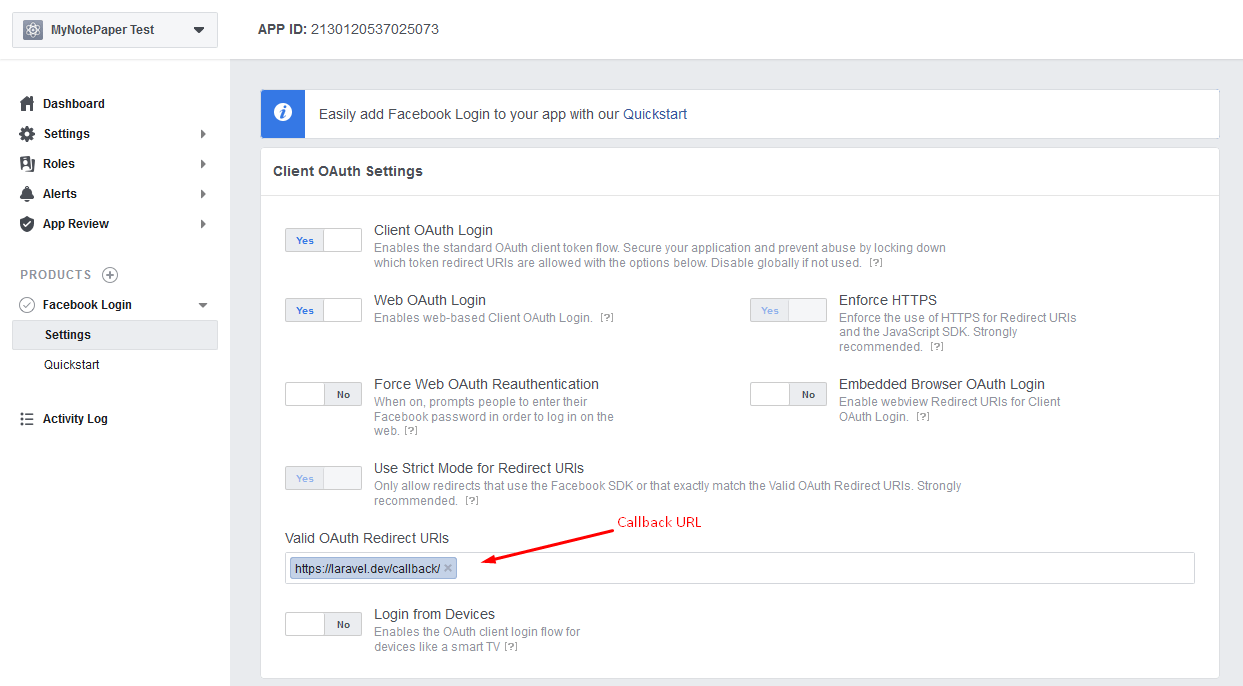
Click the Save button. From the left sidebar, click the Settings menu under Facebook Login. We need to submit our callback URL here.
Now go to Basic Settings menu to get Client and Secret ID. We need to enter our domain name in the App Domains field.
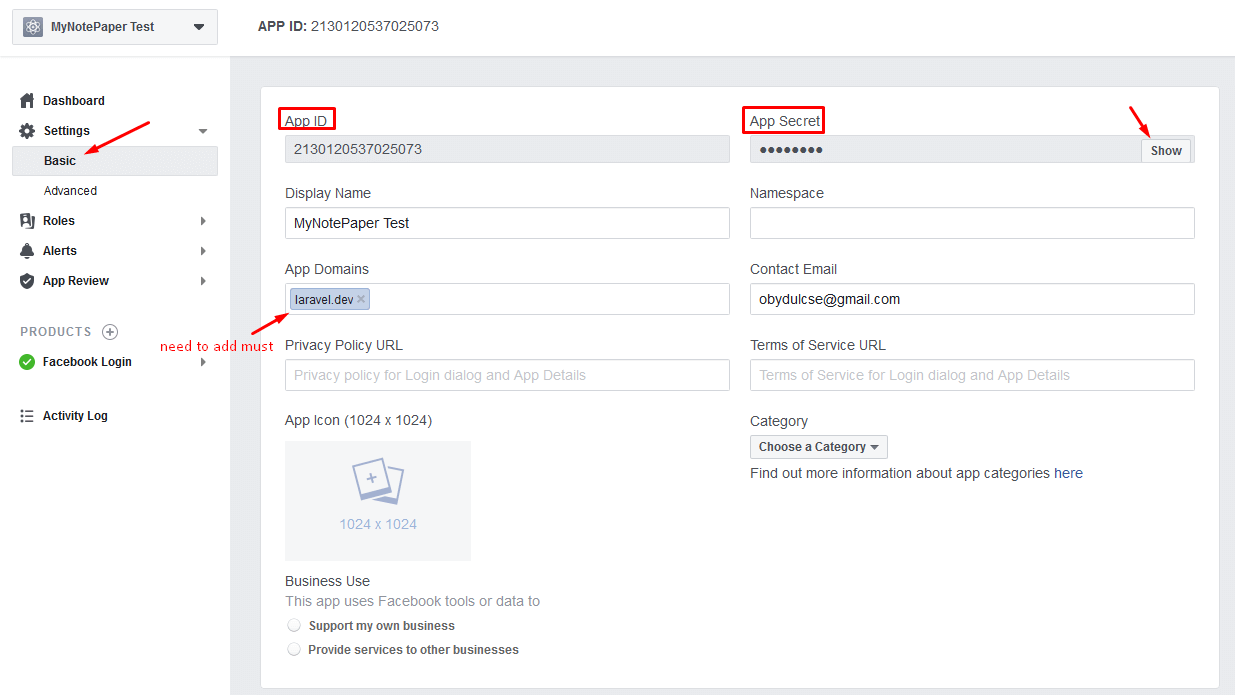
So, we have got the App ID and App Secret. Now go to config>>services.php file and add this:
'facebook' => [
    'client_id' => 'App ID Here',
    'client_secret' => 'App Secret Here',
    'redirect' => 'https://your-domain/callback'
],
Step 7 : Modify Login Page
In this step, we will add a button called “Login with Google” in the login page. Open this file resources > views > auth > login.blade.php and paste this code:
@extends('layouts.app')

@section('content')
    <div class="container">
        <div class="row justify-content-center">
            <div class="col-md-8">
                <div class="card">
                    <div class="card-header">{{ __('Login') }}</div>

                    <div class="card-body">
                        <form method="POST" action="{{ route('login') }}">
                            @csrf

                            <div class="form-group row">
                                <label for="email"
                                       class="col-md-4 col-form-label text-md-right">{{ __('E-Mail Address') }}</label>

                                <div class="col-md-6">
                                    <input id="email" type="email"
                                           class="form-control{{ $errors->has('email') ? ' is-invalid' : '' }}"
                                           name="email" value="{{ old('email') }}" required autofocus>

                                    @if ($errors->has('email'))
                                        <span class="invalid-feedback" role="alert">
                                        <strong>{{ $errors->first('email') }}</strong>
                                    </span>
                                    @endif
                                </div>
                            </div>

                            <div class="form-group row">
                                <label for="password"
                                       class="col-md-4 col-form-label text-md-right">{{ __('Password') }}</label>

                                <div class="col-md-6">
                                    <input id="password" type="password"
                                           class="form-control{{ $errors->has('password') ? ' is-invalid' : '' }}"
                                           name="password" required>

                                    @if ($errors->has('password'))
                                        <span class="invalid-feedback" role="alert">
                                        <strong>{{ $errors->first('password') }}</strong>
                                    </span>
                                    @endif
                                </div>
                            </div>

                            <div class="form-group row">
                                <div class="col-md-6 offset-md-4">
                                    <div class="form-check">
                                        <input class="form-check-input" type="checkbox" name="remember"
                                               id="remember" {{ old('remember') ? 'checked' : '' }}>

                                        <label class="form-check-label" for="remember">
                                            {{ __('Remember Me') }}
                                        </label>
                                    </div>
                                </div>
                            </div>

                            <div class="form-group row mb-0">
                                <div class="col-md-8 offset-md-4">
                                    <button type="submit" class="btn btn-primary">
                                        {{ __('Login') }}
                                    </button>
                                    <a href="{{ url('/facebook-login') }}" class="btn btn-primary">Login With Facebook</a>

                                    @if (Route::has('password.request'))
                                        <a class="btn btn-link" href="{{ route('password.request') }}">
                                            {{ __('Forgot Your Password?') }}
                                        </a>
                                    @endif
                                </div>
                            </div>
                        </form>
                    </div>
                </div>
            </div>
        </div>
    </div>
@endsection
Step 8 : Test Facebook Login
Now visit the login URL of your project https://your-domain/login
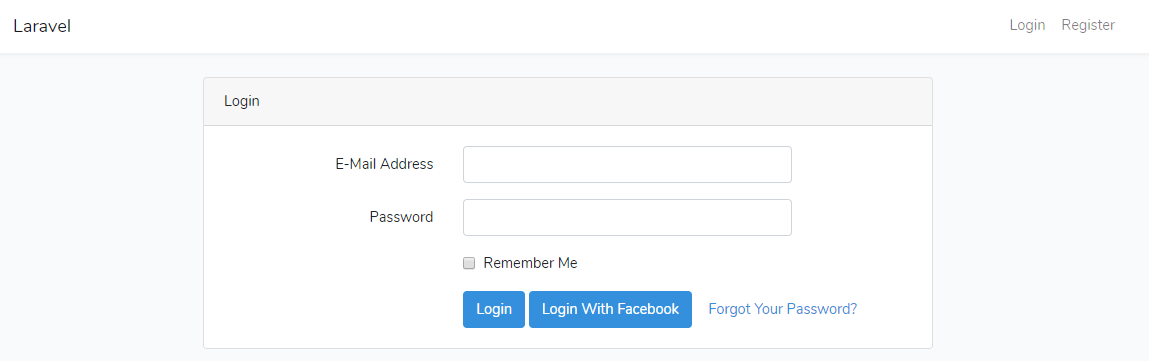
Click on the ‘Login With Facebook’ button. Then you will see a confirmation page like this:
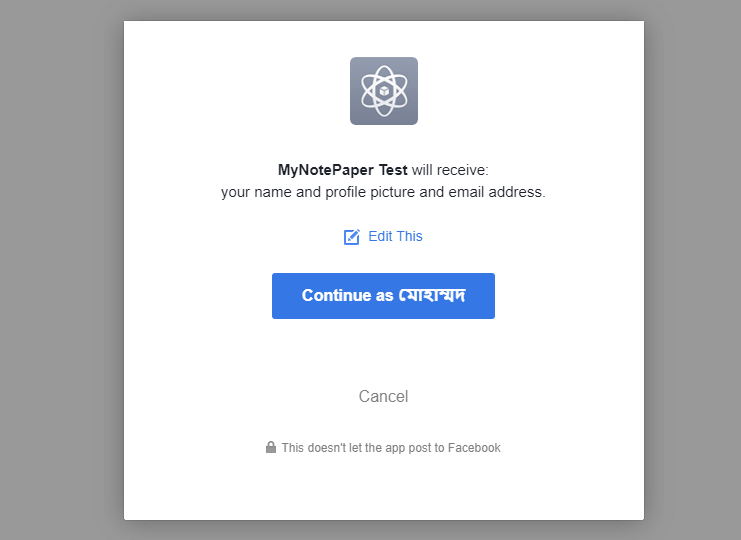
Then click Continue as Name button to process the login. If the app settings are correct, you will be redirected to your project with successfully logged-in. You can check the users table to see the record.

We have successfully logged-in with Facebook. You can download this project from Gitub.
Md Obydullah
Software Engineer | Ethical Hacker & Cybersecurity...
Md Obydullah is a software engineer and full stack developer specialist at Laravel, Django, Vue.js, Node.js, Android, Linux Server, and Ethichal Hacking.