Laravel 10 - Integrate Stripe Payment Gateway without Any Package
Hello Artisans, today I'll show you how to integrate the Stripe payment gateway without using any packages. It'll take only a few minutes to complete today's tutorial. So, let's see how we can accomplish our result with just a few steps.
Note: Tested on Laravel 10.0
First, we'll create a controller called StripeController.php where we'll write our logic to view the list of products and from the buy button we can go to the stripe page. So, fire the below command in terminal to generate controller first.
php artisan make:controller StripeControllerIt'll create a controller called StripeController under App/Http/Controllers, now what we'll do is to add logic to our controller. See the below source code.
<?php

namespace App\Http\Controllers;

use Illuminate\Http\Request;

class StripeController extends Controller
{
    public function stripe($price)
    {
        $url                        = url('/');
        $us                         = ['card','us_bank_account','alipay'];

        $session = [
            'payment_method_types' => $us,
            'line_items' => [
                [
                    'price_data' => [
                        'currency' => 'usd',
                        'product_data' => [
                            'name' => "Payment"
                        ],
                        'unit_amount' => $price * 100,
                    ],
                    'quantity' => 1,
                ]
            ],
            'mode' => 'payment',
            'success_url' => $url,
            'cancel_url' => url()->previous(),
            'phone_number_collection' => [
                'enabled' => "true"
            ],
        ];

        $secret_key = 'sk_test_51KSEttAEcZ6N0eChifvBvTyjszi2Bti1iuLvOjuIvt9PfMgDLRlRDgfgzGylXTqkOGFO6KYPeCb7N78FCKSUNwNh00hE1xcGN2';
        $headers = [
            'Authorization' => "Bearer $secret_key",
        ];

        $client = new \GuzzleHttp\Client(['verify' => false]);
        $response = $client->request('POST', 'https://api.stripe.com/v1/checkout/sessions', [
            'headers' => $headers,
            'form_params' => $session,
        ]);

        $result = $response->getBody()->getContents();
        $response =  json_decode($result,true);
        return redirect($response['url']);

    }
}
Now we'll add routes which will redirect us to stripe form. So, let's add the below route to our web.php.
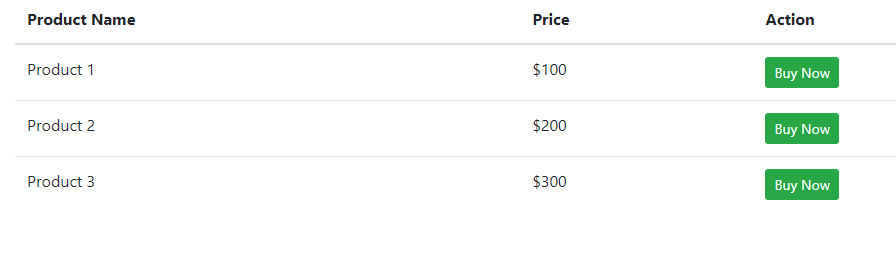
Route::get('stripe-payment/{price}', [StripeController::class, 'stripe'])->name('stripe.payment');Now we'll build a table that contains the product list. For that, we'll use welcome.blade.php which comes with Laravel by default. So, let's see the below source code.
<!doctype html>
<html lang="en">
<head>
    <meta charset="UTF-8">
    <meta name="viewport"
          content="width=device-width, user-scalable=no, initial-scale=1.0, maximum-scale=1.0, minimum-scale=1.0">
    <meta http-equiv="X-UA-Compatible" content="ie=edge">
    <title>Stripe Payment Gateway</title>
    <!-- Latest compiled and minified CSS -->
    <link rel="stylesheet" href="https://cdn.jsdelivr.net/npm/[email protected]/dist/css/bootstrap.min.css">

    <!-- jQuery library -->

</head>
<body>

<div class="container">
    <div class="row">
        <div class="col-md-12">
            <table class="table">
                <thead>
                <tr>
                    <th>Product Name</th>
                    <th>Price</th>
                    <th>Action</th>
                </tr>
                </thead>
                <tbody>
                <tr>
                    <td>Product 1</td>
                    <td>$100</td>
                    <td>
                        <a href="{{ route('stripe.payment',100) }}" class="btn btn-success btn-sm">Buy Now</a>
                    </td>
                </tr>
                <tr>
                    <td>Product 2</td>
                    <td>$200</td>
                    <td>
                        <a href="{{ route('stripe.payment',200) }}" class="btn btn-success btn-sm">Buy Now</a>
                    </td>
                </tr>
                <tr>
                    <td>Product 3</td>
                    <td>$300</td>
                    <td>
                        <a href="{{ route('stripe.payment',300) }}" class="btn btn-success btn-sm">Buy Now</a>
                    </td>
                </tr>
                </tbody>
            </table>
        </div>
    </div>
</div>

<script src="https://cdn.jsdelivr.net/npm/[email protected]/dist/jquery.slim.min.js"></script>

<!-- Popper JS -->
<script src="https://cdn.jsdelivr.net/npm/[email protected]/dist/umd/popper.min.js"></script>

<!-- Latest compiled JavaScript -->
<script src="https://cdn.jsdelivr.net/npm/[email protected]/dist/js/bootstrap.bundle.min.js"></script>
</body>
</html>
And finally, we're ready with our setup. It's time to check our output. Now go to http://127.0.0.1:8000, If everything goes well (hope so) we can see the below output.
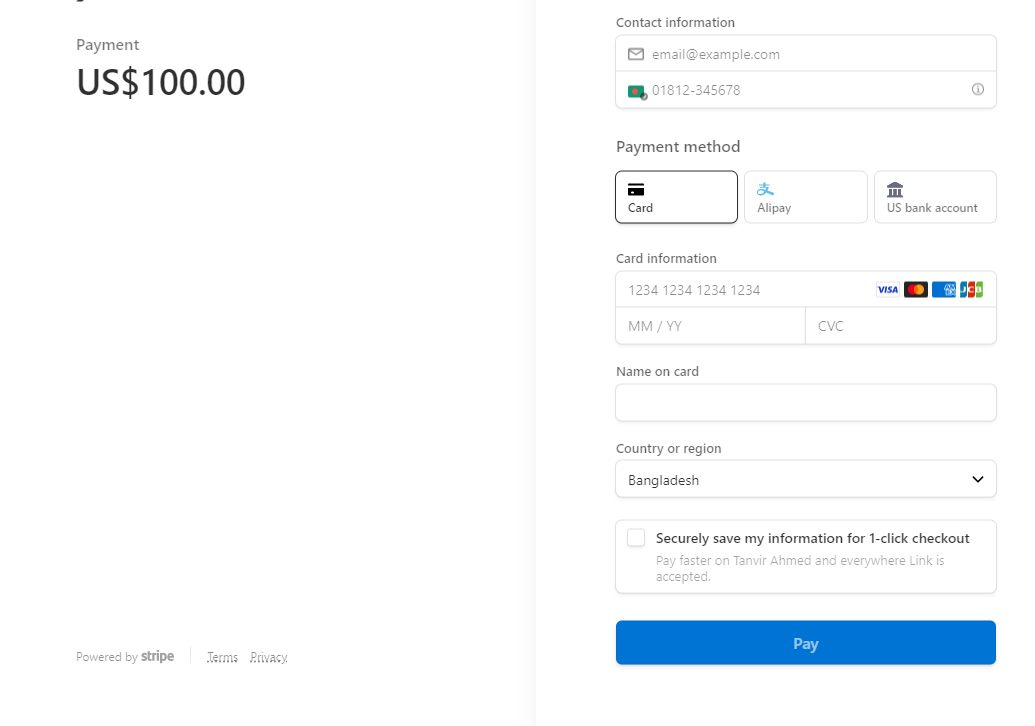
After clicking to the “Buy Now” button it'll redirect us to below stripe form
After successfully pay we can show the below in Stripe Dashboard

That's it for today. I hope you've enjoyed this tutorial. You can also download this tutorial from GitHub. Thanks for reading. 🙂