Laravel 10 Add Social Login in Laravel With Socialite
Using social login on websites is really important for user authentication. It's super convenient because users don't have to spend time filling out long forms. Instead, they can simply sign up using their social media accounts, and in the future, logging in is as easy as clicking a button.
Social login is a must-have on websites for user authentication. It's a time-saver for users since they can sign up quickly using their social accounts instead of filling out long forms. They can log in with a single click next time. Many people prefer using their social media accounts to sign up because it means they don't have to remember passwords.
However, this convenience can sometimes lead to confused users. Using social accounts for login is simple and improves the user experience, which is crucial for the success of digital products today.
- Create a new Laravel Project
- Install Laravel/UI
- Create a Bootstrap AUTH Scaffold
- Install NPM Packages
- Run NPM environment
- Update the Login page
- Run the application
- Hit this URL on your browser
- Install the Laravel Socialite package
- Set up routes
- Configure service providers
- Set CLIENT_ID and CLIENT_SECRET in the
.envfile - Set up LoginController
- Create an App for Google, Facebook, and GitHub
- Update migrations for the
userstable - Add the users’ avatars beside their name in the navbar
Creating the Laravel app is not necessary for this step, but if you haven't done it yet, you can proceed by executing the following command
composer create-project laravel/laravel laravel_socialitecomposer require laravel/uiYou can easily set up a bootstrap authentication scaffold with registration and login features by using the Artisan command:
php artisan ui bootstrap --authnpm installnpm run devProvide the buttons for users to log in with their social accounts on resources\views\auth\login.blade.php.
Note that we put the URL routes in the login buttons.
@extends('layouts.app')
@section('content')
<div class="container">
<div class="row justify-content-center">
<div class="col-md-8">
<div class="card">
<div class="card-header">{{ __('Login') }}</div>
<div class="card-body">
 <form method="POST" action="{{ route('login') }}">
     @csrf
    <div class="form-group row">
    <div class="col-md-6 offset-md-3">
      <a href="{{route('login.google')}}" class="btn btn-danger btn-block">Login with Google</a>
      <a href="{{route('login.facebook')}}" class="btn btn-primary btn-block">Login with Facebook</a>
      <a href="{{route('login.github')}}" class="btn btn-dark btn-block">Login with Github</a>
   </div>
   </div>
</form>
</div>
</div>
</div>
</div>
</div>
@endsectionYou can serve the Laravel application with the following Artisan Command:
php artisan servehttp://localhost:8000/loginYou should be able to view the login page:

Use the Composer package manager to add the package to your project's dependencies:
composer require laravel/socialiteTo set up user authentication using an OAuth provider, you'll need two routes in the routes\web.php file: one for sending users to the OAuth provider for authentication and another for handling the callback from the provider after authentication.
//Google
Route::get('/login/google', [App\Http\Controllers\Auth\LoginController::class, 'redirectToGoogle'])->name('login.google');
Route::get('/login/google/callback', [App\Http\Controllers\Auth\LoginController::class, 'handleGoogleCallback']);
//Facebook
Route::get('/login/facebook', [App\Http\Controllers\Auth\LoginController::class, 'redirectToFacebook'])->name('login.facebook');
Route::get('/login/facebook/callback', [App\Http\Controllers\Auth\LoginController::class, 'handleFacebookCallback']);
//Github
Route::get('/login/github', [App\Http\Controllers\Auth\LoginController::class, 'redirectToGithub'])->name('login.github');
Route::get('/login/github/callback', [App\Http\Controllers\Auth\LoginController::class, 'handleGithubCallback']);Before using socialite in your application, make sure to include the credentials for the OAuth providers your application uses in the config/services.php configuration file of your application.
'google' => [
   'client_id' => env('GOOGLE_CLIENT_ID'),
   'client_secret' => env('GOOGLE_CLIENT_SECRET'),
   'redirect' => 'your_redirect_url',
],
'facebook' => [
   'client_id' => env('FACEBOOK_CLIENT_ID'),
   'client_secret' => env('FACEBOOK_CLIENT_SECRET'),
   'redirect' => 'your_redirect_url',
],
'github' => [
   'client_id' => env('GITHUB_CLIENT_ID'),
   'client_secret' => env('GITHUB_CLIENT_SECRET'),
   'redirect' => 'your_redirect_url',
],
Note that the redirect value should be the callback URL you set at the Service Providers and at your routes.
CLIENT_ID and CLIENT_SECRET should not be in any public directory, so they should be stored as environment variables.
GOOGLE_CLIENT_ID=
GOOGLE_CLIENT_SECRET=

FACEBOOK_CLIENT_ID=
FACEBOOK_CLIENT_SECRET=

GITHUB_CLIENT_ID=
GITHUB_CLIENT_SECRET=
Note that after creating each App on the various Service Providers, this is where the CLIENT_ID and CLIENT_SECRET values should be placed.
"In the app\Http\Controllers\Auth\LoginController.php directory, we'll create a method called _registerOrLoginMethod(). This method is responsible for handling returning users by logging them in or registering new users. It comes into play when users are redirected to the callback route after successfully authenticating through the Service Provider."
protected function _registerOrLoginUser($data){
$user = User::where('email',$data->email)->first();
  if(!$user){
     $user = new User();
     $user->name = $data->name;
     $user->email = $data->email;
     $user->provider_id = $data->id;
     $user->avatar = $data->avatar;
     $user->save();
  }
Auth::login($user);
}
Additionally, we can now describe the various methods we established in the routes for the different Service Providers.
//Google Login
public function redirectToGoogle(){
return Socialite::driver('google')->stateless()->redirect();
}

//Google callback
public function handleGoogleCallback(){

$user = Socialite::driver('google')->stateless()->user();

  $this->_registerorLoginUser($user);
  return redirect()->route('home');
}

//Facebook Login
public function redirectToFacebook(){
return Socialite::driver('facebook')->stateless()->redirect();
}

//facebook callback
public function handleFacebookCallback(){

$user = Socialite::driver('facebook')->stateless()->user();

  $this->_registerorLoginUser($user);
  return redirect()->route('home');
}

//Github Login
public function redirectToGithub(){
return Socialite::driver('github')->stateless()->redirect();
}

//github callback
public function handleGithubCallback(){

$user = Socialite::driver('github')->stateless()->user();

  $this->_registerorLoginUser($user);
  return redirect()->route('home');
}
The redirect method provided by the Socialite façade takes care of redirecting the user to the OAuth provider, while the user method will read the incoming request and retrieve the user's information from the provider after they are authenticated.
Here are few clips that briefly describe how to create an App on the different Service Providers, obtain the OAuth Client_ID and Client_Secret, and put them in an .env file.
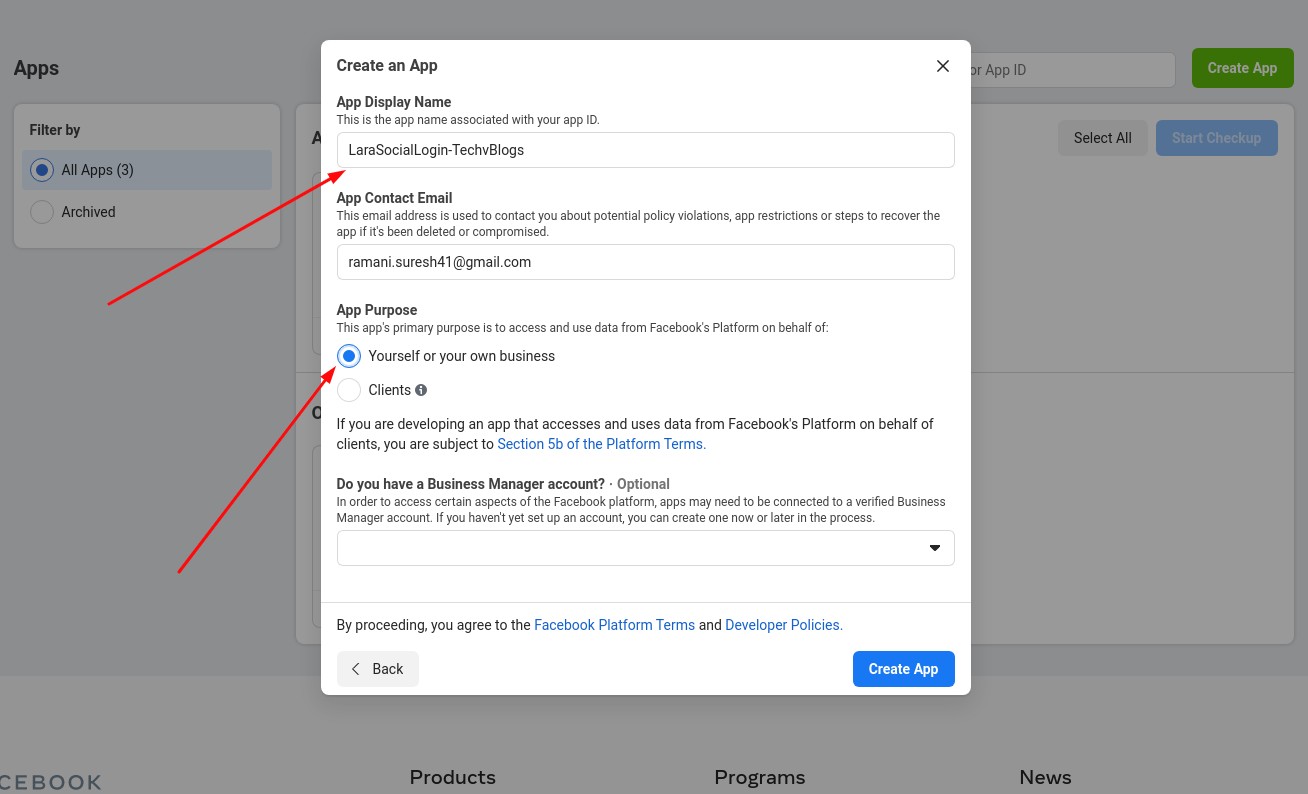
1.Creating A Facebook App
Open this link and follow the below step to create a Facebook app for client id and secret.
As you can see below the image fill all required fields in this form and click on create app button.
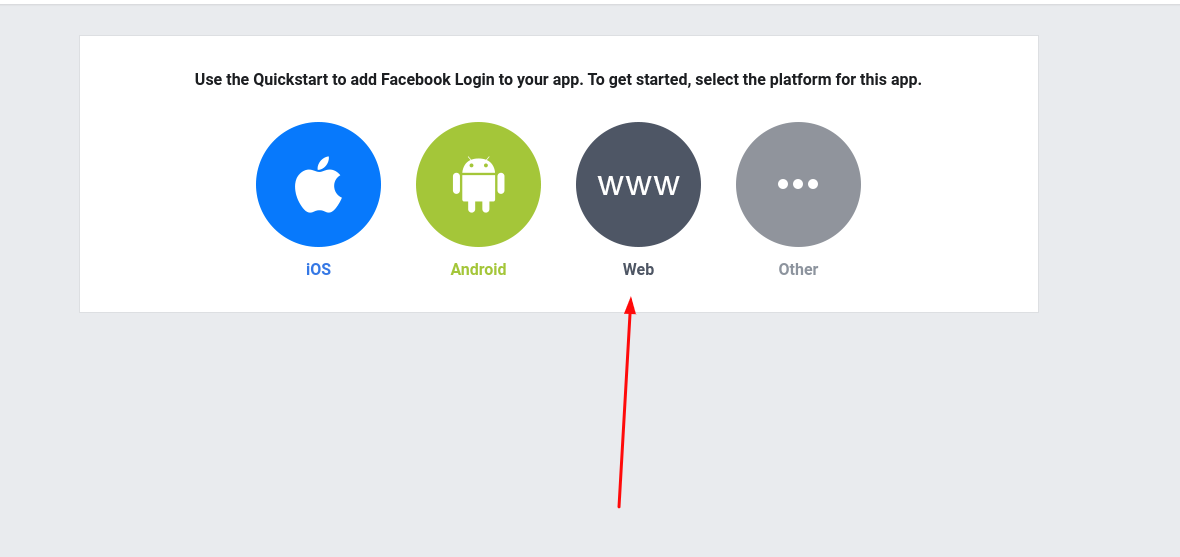
2. Select Platform
Next, let's add Facebook Login capabilities to our app. Click the plus sign next to Products in the side nav.

choose web as your platform.
3. Set your site URL into your Facebook app
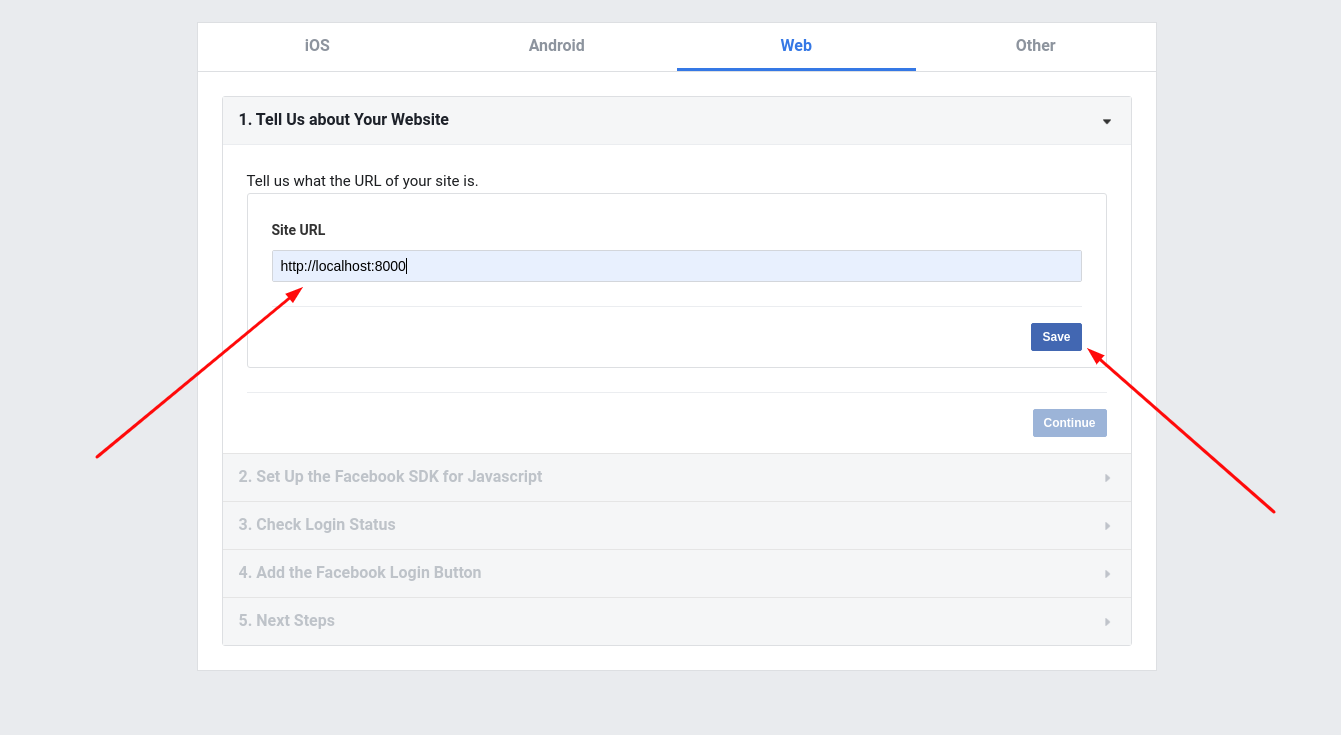
NOTE: You won't be able to use Facebook Login if your site isn't HTTPS , or you will run into errors when trying to authenticate users.
For each of the remaining steps, just click on "next" until you get to the last step.
4. Set Redirect URL
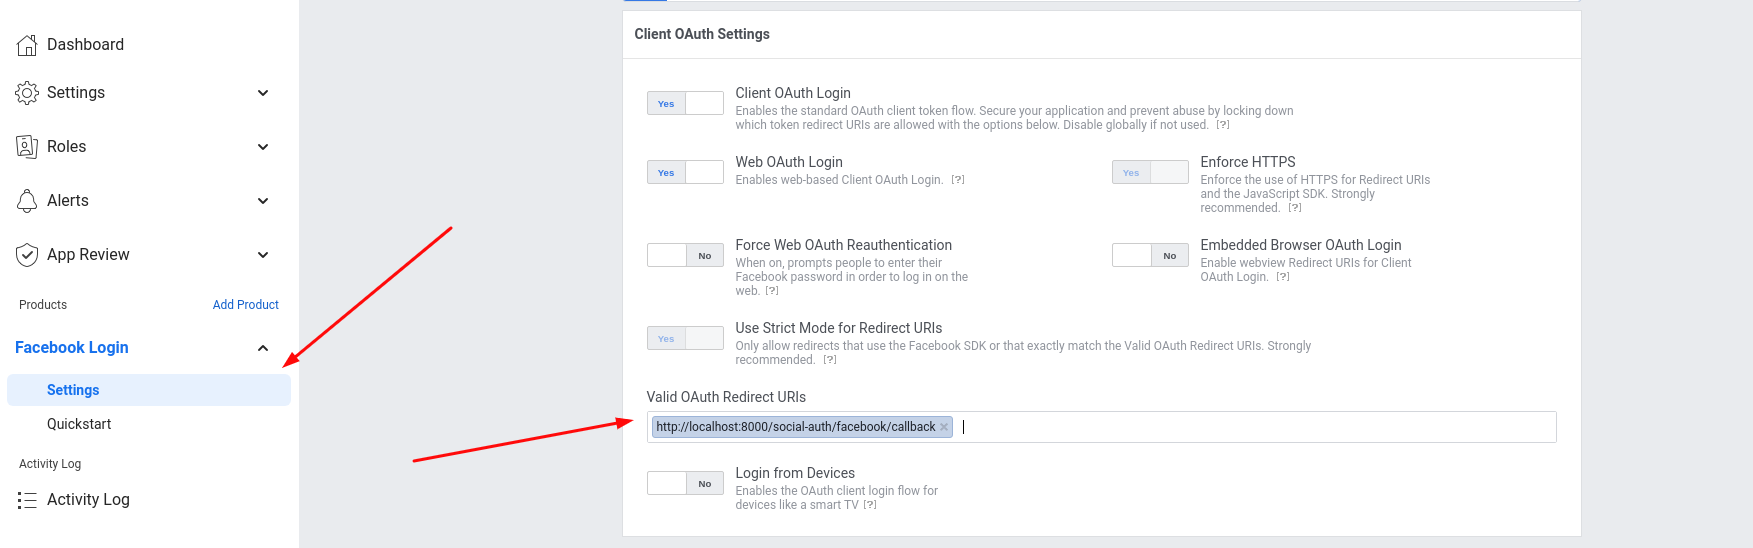
As of my requirement we set redirect url like https://localhost:8000/social-login/facebook/callback. you can set redirect url as of your requirement.
5. Copy Client ID & Secret
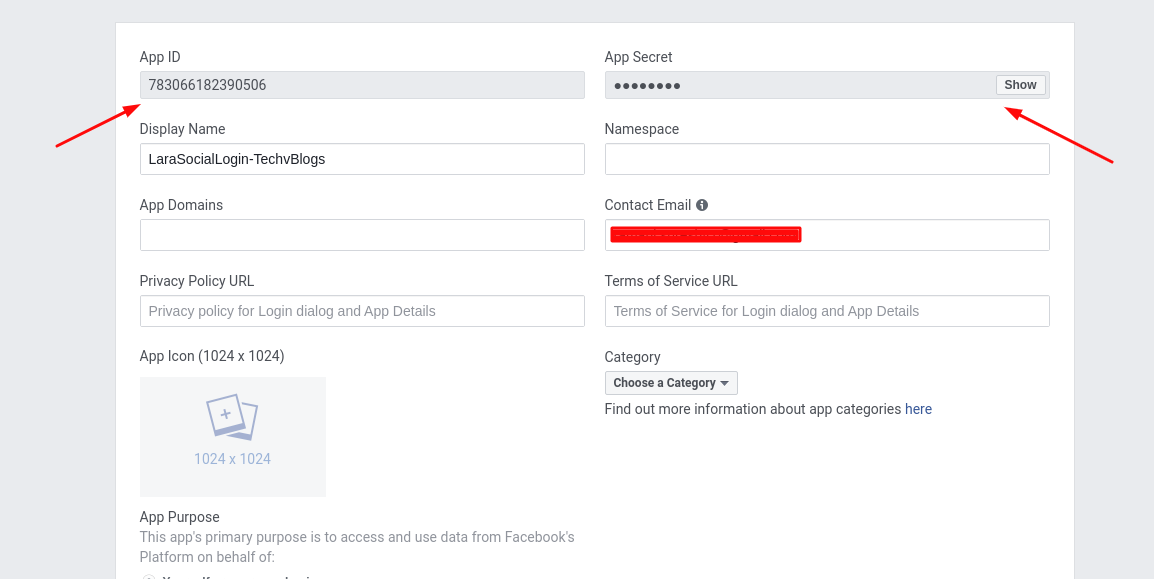
Now update our config/services.php and .env file.
FACEBOOK_CLIENT_ID='YOUR FACEBOOK CLIENT ID'
FACEBOOK_CLIENT_SECRET='YOUR FACEBOOK CLIENT SECRET'
FACEBOOK_CALLBACK_URL="${APP_URL}/social-auth/facebook/callback"'facebook' => [
'client_id' => env('FACEBOOK_CLIENT_ID'),
'client_secret' => env('FACEBOOK_CLIENT_SECRET'),
'redirect' => env('FACEBOOK_CALLBACK_URL'),
]1. Creating A Github App
Follow this guide to Create a Github App
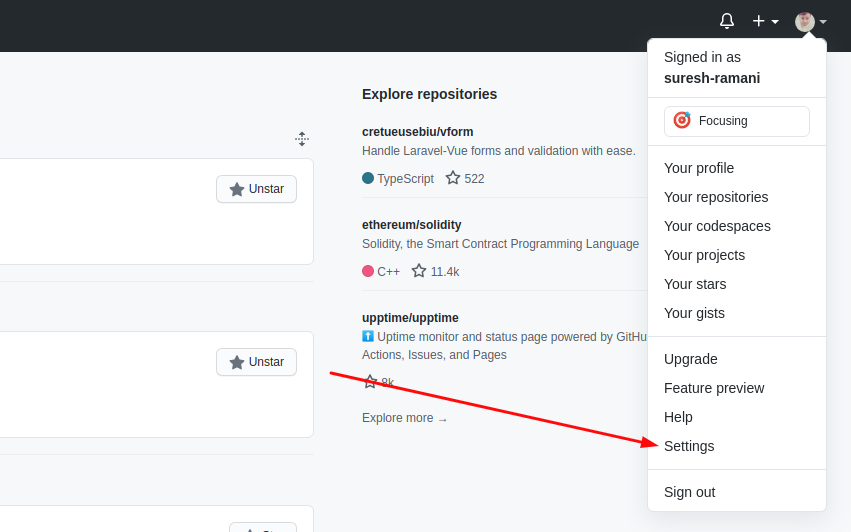
Go to the GitHub website click on your profile and last click on Settings. After this, you can see this page as shown below image.
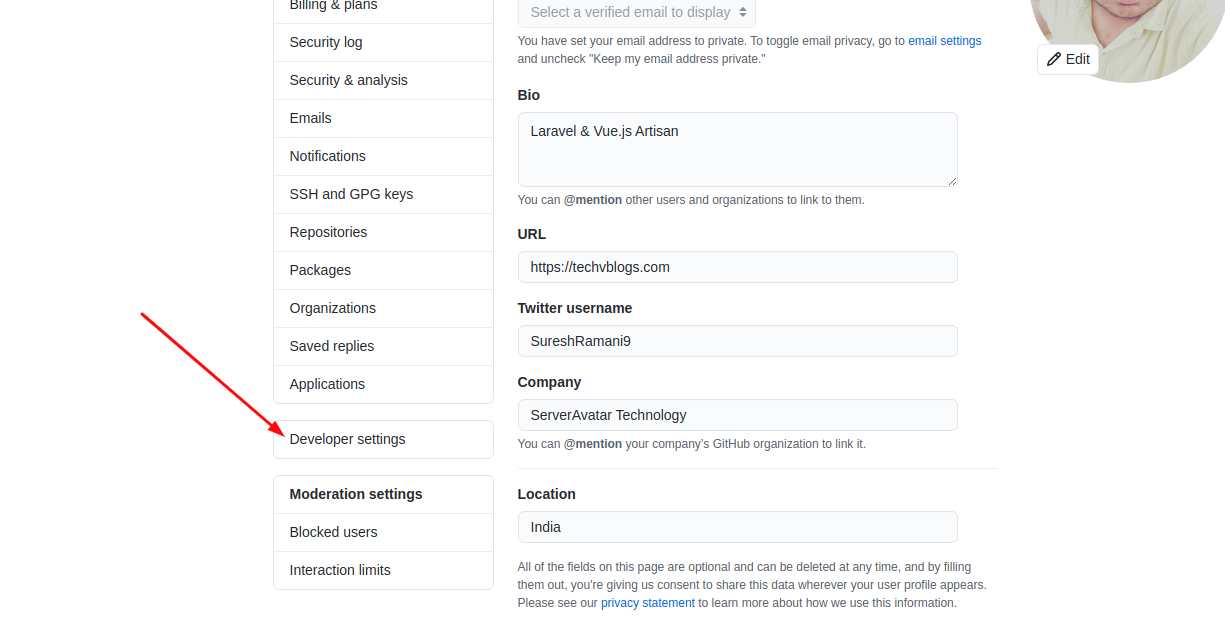
After going to this page click on the Developer setting.
In the Developer settings page in the sidebar click on OAuth Apps and Click on Register a new application.
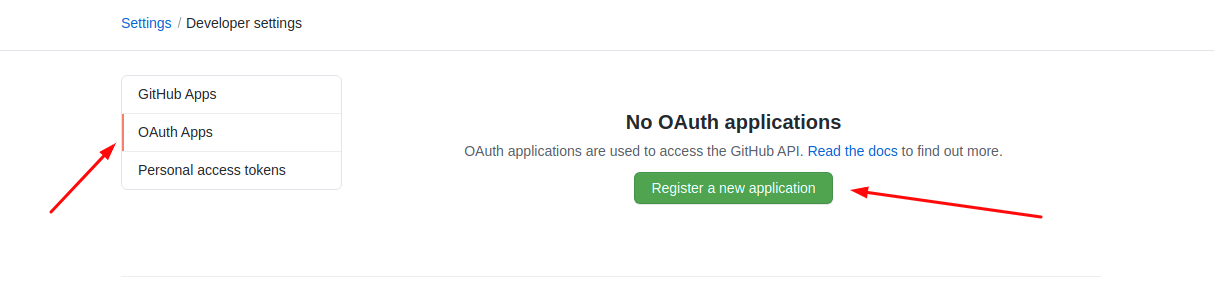
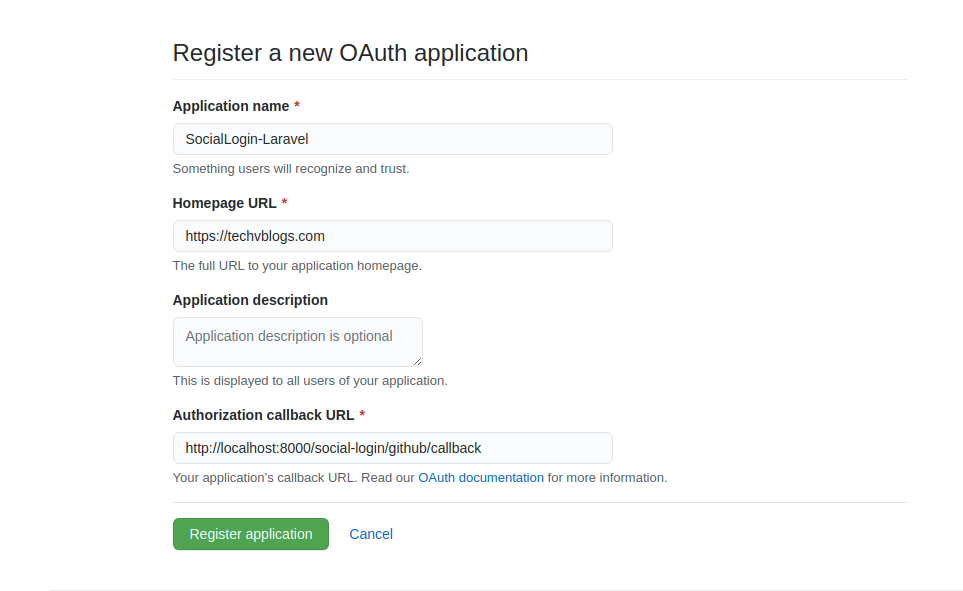
2. Register a new OAuth Application
Fill all the required field to create OAuth Application.
In last step, you can see your Client ID. You can see your Client Secret after click on Generate a new client secret button.
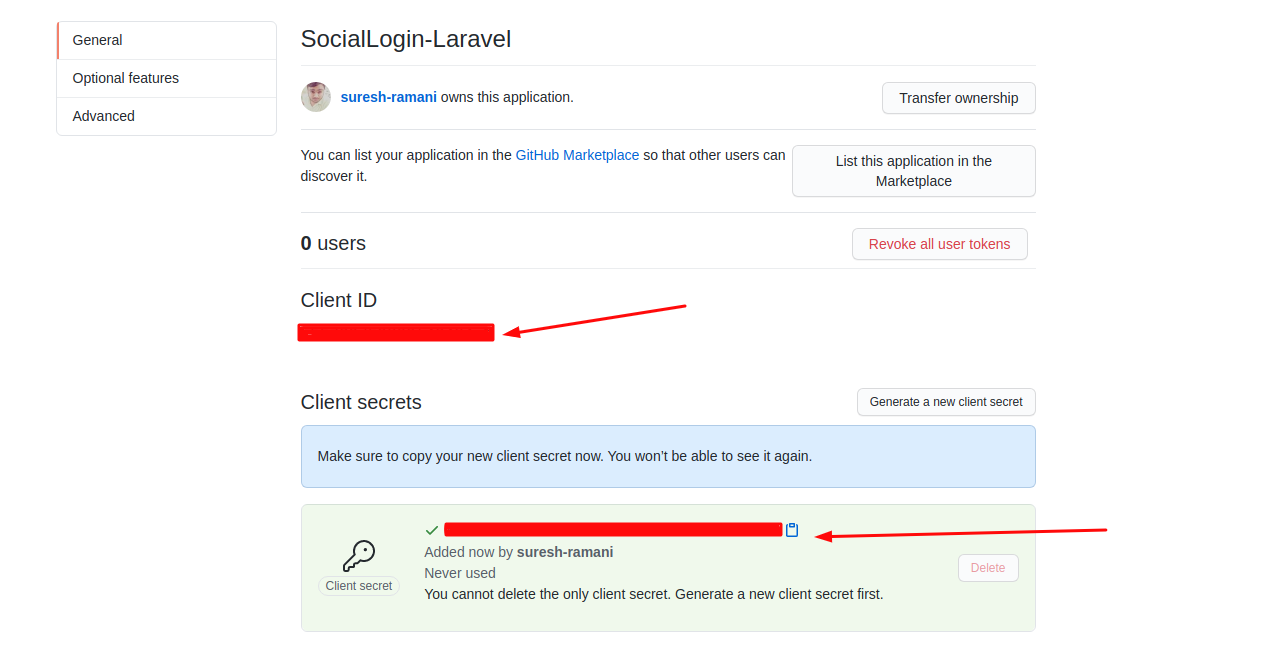
Then update our config/services.php and the .env file with your GitHub credentials.
GITHUB_CLIENT_ID='YOUR GITHUB CLIENT ID'
GITHUB_CLIENT_SECRET='YOUR GITHUB CLIENT SECRET'
GITHUB_CALLBACK_URL="${APP_URL}/social-auth/github/callback"'github' => [
'client_id' => env('GITHUB_CLIENT_ID'),
'client_secret' => env('GITHUB_CLIENT_SECRET'),
'redirect' => env('GITHUB_CALLBACK_URL'),
]Use the following Artisan command:
php artisan config:cacheIn the migration file located at database\migrations\2014_10_12_000000_create_users_table.php, we should include columns for provider_id and avatar within the up() method if the user has logged in using a social media account.
public function up()
{
  Schema::create('users', function (Blueprint $table) {
  $table->id();
  $table->string('name');
  $table->string('email')->unique();
  $table->string('provider_id')->nullable();
  $table->string('avatar')->nullable();
  $table->timestamp('email_verified_at')->nullable();
  $table->string('password')->nullable();
  $table->rememberToken();
  $table->timestamps();
});
}
Now, run the migrations again with this Artisan command:
php artisan migrate:freshAfter a successful login using a social account, we'll retrieve the user's username and avatar, along with other credentials. To update the navigation dropdown in the resources\views\layouts\app.blade.php directory, we'll display the avatar next to the username.
<li class="nav-item dropdown">
 <img src="{{Auth::user()->avatar}}" alt="{{Auth::user()->name}}">
   <a id="navbarDropdown" class="nav-link dropdown-toggle" href="#"
   role="button" data-toggle="dropdown"
   aria-haspopup="true" aria-expanded="false" v-pre>
              {{ Auth::user()->name }}
  </a>

 <div class="dropdown-menu dropdown-menu-right"
       aria-labelledby="navbarDropdown">
  <a class="dropdown-item" href="{{ route('logout') }}"
     onclick="event.preventDefault();
       document.getElementById('logout-form').submit();">
            {{ __('Logout') }}
      </a>
  <form id="logout-form" action="{{ route('logout') }}" method="POST" class="d-none">
                               @csrf
  </form>
</div>
</li>
That's it for today. I hope it'll be helpful in upcoming project. You can also download this source code from GitHub. Thanks for reading. 🙂