Laravel 5.8 Multiple Image Upload with DropzoneJS
Using Dropzone a user can drag and drop a file onto it, and the file gets uploaded to the server via AJAX. It’s is the most famous, free and open-source library for multiple image upload. Today we are going to setup Dropzone in the Laravel project.
Table of Contents
We need to follow thse few steps:
- Install Laravel and Basic Configurations
- Create Table
- Create Model and Controller
- Create Routes
- Create Blade File
- The Output
Step 1 : Install Laravel and Basic Configurations
Each Laravel project needs this thing. That’s why I have written an article on this topic. Please see this part from here: Install Laravel and Basic Configurations
Step 2 : Create Table
We will store the uploaded images to the database. So we need a table called ‘image_uploads’. Run this artisan command to create the migration file:
php artisan make:migration create_image_uploads_table --create=image_uploads
We have successfully created the migration file for ‘image_uploads’ table. Now open the migration file from ”database/migrations” folder and paste this code:
<?php

use Illuminate\Support\Facades\Schema;
use Illuminate\Database\Schema\Blueprint;
use Illuminate\Database\Migrations\Migration;

class CreateImageUploadsTable extends Migration
{
    /**
     * Run the migrations.
     *
     * @return void
     */
    public function up()
    {
        Schema::create('image_uploads', function (Blueprint $table) {
            $table->bigIncrements('id');
            $table->text('filename');
            $table->timestamps();
        });
    }

    /**
     * Reverse the migrations.
     *
     * @return void
     */
    public function down()
    {
        Schema::dropIfExists('image_uploads');
    }
}
Now run this artisan command to create the image_uploads table in the database:
php artisan migrate
Go to the phpMyAdmin and you will see the ‘image_uploads’ table.
Step 3 : Create Model and Controller
We need a controller and model for this project. Let’s run this single command to create the controller and model:
php artisan make:controller ImageUploadController --model=ImageUpload
Open App/Http/Controllers/ImageUploadController.php and paste the code from below:
<?php

namespace App\Http\Controllers;

use App\ImageUpload;
use Illuminate\Http\Request;

class ImageUploadController extends Controller
{
    public function upload()
    {
        return view('image_upload');
    }

    public function store(Request $request)
    {
        $image = $request->file('file');
        $imageName = $image->getClientOriginalName();
        $image->move(public_path('images'), $imageName);

        $imageUpload = new ImageUpload();
        $imageUpload->filename = $imageName;
        $imageUpload->save();
        return response()->json(['success' => $imageName]);
    }

    public function delete(Request $request)
    {
        $filename = $request->get('filename');
        ImageUpload::where('filename', $filename)->delete();
        $path = public_path() . '/images/' . $filename;
        if (file_exists($path)) {
            unlink($path);
        }
        return $filename;
    }
}
We have successfully created the model and controller.
Step 4 : Create Routes
Let’s create the routes:
<?php

/*
|--------------------------------------------------------------------------
| Web Routes
|--------------------------------------------------------------------------
|
| Here is where you can register web routes for your application. These
| routes are loaded by the RouteServiceProvider within a group which
| contains the "web" middleware group. Now create something great!
|
*/

Route::get('upload', 'ImageUploadController@upload');
Route::post('upload/store', 'ImageUploadController@store');
Route::post('delete', 'ImageUploadController@delete');
Step 5 : Create Blade File
Go to resources/views folder and make a blade file named ‘image_upload.blade.php’ for image upload.
<!DOCTYPE html>
<html lang="en">
<head>
<title>Laravel Multiple Image Upload Using DropzoneJS</title>
<meta name="_token" content="{{csrf_token()}}"/>
<link rel="stylesheet" href="https://maxcdn.bootstrapcdn.com/bootstrap/4.0.0/css/bootstrap.min.css">
<link rel="stylesheet" href="https://cdnjs.cloudflare.com/ajax/libs/dropzone/5.5.0/min/dropzone.min.css">
<script src="https://ajax.googleapis.com/ajax/libs/jquery/3.3.1/jquery.js"></script>
<script src="https://cdnjs.cloudflare.com/ajax/libs/dropzone/5.5.0/dropzone.js"></script>
</head>
<body>
<div class="container">
<h3 class="text-center" style="margin-top: 50px;">Laravel Multiple Image Upload Using DropzoneJS</h3><br>
<form method="post" action="{{url('upload/store')}}" enctype="multipart/form-data"
class="dropzone" id="dropzone">
@csrf
</form>
<script type="text/javascript">
Dropzone.options.dropzone =
{
maxFilesize: 12,
renameFile: function (file) {
var dt = new Date();
var time = dt.getTime();
return time + file.name;
},
acceptedFiles: ".jpeg,.jpg,.png,.gif",
addRemoveLinks: true,
timeout: 50000,
removedfile: function (file) {
var name = file.upload.filename;
$.ajax({
headers: {
'X-CSRF-TOKEN': $('meta[name="_token"]').attr('content')
},
type: 'POST',
url: '{{ url("delete") }}',
data: {filename: name},
success: function (data) {
console.log("File has been successfully removed!!");
},
error: function (e) {
console.log(e);
}
});
var fileRef;
return (fileRef = file.previewElement) != null ?
fileRef.parentNode.removeChild(file.previewElement) : void 0;
},
success: function (file, response) {
console.log(response);
},
error: function (file, response) {
return false;
}
};
</script>
</body>
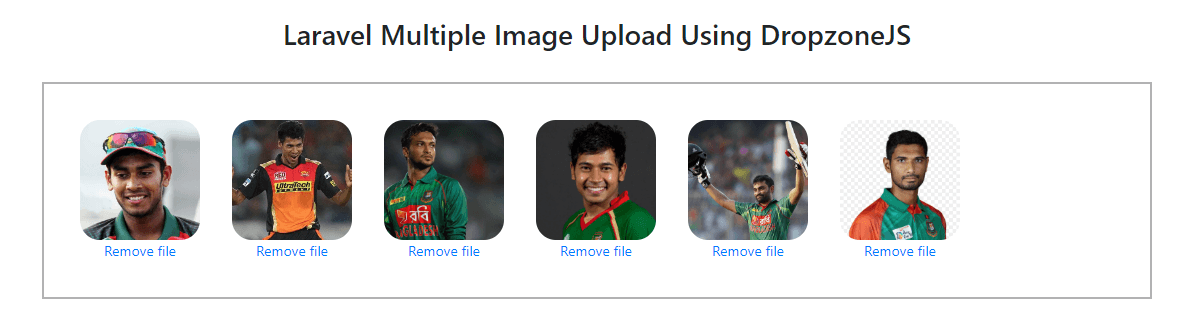
</html>Step 6 : The Output
Our project is ready to run. Run the application and go to the http://myproject/upload to see the multiple image upload page. From here we can upload multiple images. The images will be saved to the database too. We can delete the files from storage and database by clicking the delete button. Here’s the output of our project:
We are done. Now you can easily upload multiple image in Laravel application.
Md Obydullah
Software Engineer | Ethical Hacker & Cybersecurity...
Md Obydullah is a software engineer and full stack developer specialist at Laravel, Django, Vue.js, Node.js, Android, Linux Server, and Ethichal Hacking.