Use Select2 Dropdown in Laravel Livewire
Hello Artisans, today I'll show you can build your dynamic select2 dropdown in Livewire using jQuery select2 plugin. jQuery select2 plugin offer us many customizable features without any hesitation. For more info click here. So no more talk, let's see how we can implement the select2 dropdown in Livewire.
Note: Tested on Laravel 9.2.
Table of Contents
- Create a Fresh Laravel Application
- Install Livewire
- Create and configure select2 Component in Livewire
- Define Routes
- Setup Blade File
- Output
Create a Fresh Laravel Application
At first we'll install a fresh Laravel application by invoking the below command in our terminal
composer create-project --prefer-dist laravel/laravel livewire-select2or if you've Laravel installer
laravel new livewire-select2Install Livewire
After installing the Laravel application we need to install the Livewire package by firing the below command.
composer require livewire/livewireCreate select2 Component in Livewire
As we already install the Livewire package then we can continue with our coding parts. So, at first we need to create a select2 component by firing the below command.
php artisan make:livewire select2-dropdownThis will create the below two files
CLASS: app/Http/Livewire//Select2Dropdown.php
VIEW: C:\xampp\htdocs\blogs\livewire-select2\resources\views/livewire/select2-dropdown.blade.php
At first we'll open the Select2Dropdown.php file and configured like below
<?php

namespace App\Http\Livewire;

use Livewire\Component;

class Select2Dropdown extends Component
{
    public $ottPlatform = '';

    public $webseries = [
        'Wanda Vision',
        'Money Heist',
        'Lucifer',
        'Stranger Things'
    ];
    public function render()
    {
        return view('livewire.select2-dropdown')->extends('index');
    }
}
Now we'll open the select2-dropdown.blade.php file and setup like below
<div>
    <div wire:ignore>
        <select class="form-control" id="select2-dropdown">
            <option value="">Select Option</option>
            @foreach($webseries as $item)
                <option value="{{ $item }}">{{ $item }}</option>
            @endforeach
        </select>
    </div>
</div>
@push('scripts')
    <script>
        $(document).ready(function () {
            $('#select2-dropdown').select2();
            $('#select2-dropdown').on('change', function (e) {
                var data = $('#select2-dropdown').select2("val");
            @this.set('ottPlatform', data);
            });
        });
    </script>
@endpush
Now we are done with our setup part, let's go to the next step
Define Routes
No we'll put the below route in our web.php.
Route::get('/', App\Http\Livewire\Select2Dropdown::class);
Setup Blade file
Now we need to create a blade file called index.blade.php and put the below code
<!DOCTYPE html>
<html>
<head>

    <title>Laravel 9 Livewire Select2 Dropdown Example</title>
    @livewireStyles
    <link href="//cdn.jsdelivr.net/npm/[email protected]/dist/css/bootstrap.min.css" rel="stylesheet" id="bootstrap-css">
    <script src="//cdn.jsdelivr.net/npm/[email protected]/dist/js/bootstrap.min.js"></script>
    <link href="https://cdn.jsdelivr.net/npm/[email protected]/dist/css/select2.min.css" rel="stylesheet" />

    <script src="//cdnjs.cloudflare.com/ajax/libs/jquery/3.2.1/jquery.min.js"></script>
    <script src="https://cdn.jsdelivr.net/npm/[email protected]/dist/js/select2.min.js"></script>
</head>
<body>
<div class="container">
    <div class="row justify-content-center">
        <div class="col-lg-6">
            <h4 class="mt-5 mb-3">Livewire Select2 Dropdown</h4>
            @yield('content')
        </div>
    </div>
</div>
</body>
@livewireScripts
@stack('scripts')
</html>
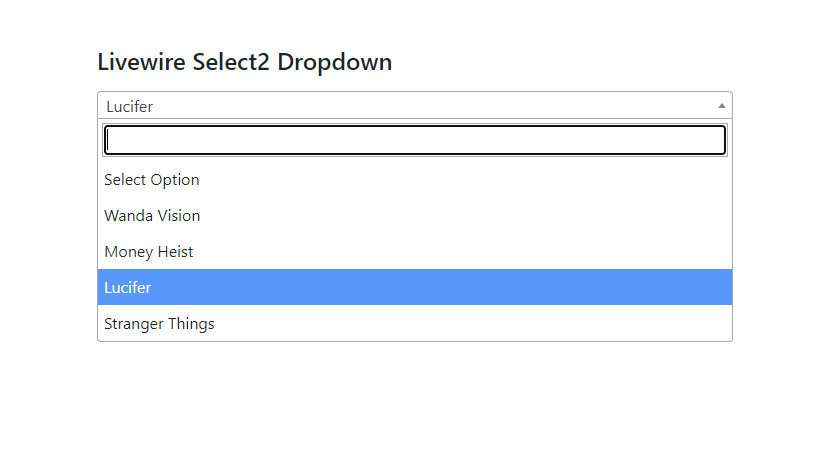
Output
Now the time has to check for the output. Go to the http://127.0.0.1:8000 and if everything is fine (I hope so), you'll find the below output.
That's it for today. Hope you've enjoyed this tutorial. You can also download this tutorial from GitHub. Thanks for reading.