Laravel Full Text Search with Scout
Hello Artisans, today We'll discuss about Laravel 9 scout search with full text. From today's tutorial you'll know about how the scout elastic search works. For acquire elastic search we'll use laravel/scout package. So, let's see how we can implement the elastic search in our Laravel Application.
Note: Tested on Laravel 9.2.
Table of Contents
- Install and Configure laravel/scout
- Setup User Model
- Create Dummy Records
- Create and Setup Controller
- Create and Setup blade File
- Define Routes
- Output
Install and Configure laravel/scout
For install laravel/scout fire the below command in your terminal.
composer require laravel/scoutAfter the successfully installation fire the below command to publish our configuration file.
php artisan vendor:publish --provider="Laravel\Scout\ScoutServiceProvider"Now we need to set the the scout driver as database in our .env file. Put the below variable in your .env file
SCOUT_DRIVER=databaseSetup User Model
Now we've to configure our model for elastic search. Replace the User.php with the below codes
<?php

namespace App\Models;

use Illuminate\Contracts\Auth\MustVerifyEmail;
use Illuminate\Database\Eloquent\Factories\HasFactory;
use Illuminate\Foundation\Auth\User as Authenticatable;
use Illuminate\Notifications\Notifiable;
use Laravel\Sanctum\HasApiTokens;
use Laravel\Scout\Searchable;

class User extends Authenticatable
{
    use HasApiTokens, HasFactory, Notifiable,Searchable;

    /**
     * The attributes that are mass assignable.
     *
     * @var array<int, string>
     */
    protected $fillable = [
        'name',
        'email',
        'password',
    ];

    /**
     * The attributes that should be hidden for serialization.
     *
     * @var array<int, string>
     */
    protected $hidden = [
        'password',
        'remember_token',
    ];

    /**
     * The attributes that should be cast.
     *
     * @var array<string, string>
     */
    protected $casts = [
        'email_verified_at' => 'datetime',
    ];

    public function toSearchableArray()
    {
        return [
            'name' => $this->name,
            'email' => $this->email
        ];
    }
}
Create Dummy Records
Now we'll create some dummy records using tinker, so that we can check/understand the behavior of our implemented elastic search on our User model. If you're new with the Tinker, I strongly suggest you to checkout one of my short tutorial on Tinker. So, at first migrate your tables using the below command.
php artisan migrateAfter successful of migration use the below commands to create dummy user records
php artisan tinker

User::factory()->count(20)->create()
It'll create 20 users to your users table.
Create and Setup Controller
Now we'll create a controller where we'll write our logic to show all the user or the user is being searched be our implemented elastic search. So, fire the below command in the terminal to create a controller.
php artisan make:controller UserControllerIt'll create a controller under app\Http\Controller\UserController.php. Open the file and put the below codes.
<?php

namespace App\Http\Controllers;

use App\Models\User;
use Illuminate\Http\Request;

class UserController extends Controller
{
    public function index(Request $request)
    {
        if($request->filled('search')){
            $users = User::search($request->search)->get();
        }else{
            $users = User::get();
        }

        return view('users', compact('users'));
    }
}
Create and Setup blade File
In this step, first we'll create a blade file called users.blade.php where we'll show our integrated elastic search and list of users. So, create a file under the resources/views/users.blade.php and put the below codes.
<!DOCTYPE html>
<html>
<head>
    <title>Laravel 9 Scout Full Text Search Tutorial - Shouts.dev</title>
    <link href="https://cdnjs.cloudflare.com/ajax/libs/twitter-bootstrap/5.0.1/css/bootstrap.min.css" rel="stylesheet">
</head>
<body>

<div class="container">
    <h1>Laravel 9 Scout Full Text Search Tutorial - Shouts.dev</h1>

    <form method="GET">
        <div class="input-group mb-3">
            <input
                type="text"
                name="search"
                value="{{ request()->get('search') }}"
                class="form-control"
                placeholder="Search..."
                aria-label="Search"
                aria-describedby="button-addon2">
            <button class="btn btn-success" type="submit" id="button-addon2">Search</button>
        </div>
    </form>

    <table class="table table-bordered data-table">
        <thead>
        <tr>
            <th>ID</th>
            <th>Name</th>
            <th>Email</th>
        </tr>
        </thead>
        <tbody>
        @foreach($users as $user)
            <tr>
                <td>{{ $user->id }}</td>
                <td>{{ $user->name }}</td>
                <td>{{ $user->email }}</td>
            </tr>
        @endforeach
        </tbody>
    </table>
</div>

</body>

</html>
Define Routes
Now we will define routes for viewing the users list and where we can search for our desired user using elastic search.
Put these below routes in your web.php.
Route::get('users', [App\Http\Controllers\UserController::class, 'index']);Output
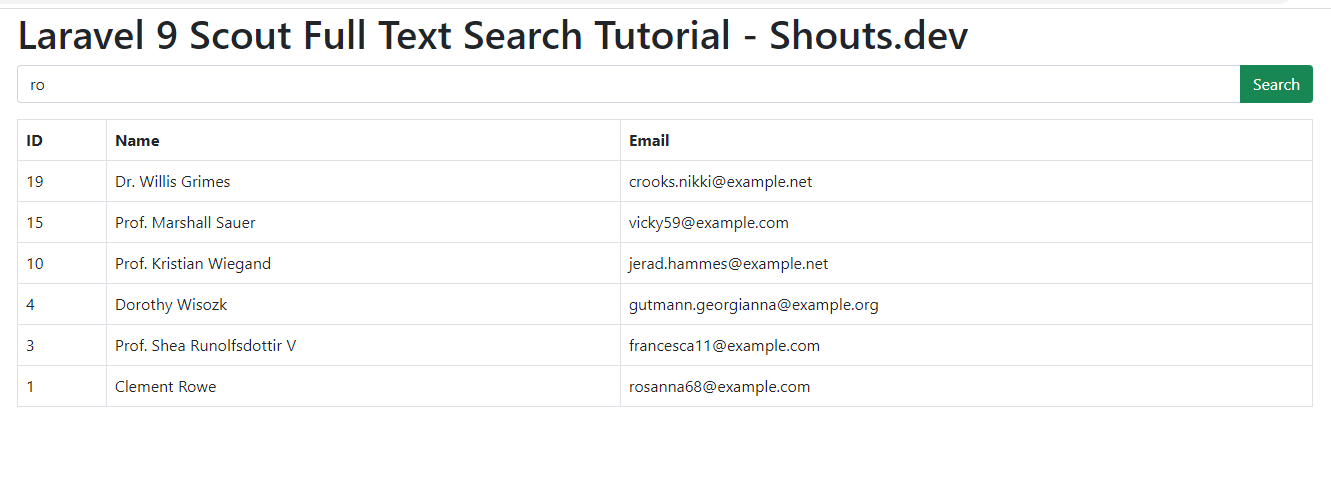
Now we ready with our setup. It's time to check our output. Now go to http://127.0.0.1:8000/users, If everything goes well you'll find a below output.
That's it for today. Hope you'll enjoy this tutorial. You can also download this tutorial from GitHub. Thanks for reading. 🙂