Laravel File Upload Tutorial
Today we are going to talk about Laravel file upload. In Laravel, we can easily upload files. Just follow these simple steps:
Note: This article may help you: Laravel Multiple Image Upload with DropzoneJS.
Table of Contents
Step 1 : Create a Controller
Open CMD and go to your Laravel project directory. Let’s create a controller by typing this command:
php artisan make:controller FileUploadController
Open FileUploadController.php from app/Http/Controllers and paste this code:
<?php

namespace App\Http\Controllers;

use Illuminate\Http\Request;

class FileUploadController extends Controller
{
    public function index()
    {
        return view('upload_file');
    }

    public function fileStore(Request $request)
    {
        if ($request->hasFile('file')) {

            $file = $request->file('file');

            // file name
            echo 'File Name: ' . $file->getClientOriginalName();
            echo '
';

            // size
            echo 'File Size: ' . $file->getSize();
            echo '
';

            // extension
            echo 'File Extension: ' . $file->getClientOriginalExtension();
            echo '
';

            // mime type
            echo 'File Mime Type: ' . $file->getMimeType();
            echo '
';

            // move uploaded file to public/uploads folder
            $destinationPath = 'uploads';
            $file->move($destinationPath, $file->getClientOriginalName());

            echo 'Upload Successful.';
        } else {
            echo 'Please select a file.';
        }
    }
}
Step 2 : Create a View
Navigate to resource >> views folder and make a file named “upload_file.blade.php“. Now open the file and paste this code:
@extends('layouts.app')

@section('content')
    <div class="container">
        <div class="row justify-content-center">
            <div class="col-md-8">
                <div class="card">
                    <div class="card-header">File Uploader</div>

                    <div class="card-body">
                        <form method="POST" action="{{ route('file-store') }}" enctype="multipart/form-data">
                            @csrf

                            <div class="form-group row">
                                <div class="col-md-12">
                                    <div class="input-group">
                                        <div class="custom-file">
                                            <input type="file" class="custom-file-input" name="file">
                                            <label class="custom-file-label">Choose file</label>
                                        </div>
                                    </div>
                                </div>
                            </div>

                            <div class="form-group row mb-0">
                                <div class="col-md-12">
                                    <button type="submit" class="btn btn-primary">Upload
                                    </button>
                                </div>
                            </div>
                        </form>
                    </div>
                </div>
            </div>
        </div>
    </div>
@endsection
We are almost done. Just need to define routes.
Step 3 : Define Routes
Open routes >> web.php and add these two lines:
Route::get('upload', 'FileUploadController@index');
Route::post('store', 'FileUploadController@fileStore')->name("file-store");
Step 4 : Test File Uploader
Now visit http://localhost:8000/upload from a browser to test the file uploader.
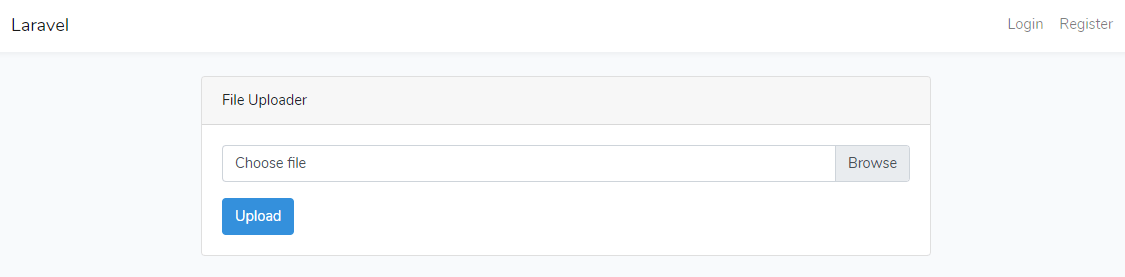
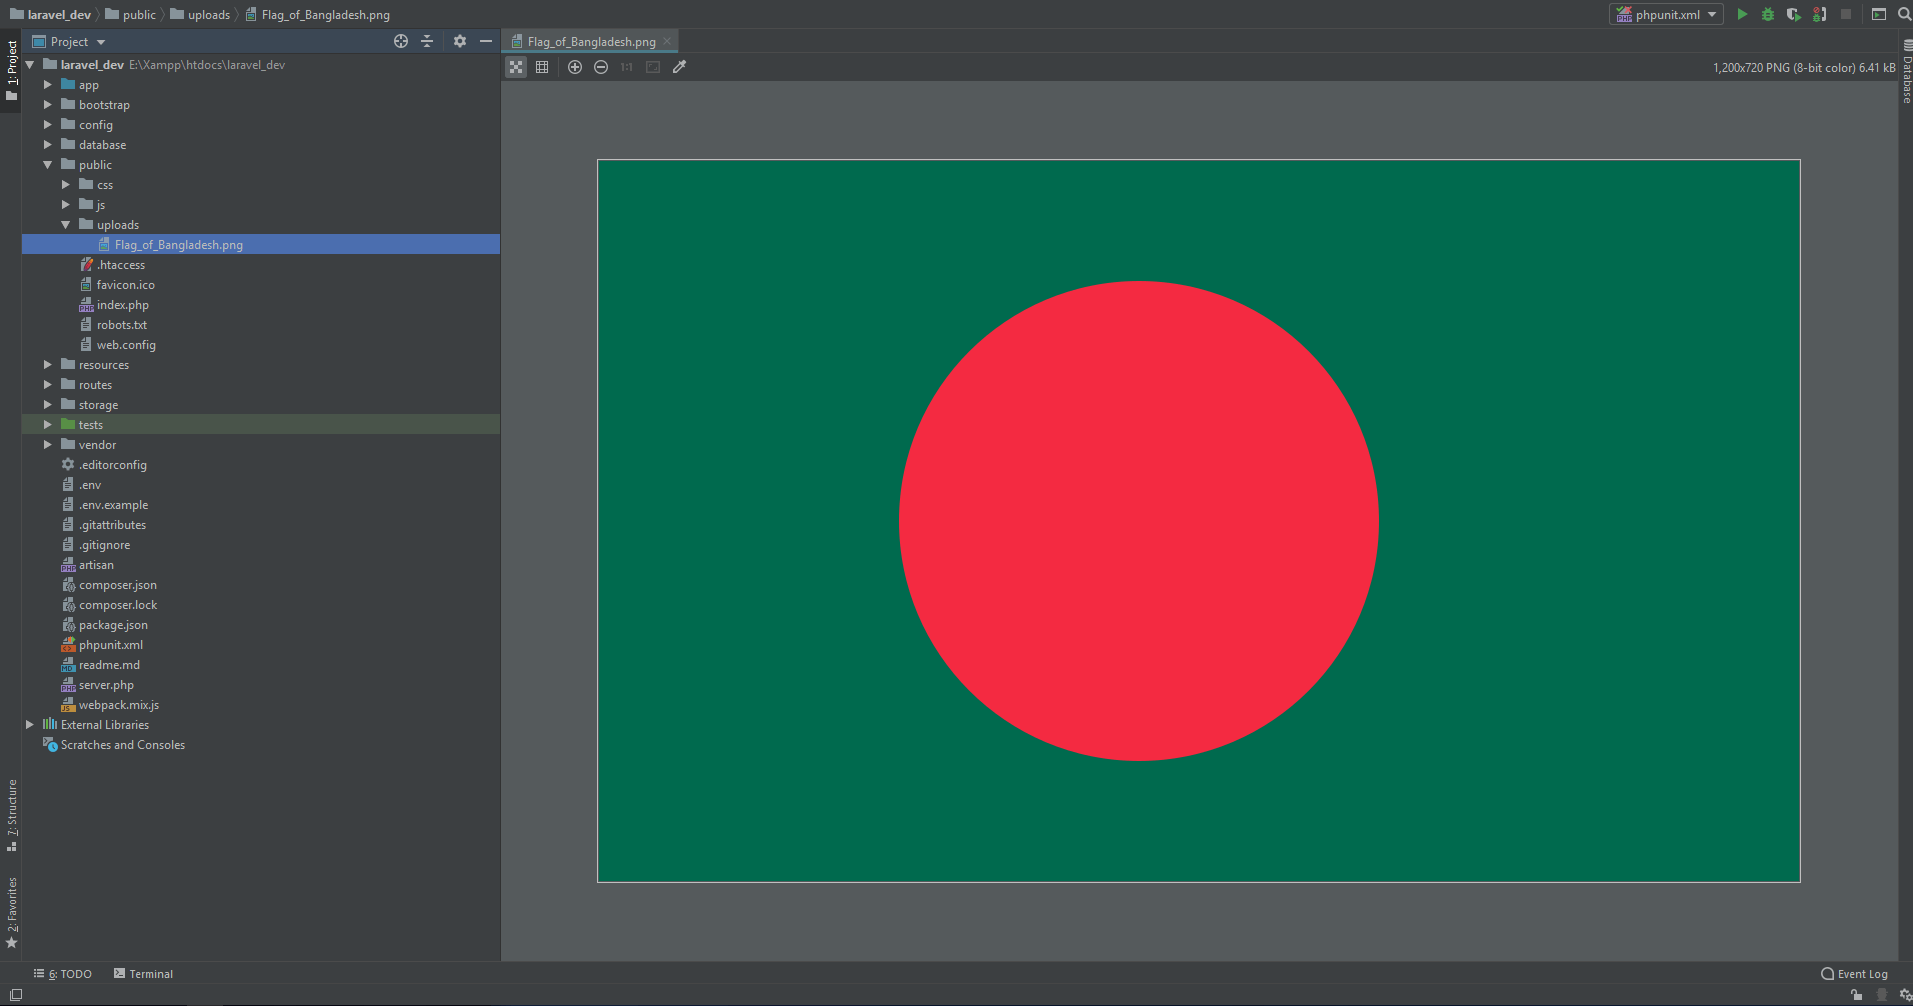
Select a file and click “Upload” button. Now go to public/uploads folder to see the uploaded file. Here’s my result:
I hope, now you can easily upload file in Laravel. ?
Md Obydullah
Software Engineer | Ethical Hacker & Cybersecurity...
Md Obydullah is a software engineer and full stack developer specialist at Laravel, Django, Vue.js, Node.js, Android, Linux Server, and Ethichal Hacking.