React Hook Forms and Validation with Yup
One of the most important aspects of building forms is validation. Form validation ensures that users provide the correct data in the right format, and it helps to prevent errors and improve the overall user experience.
Today we are going to learn how we can implement validation in React hook form using Yup.

So let's get started.
React Hook Forms is a lightweight library for building forms in React. It provides a simple and efficient way to handle form inputs, including validation, without the need for heavy dependencies or complicated setups. In combination with the Yup validation library, React Hook Forms can help to create powerful and robust forms with ease.
Yup is a powerful validation library that can be used in conjunction with React Hook Forms to provide flexible and robust validation for form inputs. Yup provides a simple schema-based syntax that allows us to define the validation rules for each input in the form.
This can include basic checks such as required fields and data type validation, as well as more complex validation such as minimum and maximum values, regular expressions, and custom validation functions.
To use Yup validations with React Hook Form, we first need to install the yup and @hookform/resolvers packages. We can install it using npm:
npm i @hookform/resolvers yupNow that we have installed yup & @hookform/resolvers we can starting defining the schema of our form.
const schema = yup.object({
	//name is required with minimum length of 8
	name: yup.string().min(3)
  // email is required with email format
  email: yup.string().email().required(),
  // phone number needs to match the regex expression
  phone: yup
    .string()
    .matches(
      /^1?[ -.]?\(?([2-9][0-9]{2})\)?[ -.]?([2-9][0-9]{2})[ -.]?([0-9]{4})$/,
      "Enter a valid phone number"
    ),
  // password is required with minimum length of 8
  password: yup.string().min(8).required(),
});
Here you can see, yup is responsible for the majority of our job while we simply provide instructions on how to do it. Our sole task was defining the defining validations to our form for phone with a regex, and name and password with a minimum characters length and email as a valid email.
The next step is to link our yup schema with react hook forms, which is a one-liner and astonishingly simple.
So now, it is time to bind our yup schema with react hook forms, that’s a one-liner only
const {register, handleSubmit, watch, formState: {errors}} = useForm({
        mode: "onBlur",
        resolver: yupResolver(schema),
    });
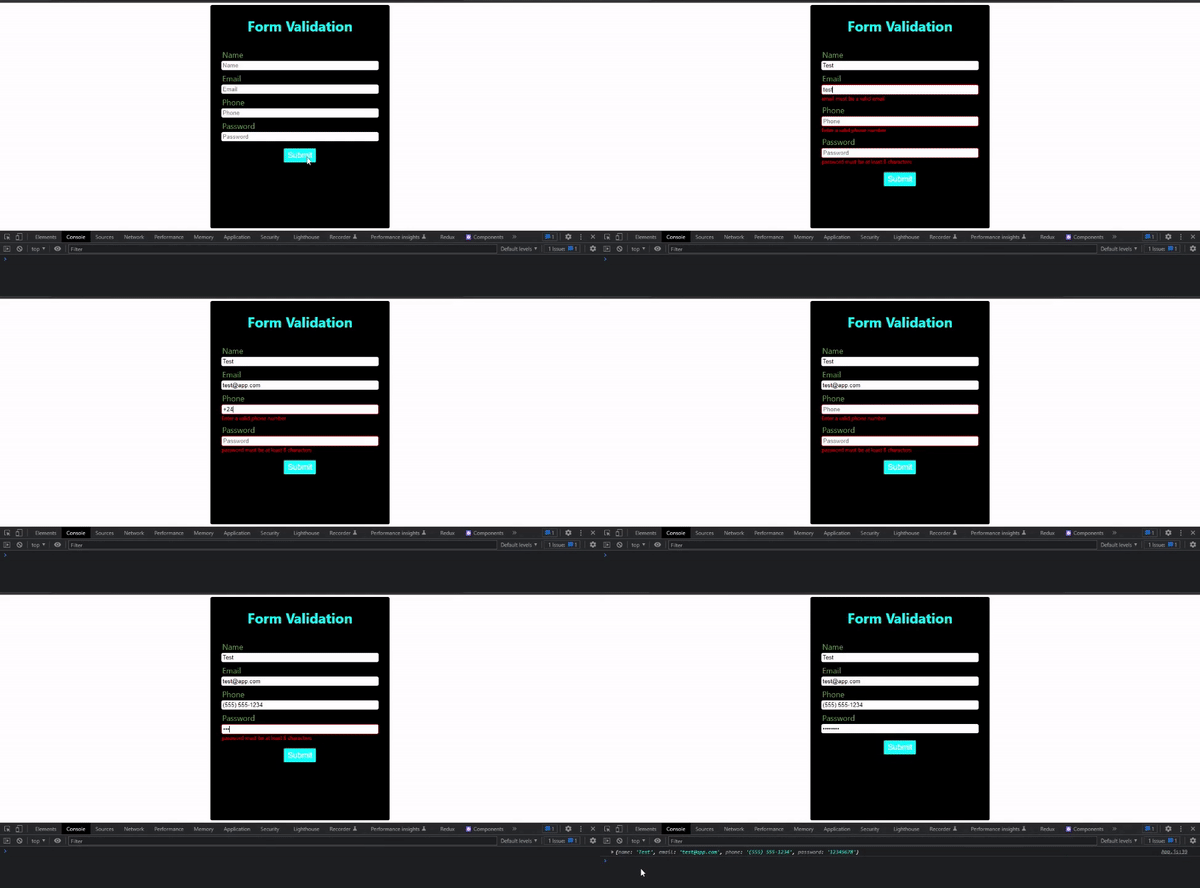
We use onBlur mode to see immediate response.
Now it's time to test our implementation:
import React from 'react';
import './App.css';
import * as yup from "yup";
import {yupResolver} from "@hookform/resolvers/yup/dist/yup";
import {useForm} from "react-hook-form";
import {Button, Col, Form, Row} from "react-bootstrap";

const schema = yup.object({
    //name is required with minimum length of 8
    name: yup.string().min(3),
    // email is required with email format
    email: yup.string().email().required(),
    // phone number needs to match the regex expression
    phone: yup
        .string()
        .matches(
            /^1?[ -.]?\(?([2-9][0-9]{2})\)?[ -.]?([2-9][0-9]{2})[ -.]?([0-9]{4})$/,
            "Enter a valid phone number"
        ),
    // password is required with minimum length of 8
    password: yup.string().min(8).required(),
});

const App = () => {
    const {register, handleSubmit, watch, formState: {errors}} = useForm({
        mode: "onBlur",
        resolver: yupResolver(schema),
    });

    const onSubmit = (data) => {
        console.log(data);
    }

    return (
        <div className='App'>
            <h1>Form Validation</h1>
            <Form
                noValidate
                onSubmit={handleSubmit(onSubmit)}
                className="form-validation-type"
            >
                <Row>
                    <Form.Group as={Col} md="4" className="form-group">
                        <Form.Label>Name</Form.Label>
                        <Form.Control
                            {...register("name")}
                            required
                            className={errors.name ? "is-invalid" : ""}
                            type="text"
                            placeholder="Name"
                        />
                        {/*add error msg*/}
                        {errors.name && (
                            <span className="error invalid-feedback">
                                {errors.name.message}
                            </span>
                        )}
                    </Form.Group>
                    <Form.Group as={Col} md="4" className="form-group">
                        <Form.Label>Email</Form.Label>
                        <Form.Control
                            {...register("email")}
                            required
                            className={errors.email ? "is-invalid" : ""}
                            type="email"
                            placeholder="Email"
                        />
                        {errors.email && (
                            <span className="error invalid-feedback">
                                    {errors.email.message}
                                </span>
                        )}
                    </Form.Group>
                    <Form.Group as={Col} md="4" className="form-group">
                        <Form.Label>Phone</Form.Label>
                        <Form.Control
                            {...register("phone")}
                            required
                            className={errors.phone ? "is-invalid" : ""}
                            type="text"
                            placeholder="Phone"
                        />
                        {errors.phone && (
                            <span className="error invalid-feedback">
                                {errors.phone.message}
                            </span>
                        )

                        }
                    </Form.Group>
                    <Form.Group as={Col} md="4" className="form-group">
                        <Form.Label>Password</Form.Label>
                        <Form.Control
                            {...register("password")}
                            required
                            className={errors.password ? "is-invalid" : ""}
                            type="password"
                            placeholder="Password"
                        />
                        {errors.password && (
                            <span className="error invalid-feedback">
                                {errors.password.message}
                            </span>
                        )}
                    </Form.Group>

                    <Button type="submit">Submit</Button>

                </Row>
            </Form>
        </div>
    );
};
export default App;
That's all for today. Hope you have learn something useful. Thanks for reading.