Laravel Add Multiple Markers in Google Map
Hello Artisans, today I'll show you how to add multiple markers Google map in your Laravel application. Nowadays Google Map is a mandatory thing for a website. And also we need to show multiple markers on a map based on where the shop/restaurant is situated. So, let's see how we can easily integrate multiple markers in Google map in our Laravel application.
Note: Tested on Laravel 9.19
Now, we'll add a new variable in the .env file to set the Google map API key which we'll use later in the blade file. See below the source code:
GOOGLE_MAP_KEY=google_api_keyNow we'll update our default blade file called welcome.blade.php which is come by default. Now open the file and replace with below codes.
<!DOCTYPE html>
<html lang="{{ str_replace('_', '-', app()->getLocale()) }}">

<head>
    <meta charset="utf-8">
    <meta name="viewport" content="width=device-width, initial-scale=1">
    <title>Add Google Map in Laravel - shouts.dev</title>

    <style type="text/css">
        #map {
            height: 400px;
        }
    </style>
</head>

<body>
<div class="container mt-5">
    <h2>Google Map in Laravel - shouts.dev</h2>
    <div id="map"></div>
</div>

@php
    $locations = [
                ['Khilkhet', 23.82973741600876, 90.42004192480192],
                ['Baridhara', 23.808117739943608, 90.44537670239676],
                ['300 Fit ', 23.836538363288035, 90.4658279948394],
                ['Tongi', 23.901545202737925, 90.40824277591372],
                ['Dhamrai', 23.914649046324804, 90.21735533044152],
                ['Manikganj', 23.86481597833292, 90.00501020845859],
            ];
@endphp
<script type="text/javascript">
    function initMap() {
        const myLatLng = { lat: 23.81663586829542, lng: 90.36618138671278 };
        const map = new google.maps.Map(document.getElementById("map"), {
            zoom: 10,
            center: myLatLng,
        });

        var locations = {{ Js::from($locations) }};

        var infowindow = new google.maps.InfoWindow();

        var marker, i;

        for (i = 0; i < locations.length; i  ) {
            marker = new google.maps.Marker({
                position: new google.maps.LatLng(locations[i][1], locations[i][2]),
                map: map
            });

            google.maps.event.addListener(marker, 'click', (function(marker, i) {
                return function() {
                    infowindow.setContent(locations[i][0]);
                    infowindow.open(map, marker);
                }
            })(marker, i));

        }
    }

    window.initMap = initMap;
</script>

<script type="text/javascript"
        src="https://maps.google.com/maps/api/js?key={{ env('GOOGLE_MAP_KEY') }}&callback=initMap" ></script>

</body>
</html>
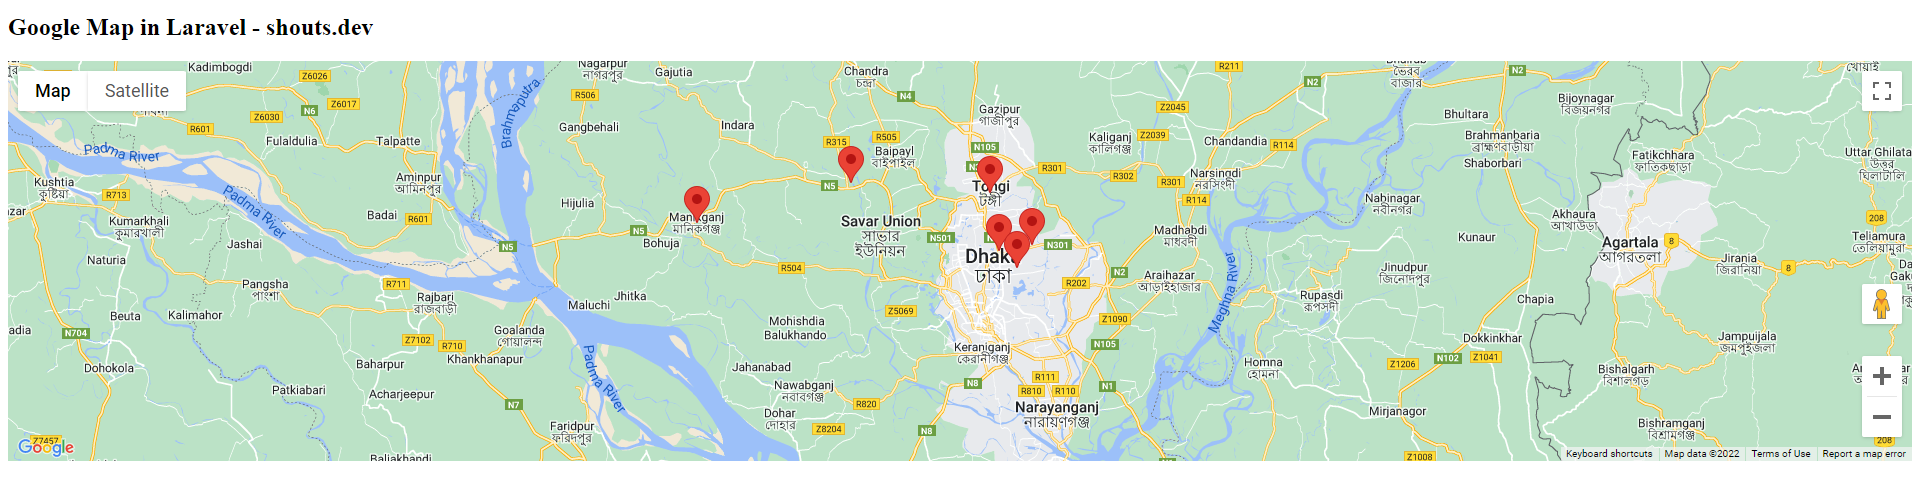
And finally, we're ready with our setup. It's time to check our output. Now go to http://127.0.0.1:8000, If everything goes well (hope so) we can see the below output.
That's it for today. I hope you've enjoyed this tutorial. You can also download this tutorial from GitHub. Thanks for reading. 🙂