Laravel 10 - How to Implement Sweet Alert
Hello Artisan, today I'll show you how to implement Sweet Alert on your Laravel project. Sweet Alert is the nice way to interact with user with confirmation or alert. You can find more in the official docs. It'll take only few steps to complete. So, let's start how we can easily integrate Sweet Alert into our Laravel project.
Note: Tested on Laravel 10.0
At first we'll create some dummy data using tinker. If you're new with the terms of tinker, I recommend you to please take short time time to see one of m short tutorial on Tinker. Let's fire the below command in your terminal
php artisan tinker

User::factory()->count(20)->create()
It'll create 20 users in database.
First, we'll create a controller called UserController.php where we'll write our logic to view the list of users and from the delete button we can delete the user with an confirmation of Sweet Alert. So, fire the below command in terminal to generate controller first.
php artisan make:controller UserControllerIt'll create a controller called UserController under App/Http/Controllers, now what we'll do is to add logic to our controller. See the below source code.
<?php

namespace App\Http\Controllers;

use App\Models\User;
use Illuminate\Http\Request;

class UserController extends Controller
{
    public function index(Request $request): \Illuminate\Contracts\View\View|\Illuminate\Foundation\Application|\Illuminate\Contracts\View\Factory|\Illuminate\Contracts\Foundation\Application
    {
        $data = [
            'users' => User::latest()->paginate(8)
        ];

        return view('users', $data);
    }
    public function destroy($id): \Illuminate\Http\RedirectResponse
    {
        User::destroy($id);
        return back();
    }
}
Now we'll add routes which will let us show the user view page and can delete the user. So, let's add the below route to our web.php.
Route::resource('users', UserController::class)->only(['index', 'destroy']);Now we'll build a table which'll contain the user list. For that we'll create a file called users.blade.php. Let's create a file under resources/views. Now, let's add the below source code.
<!DOCTYPE html>
<html>
<head>
    <title>Laravel 10 Sweet Alert Confirm Delete Example - shouts.dev</title>
    <meta name="csrf-token" content="{{ csrf_token() }}">
    <link href="https://cdn.jsdelivr.net/npm/[email protected]/dist/css/bootstrap.min.css" rel="stylesheet">
    <link href="https://cdnjs.cloudflare.com/ajax/libs/limonte-sweetalert2/5.0.7/sweetalert2.min.css" rel="stylesheet">
</head>
<body>

<div class="container">

    <h3 class="text-center mt-4 mb-5">Laravel 10 Sweet Alert Confirm Delete Example - shouts.dev</h3>

    <table class="table table-bordered table-striped data-table">
        <thead>
        <tr>
            <th>No</th>
            <th>Name</th>
            <th>Email</th>
            <th class="text-center">Action</th>
        </tr>
        </thead>
        <tbody>
        @foreach($users as $key=> $user)
            <tr>
                <td>{{   $key }}</td>
                <td>{{ $user->name }}</td>
                <td>{{ $user->email }}</td>
                <td class="text-center">
                    <form method="POST" action="{{ route('users.destroy', $user->id) }}">
                        @csrf
                        @method('DELETE')
                        <button type="submit" class="btn btn-xs btn-danger btn-flat show-alert-delete-box btn-sm" data-toggle="tooltip" title='Delete'>Delete</button>
                    </form>
                </td>
            </tr>
        @endforeach
        </tbody>
    </table>
</div>

<script src="https://cdnjs.cloudflare.com/ajax/libs/jquery/3.6.0/jquery.min.js"></script>
<script src="https://cdnjs.cloudflare.com/ajax/libs/sweetalert/2.1.2/sweetalert.min.js"></script>

<script type="text/javascript">
    $(document).ready(function() {
        $(document).on('click', '.show-alert-delete-box', function(event){
            var form =  $(this).closest("form");

            event.preventDefault();
            swal({
                title: "Are you sure you want to delete this record?",
                text: "If you delete this, it will be gone forever.",
                icon: "warning",
                type: "warning",
                buttons: ["Cancel","Yes!"],
                confirmButtonColor: '#3085d6',
                cancelButtonColor: '#d33',
                confirmButtonText: 'Yes, delete it!'
            }).then((willDelete) => {
                if (willDelete) {
                    form.submit();
                }
            });
        });
    });
</script>

</body>
</html>
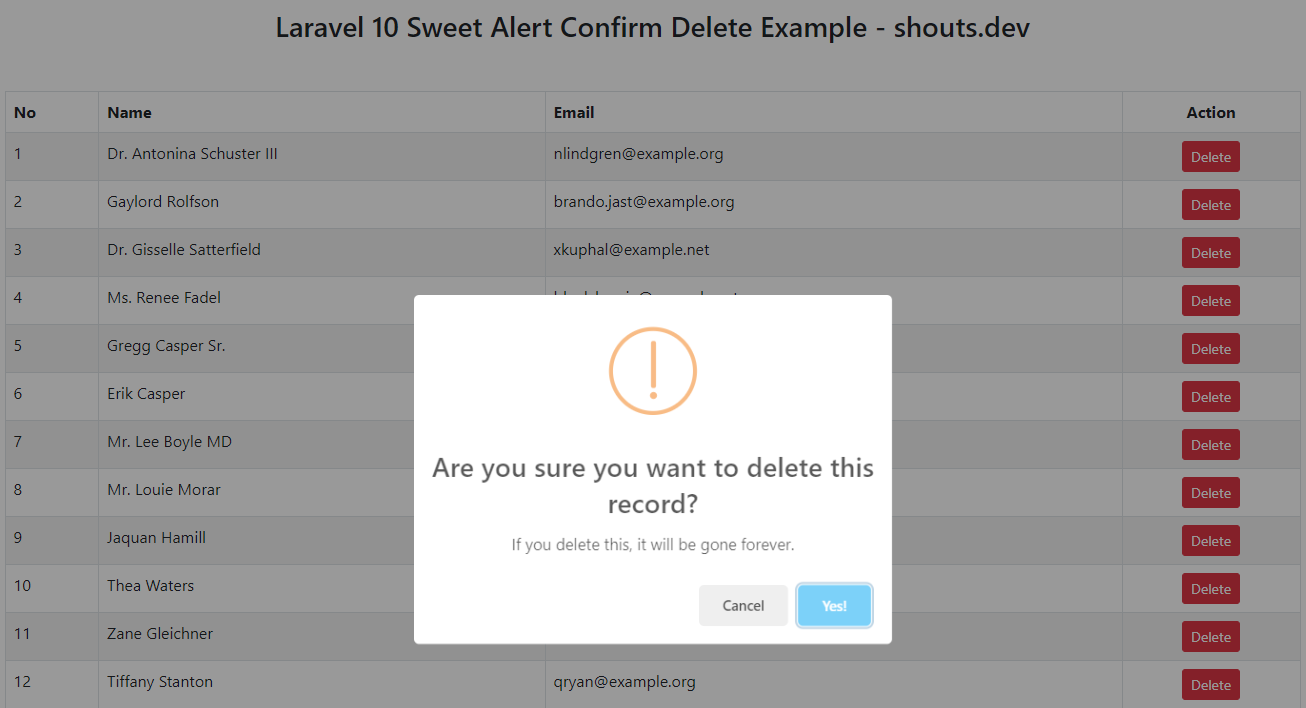
And finally, we're ready with our setup. It's time to check our output. Now go to http://127.0.0.1:8000/users, If everything goes well (hope so) we can see the below output.
That's it for today. I hope you've enjoyed this tutorial. You can also download this tutorial from GitHub. Thanks for reading. 🙂