VueJS Working with Pinia for State Management
Hello dev's, today I'll show you how to use Pinia in you vue 3 project. Pinia, currently the most popular library for state management. One of the main feature of State management is, it is independent from one component to another component. That's mean we can use any state to any component. So, let's see how we can easily use pinia in our vue 3 project.
First we've to create fresh vuejs project using the below command.
npm init vue@latestThis command will install and execute create-vue, the official Vue project scaffolding tool. You will be presented with prompts for several optional features such as TypeScript and testing support. Please follow the screen what you've asked for. And this will install a fresh Vue3 project. Run the below command to finish setup your project.
> cd <your-project-name>
> npm install
> npm run dev
And that's it successfully created a vue project.
And now we've to setup pinia for managing our state. So, let's run the below command to install pinia
npm install pinia And this will install pinia in your vue3 project. Now replace your main.js code with the below codes.
import { createApp } from 'vue'
import App from './App.vue'
import { createPinia } from 'pinia'
import './assets/main.css';

const app = createApp(App);
const pinia = createPinia()

// make Pinia available in your Vue app
app.use(pinia);

app.mount('#app');
Now we need to setup our state variables and Actions. So, let's create a file called store.js under src/store. And replace with below codes.
import { defineStore } from 'pinia'
export const useCounterStore = defineStore('counter', {
    state: () => ({
        count: 0
    }),
    actions: {
        increment() {
            this.count++
        },
        decrement() {
            this.count--
        }
    }
})
And finally our setup is done. Now we'll test our stet management by replacing App.vue file codes with the below one.
<template>
  <div>
    <p>Count: {{ count }}</p>
    <button @click="increment">Increment</button>
    <button @click="decrement">Decrement</button>
  </div>
</template>
<script>

import { useCounterStore } from './store/store.js'
import { computed } from 'vue'
export default {
  setup() {
    const store = useCounterStore()

    const count = computed(() => store.count)

    const increment = () => {
      store.increment()
    }

    const decrement = () => {
      store.decrement()
    }

    return {
      count,
      increment,
      decrement
    }
  }
}
</script>
<style scoped>
header {
  line-height: 1.5;
}

.logo {
  display: block;
  margin: 0 auto 2rem;
}

@media (min-width: 1024px) {
  header {
    display: flex;
    place-items: center;
    padding-right: calc(var(--section-gap) / 2);
  }

  .logo {
    margin: 0 2rem 0 0;
  }

  header .wrapper {
    display: flex;
    place-items: flex-start;
    flex-wrap: wrap;
  }
}
</style>
And its' time to check the output of our tutorial. Let's go to http://localhost:5173/ (this can be different based on your free port). And you can see the below result
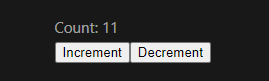
That's it for today. I hope you've enjoyed this tutorial. You can also download this project form Github also. Thanks for reading. 🙂