Razorpay Payment Gateway Integration in Laravel
Hello Artisan, today I'll show you integration of Razorpay payment gateway in our Laravel App. Razorpay is an indian Payment Gateway. We'll use an package called razorpay/razorpay which is easier to instegrate. So no more talk and let's see how we can integrate in our application.
Note: Tested on Laravel 8.75.
Table of Contents
Install Package
For installing the razorpay/razorpay package we just need to fire the below command in our terminal.
composer require razorpay/razorpay Configure .env
Please make sure you have an account in razorpay otherwise you cannot use the razorpay service. To create an account, click here it is very easy. You can also use you google account. Ok now we can head over to our tutorial.
Now we need to setup the razorpay key and secret in our .env file. put the below code in the bottom of your .env file
RAZORPAY_KEY=********
RAZORPAY_SECRET=************
Create and Setup Controller
Now, we need to do some work in our controller which will show the payment page and complete the payment process. So, first create a controller using below command
php artisan make:controller RazorPayControllerIt'll create controller called RazorPayController.php. Open the file and paste the following code
<?php

namespace App\Http\Controllers;

use Illuminate\Http\Request;
use Razorpay\Api\Api;

class RazorPayController extends Controller
{
    public function index()
    {
        return view('razorpay');
    }


    public function store(Request $request): \Illuminate\Http\RedirectResponse
    {
        $input = $request->all();

        $api = new Api(env('RAZORPAY_KEY'), env('RAZORPAY_SECRET'));

        $payment = $api->payment->fetch($input['razorpay_payment_id']);

        if(count($input)  && !empty($input['razorpay_payment_id'])) {
            try {
                $api->payment->fetch($input['razorpay_payment_id'])->capture(array('amount'=>$payment['amount']));
            } catch (\Exception $e) {
                return back()->with('error',$e->getMessage());
            }
        }

        return back()->with('success','Payment successful');
    }
}
Create Route
Put the below route in your web.php
Route::get('razorpay-payment', [\App\Http\Controllers\RazorPayController::class, 'index']);
Route::post('razorpay-payment', [\App\Http\Controllers\RazorPayController::class, 'store'])->name('razorpay.payment.store');
Setup Blade Template
Now we need setup our blade file where we can process the payment with our razorpay payment gateway. So create razorpay.blade.php under resources/views and paste the following code.
<!DOCTYPE html>
<html lang="{{ str_replace('_', '-', app()->getLocale()) }}">
<head>
    <meta charset="utf-8">
    <meta name="viewport" content="width=device-width, initial-scale=1">
    <meta name="csrf-token" content="{{ csrf_token() }}">
    <title>Laravel - Razorpay Payment Gateway Integration Example - CodeCheef</title>
    <script src="https://cdnjs.cloudflare.com/ajax/libs/jquery/3.6.0/jquery.min.js" crossorigin="anonymous"></script>
    <link rel="stylesheet" href="https://maxcdn.bootstrapcdn.com/bootstrap/4.0.0/css/bootstrap.min.css" integrity="sha384-Gn5384xqQ1aoWXA+058RXPxPg6fy4IWvTNh0E263XmFcJlSAwiGgFAW/dAiS6JXm" crossorigin="anonymous">
</head>
<body>
<div id="app">
    <main class="py-4">
        <div class="container">
            <div class="row">
                <div class="col-md-6 offset-3 col-md-offset-6">

                    @if($message = Session::get('error'))
                        <div class="alert alert-danger alert-dismissible fade in" role="alert">
                            <button type="button" class="close" data-dismiss="alert" aria-label="Close">
                                <span aria-hidden="true">×</span>
                            </button>
                            <strong>Error!</strong> {{ $message }}
                        </div>
                    @endif

                    @if($message = Session::get('success'))
                        <div class="alert alert-success alert-dismissible fade {{ Session::has('success') ? 'show' : 'in' }}" role="alert">
                            <button type="button" class="close" data-dismiss="alert" aria-label="Close">
                                <span aria-hidden="true">×</span>
                            </button>
                            <strong>Success!</strong> {{ $message }}
                        </div>
                    @endif

                    <div class="card card-default">
                        <div class="card-header">
                            Laravel - Razorpay Payment Gateway Integration
                        </div>

                        <div class="card-body text-center">
                            <form action="{{ route('razorpay.payment.store') }}" method="POST" >
                                @csrf
                                <script src="https://checkout.razorpay.com/v1/checkout.js"
                                        data-key="{{ env('RAZORPAY_KEY') }}"
                                        data-amount="1000"
                                        data-buttontext="Pay 10 INR"
                                        data-name="shouts.dev"
                                        data-description="Rozerpay"
                                        data-image="https://cdn.shouts.dev/wp-content/uploads/2021/11/02014354/logo-black.png"
                                        data-prefill.name="name"
                                        data-prefill.email="email"
                                        data-theme.color="#ff7529">
                                </script>
                            </form>
                        </div>
                    </div>

                </div>
            </div>
        </div>
    </main>
</div>
</body>
</html>
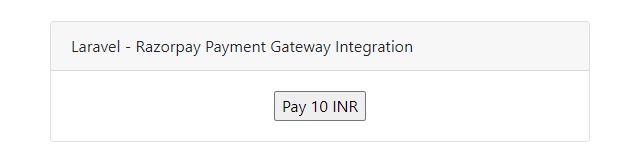
Output
Now we've completed our tutorial. It's time to show the result. Go to http://127.0.0.1:8000/razorpay-payment and you'll find the below output
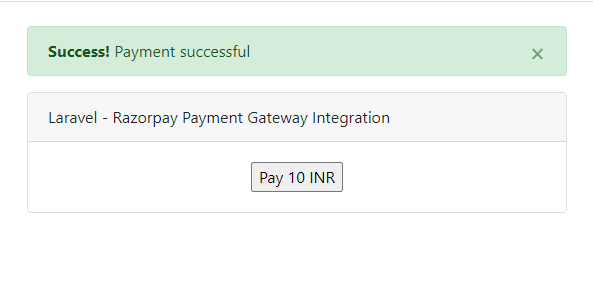
Now click on the Pay 10 INR to process the razorpay payment and select card to use in test mode. You can find the dummy card details here . After successfully payment you will see the below output
You can also see all the transactions held in transaction in razorpay dashboard.
That's it for today. Hope you'll enjoy this tutorial. You can also download this from GitHub. Thanks for reading.