Laravel Socialite Login with Google Account With Breeze
Hello Artisans, today I'll talk about laravel 9 login with google. it's a simple example of laravel 9 login with gmail account. I would like to share with you laravel 9 breeze login with google. For more about breeze and installation you can see my article Laravel Authentication with Breeze. Let's see below example laravel 9 socialite login with google.
So if you want to also implement login with a Google Gmail account then I will help you with step-by-step instructions. let's follow the tutorial and implement it.
Note: Tested on Laravel 9.18
Table of Contents
- Install Socialite
- Create Google App
- Update config file
- Add new column to users table
- Create and Setup Controller
- Define Route
- Update and Setup Vue File
- Output
Install Socialite
In first step we will install Socialite Package that provide api to connect with google account. For .So, first open your terminal and run bellow command:
composer require laravel/socialiteCreate Google App
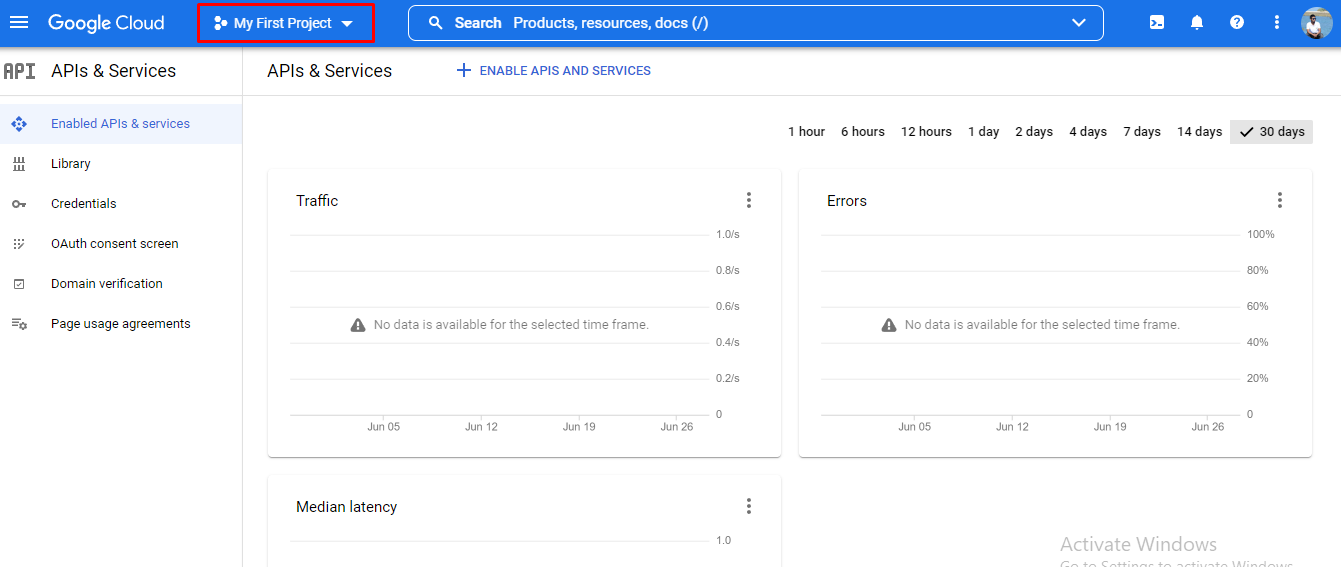
Now we need google client id and secret that way we can get information of other user. so if you don't have google app account then you can create from here : Google Developers Console. you can find bellow screen. If you already had your apps than you will see them on top bar. Otherwise create a new project by clicking on Add Project button from top bar.
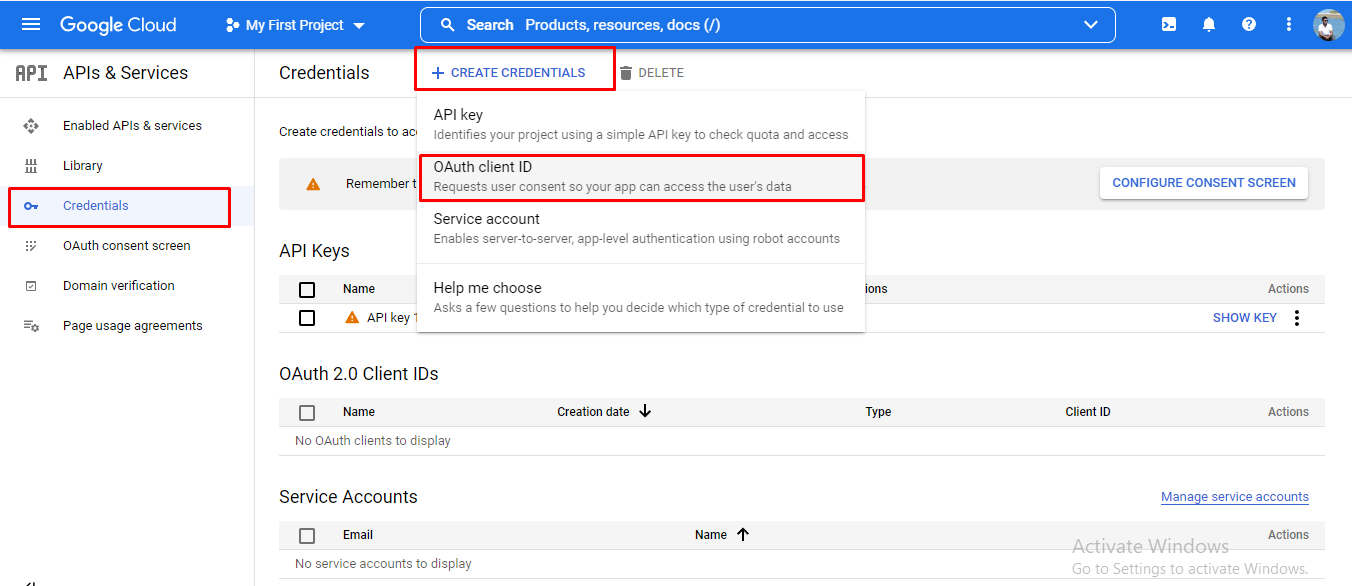
Now you have to click on Credentials and click on Create Credentials and and choose OAuth client ID.
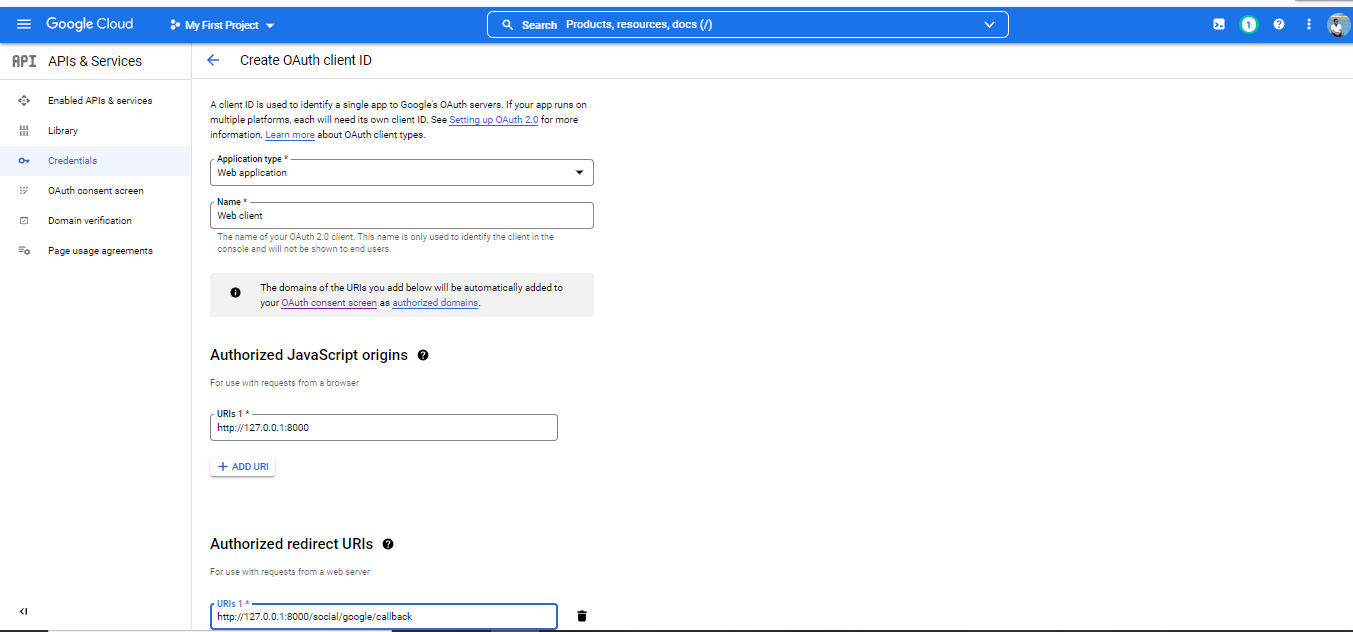
Now you have to provide your app information like below. Provide the information and hit the save button.
Now you will see a modal like this with your Client ID and secret:
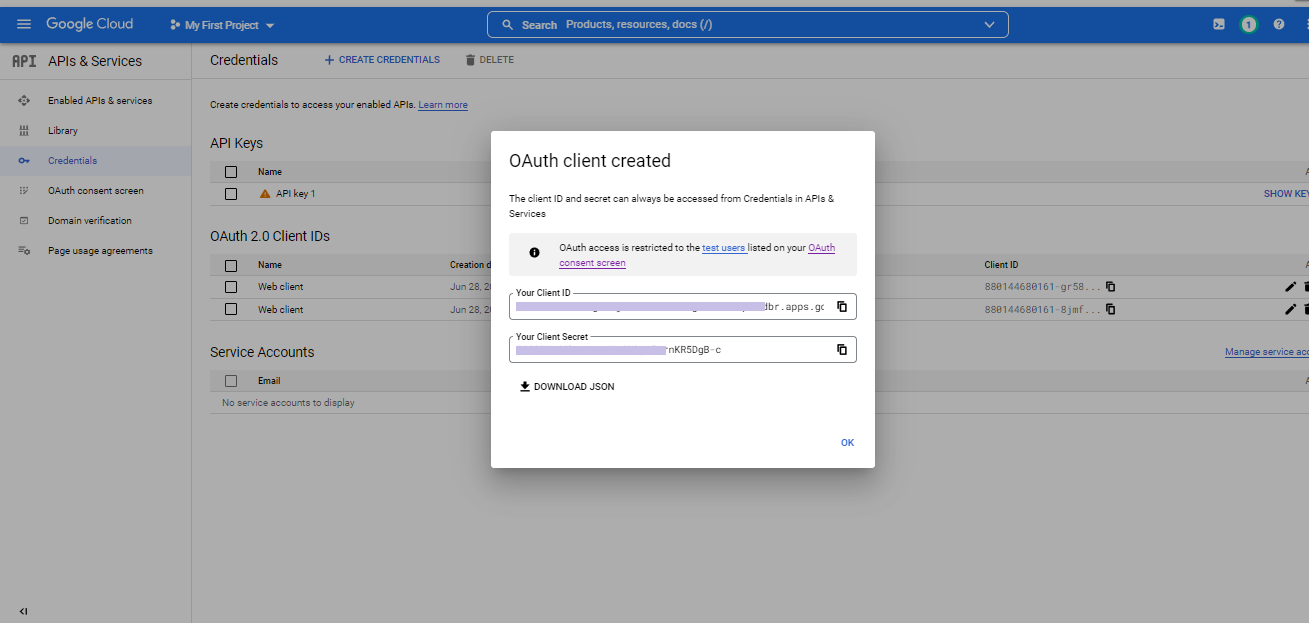
Now, copy and paste them on your .env file like below along with your callback URL that you have provided on app information.
GOOGLE_CLIENT_ID="........................bhc5b.apps.googleusercontent.com"
GOOGLE_CLIENT_SECRET="...........y1Z_0H8_JHg9T9lzxI3Yx"
GOOGLE_CALLBACK_URL="http://127.0.0.1:8000/social/google/callback"
Update Config file
now, update your services.php file like below :
<?php

return [

    /*
    |--------------------------------------------------------------------------
    | Third Party Services
    |--------------------------------------------------------------------------
    |
    | This file is for storing the credentials for third party services such
    | as Mailgun, Postmark, AWS and more. This file provides the de facto
    | location for this type of information, allowing packages to have
    | a conventional file to locate the various service credentials.
    |
    */

    'mailgun' => [
        'domain' => env('MAILGUN_DOMAIN'),
        'secret' => env('MAILGUN_SECRET'),
        'endpoint' => env('MAILGUN_ENDPOINT', 'api.mailgun.net'),
        'scheme' => 'https',
    ],

    'postmark' => [
        'token' => env('POSTMARK_TOKEN'),
    ],

    'ses' => [
        'key' => env('AWS_ACCESS_KEY_ID'),
        'secret' => env('AWS_SECRET_ACCESS_KEY'),
        'region' => env('AWS_DEFAULT_REGION', 'us-east-1'),
    ],
    'google' => [
        'client_id' => env('GOOGLE_CLIENT_ID'),
        'client_secret' => env('GOOGLE_CLIENT_SECRET'),
        'redirect' => env('GOOGLE_CALLBACK_URL'),
    ],

];
Add new column to users table
Now, run this command to create a migration file to for adding google_id column on our users table:
php artisan make:migration add_column_to_user_tableNow, update your migration file like below:
<?php

use Illuminate\Database\Migrations\Migration;
use Illuminate\Database\Schema\Blueprint;
use Illuminate\Support\Facades\Schema;

return new class extends Migration
{
    /**
     * Run the migrations.
     *
     * @return void
     */
    public function up()
    {
        Schema::table('users', function ($table) {
            $table->string('google_id')->nullable();
        });
    }

    /**
     * Reverse the migrations.
     *
     * @return void
     */
    public function down()
    {
        //
    }
};
Now, we will migrate our migration file:
php artisan migrateCreate and Setup Controller
Now create GoogleController and update controller like this:
<?php

namespace App\Http\Controllers\Auth;

use App\Http\Controllers\Controller;
use App\Models\User;
use Illuminate\Http\Request;
use Laravel\Socialite\Facades\Socialite;
use Auth;

class GoogleController extends Controller
{
    public function redirect()
    {
        return Socialite::driver('google')->redirect();
    }

    public function googleCallback()
    {
        try {

            $user = Socialite::driver('google')->user();

            $current_user = User::where('google_id', $user->id)->first();

            if($current_user){

                Auth::login($current_user);

                return redirect()->intended('dashboard');

            }else{
                $newUser = User::updateOrCreate(['email' => $user->email],[
                    'name' => $user->name,
                    'google_id'=> $user->id,
                    'password' => encrypt('123456dummy')
                ]);

                Auth::login($newUser);

                return redirect()->intended('dashboard');
            }

        } catch (Exception $e) {
            dd($e->getMessage());
        }
    }
}
Define route
Now, we will define our route
<?php

use Illuminate\Foundation\Application;
use Illuminate\Support\Facades\Route;
use Inertia\Inertia;

/*
|--------------------------------------------------------------------------
| Web Routes
|--------------------------------------------------------------------------
|
| Here is where you can register web routes for your application. These
| routes are loaded by the RouteServiceProvider within a group which
| contains the "web" middleware group. Now create something great!
|
*/

Route::get('/', function () {
    return Inertia::render('Welcome', [
        'canLogin' => Route::has('login'),
        'canRegister' => Route::has('register'),
        'laravelVersion' => Application::VERSION,
        'phpVersion' => PHP_VERSION,
    ]);
});

Route::get('/dashboard', function () {
    return Inertia::render('Dashboard');
})->middleware(['auth', 'verified'])->name('dashboard');

require __DIR__.'/auth.php';

Route::controller(App\Http\Controllers\Auth\GoogleController::class)->group(function(){
    Route::get('social/google', 'redirect')->name('auth.google');
    Route::get('social/google/callback', 'googleCallback');
});
Update and Setup Vue File
Now, we will update our Login.vue file and add google login icon and route:
<script setup>
import BreezeButton from '@/Components/Button.vue';
import BreezeCheckbox from '@/Components/Checkbox.vue';
import BreezeGuestLayout from '@/Layouts/Guest.vue';
import BreezeInput from '@/Components/Input.vue';
import BreezeLabel from '@/Components/Label.vue';
import BreezeValidationErrors from '@/Components/ValidationErrors.vue';
import { Head, Link, useForm } from '@inertiajs/inertia-vue3';

defineProps({
    canResetPassword: Boolean,
    status: String,
});

const form = useForm({
    email: '',
    password: '',
    remember: false
});

const submit = () => {
    form.post(route('login'), {
        onFinish: () => form.reset('password'),
    });
};
</script>

<template>
    <BreezeGuestLayout>
        <Head title="Log in" />

        <BreezeValidationErrors class="mb-4" />

        <div v-if="status" class="mb-4 font-medium text-sm text-green-600">
            {{ status }}
        </div>

        <form @submit.prevent="submit">
            <div>
                <BreezeLabel for="email" value="Email" />
                <BreezeInput id="email" type="email" class="mt-1 block w-full" v-model="form.email" required autofocus autocomplete="username" />
            </div>

            <div class="mt-4">
                <BreezeLabel for="password" value="Password" />
                <BreezeInput id="password" type="password" class="mt-1 block w-full" v-model="form.password" required autocomplete="current-password" />
            </div>

            <div class="block mt-4">
                <label class="flex items-center justify-between">
                    <div class="left">
                        <BreezeCheckbox name="remember" v-model:checked="form.remember" />
                        <span class="ml-2 text-sm text-gray-600">Remember me</span>
                    </div>

                    <Link v-if="canResetPassword" :href="route('password.request')" class="underline text-sm text-gray-600 hover:text-gray-900">
                        Forgot your password?
                    </Link>
                </label>
            </div>

            <div class="flex items-center justify-end mt-4">
                <a :href="route('auth.google')">
                    <img src="https://developers.google.com/identity/images/btn_google_signin_dark_normal_web.png" style="margin-left: 3em;height: 40px;border-radius: 12px">
                </a>

                <BreezeButton class="ml-4" :class="{ 'opacity-25': form.processing }" :disabled="form.processing">
                    Log in
                </BreezeButton>
            </div>
        </form>
    </BreezeGuestLayout>
</template>
Output
Now we are ready to run our example and login with user. so run below command so quick run:
php artisan serveNow, to see our output we have to recompile our vue file by running this command:
npm run watchNow, go to your system and check on http://127.0.0.1:8000/login and see the result:
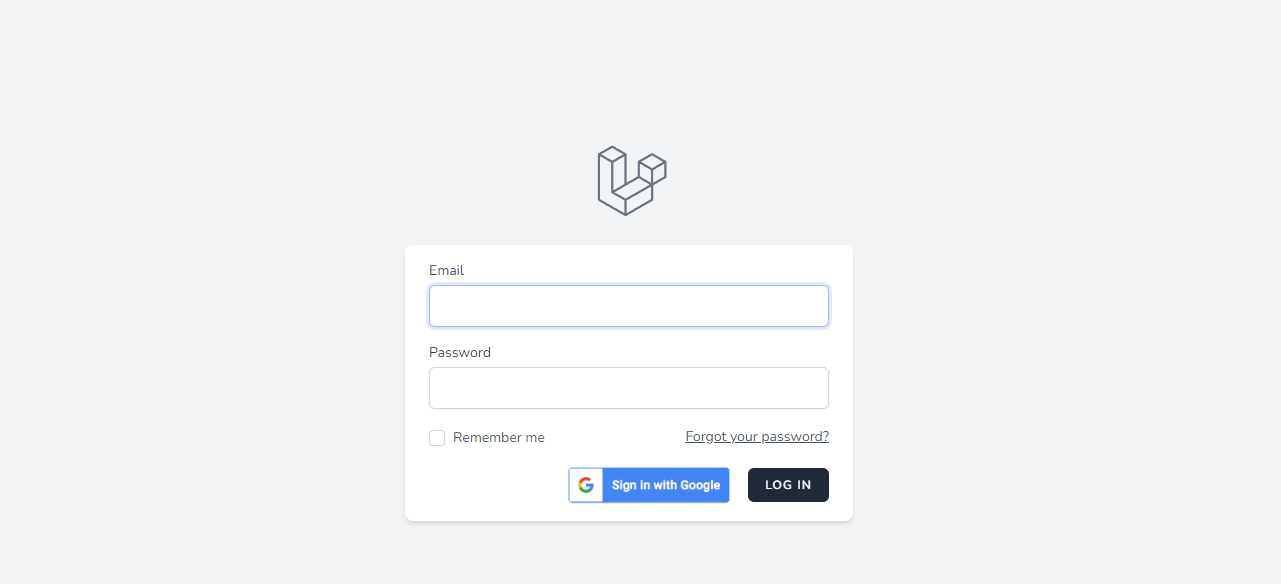
Now, click on Sign in with Google button and it will redirect you to choose your gmail account.
That's it for today. I hope you've enjoyed this tutorial. Thanks for reading.🙂