Install and Configure Squid Proxy on CentOS 7 & 8
Squid is a caching and forwarding HTTP web proxy. It has a wide variety of uses, including speeding up a web server by caching repeated requests, caching web, DNS and other computer network lookups for a group of people sharing network resources, and aiding security by filtering traffic.
In this article, I’m going to show how to install & configure Squid proxy on CentOS 7 and 8. Let’s begin:
Table of Contents
Install Squid
Squid package is available on CentOS repository. Run this command to install Squid:
# CentOS/RHEL 8
sudo dnf install squid

# CentOS/RHEL 7
sudo yum install squid
Once the installation is completed, we have start and enable Squid service:
# Enable
sudo systemctl enable squid

# Start
sudo systemctl start squid
Now check the status:
sudo systemctl status squidConfigure Squid
The config file located on /etc/squid/squid.conf. Let’s take a backup before modifying:
sudo cp /etc/squid/squid.conf /etc/squid/squid.conf.bkpNow open the file with your favorite text editor:
sudo nano /etc/squid/squid.confThe default Squid port is 3128. We can easily change the port:
# Default
http_port 3128 # change to any port if needed
By default, Squid allows access only from localnet & localhost. We can allow specific IPs to access Squid. To do this, create this file:
sudo nano /etc/squid/allowed_ips.txtThen enter IP address:
# Allowed IPs
192.168.45.1
192.168.21.2
# more...
Now we need to add 2 lines in the main config file:
# ...
acl allowed_ips  src "/etc/squid/allowed_ips.txt" # add this line
# ...
http_access allow localnet
http_access allow localhost
http_access allow allowed_ips # add this line
If you want to access Squid from any IP, then just change this:
# Change
http_access deny all

# To
http_access allow all
Then restart Squid service:
sudo systemctl restart squidSet Authentication
We’re able to set authentication in Squid. We’ll use the openssl to generate the password. The login details will be stored in /etc/squid/htpasswd file.
The structure of adding user:
printf "THE_USERNAME:$(openssl passwd -crypt THE_PASSWORD)\n" | sudo tee -a /etc/squid/htpasswd
Let’s add a demo user called “user1” with password “123456”:
printf "user1:$(openssl passwd -crypt 123456)\n" | sudo tee -a /etc/squid/htpasswd
After that, we have to enable the HTTP basic authentication in Squid config file:
# # add these 3 lines
auth_param basic program /usr/lib64/squid/basic_ncsa_auth /etc/squid/htpasswd
auth_param basic realm proxy
acl authenticated proxy_auth REQUIRED
# ...
http_access allow localnet
http_access allow localhost
http_access allow authenticated # add this line
Done. Restart the Squid service:
sudo systemctl restart squidConfig Firewall
If you are running a firewall, you’ll need to open port 3128. To do so run the following commands:
# Add port
sudo firewall-cmd --permanent --add-port=3128/tcp

# Reload
sudo firewall-cmd --reload
Test Our Proxy
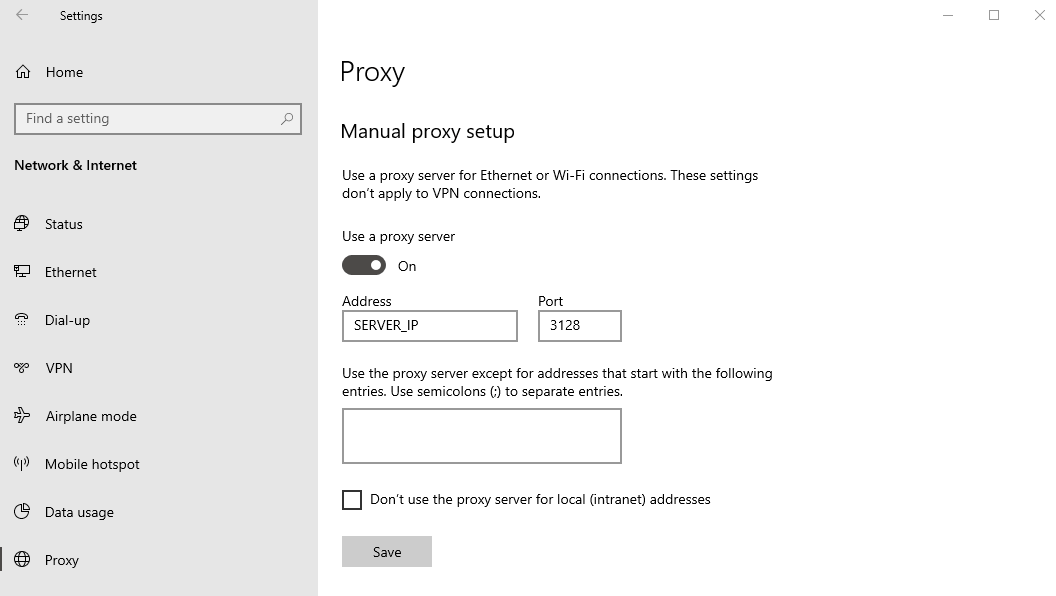
Our proxy server is ready to use. We can try to connect our proxy from any proxy client. I’m testing on Windows 10 proxy settings.

You can also set our proxy info in the browser’s proxy settings.
Google Chrome: Chrome uses default system proxy settings. Such as on Windows, chrome uses Windows proxy settings.
Firefox: Options > Network Settings > Select “Manual proxy configuration & Use this proxy server for all protocols”.
After enabling the proxy, visit abstractapi.com/ip-geolocation-api to check location information. You can also check from here ip-api.com/json.
Note: Abstract API provides powerful APIs to help you enrich any user experience or automate any workflow. You can take a look at their services.
Done. Our proxy server is ready to use. Thanks for reading.
Md Obydullah
Software Engineer | Ethical Hacker & Cybersecurity...
Md Obydullah is a software engineer and full stack developer specialist at Laravel, Django, Vue.js, Node.js, Android, Linux Server, and Ethichal Hacking.