Install Google Drive and Schedule Backup to GDrive on CentOS 7
We know that Google drive is traditional cloud storage. It is also offering 15 GB is free of cost. We can take our website’s schedule backup to Google Drive very easily. Let’s setup GDrive in our CentOS 7 server.
Deprecated: This method won’t work anymore. Please read this article: Mount Google Drive using GDrive on Linux Server with Own OAuth Credentials.
Table of Contents
Step 1 : Install GDrive
Login to your server using SSH and download GDrive to your server. We are going to use wget to download the GDrive. If you didn’t install wget yet, then run this command to install wget first.
sudo yum install wgetNow download GDrive by typing this command:
sudo wget -O drive https://drive.google.com/uc?id=0B3X9GlR6EmbnMHBMVWtKaEZXdDgMove GDrive to /usr/sbin/drive folder by entering this command:
sudo mv drive /usr/sbin/driveSet permission:
sudo chmod 755 /usr/sbin/driveWe have installed GDrive in our server. Let’s connect to our Google Drive account. First, open browser and login to your google account. Our GDrive will be connected to this google drive account.
Run drive command to start the authentication process. You will a link like this:
https://accounts.google.com/o/oauth2/auth?client_id=123456789123-7n0vf5akeru7on...
Copy and paste the link in the browser. Accept the permission and you will get a verification code. Copy the verification and paste back into your shell:
Enter verification code: 4/9gKYAFAJ326XIP6JJHAEhs342t35LPiA5QGW0935...
We have installed Google Drive and connected to our Google Drive account.
Step 2 : Create a Backup Shell Script
We are going to create a bash script. It will compress all files and folder. Then it will upload it to Google Drive.
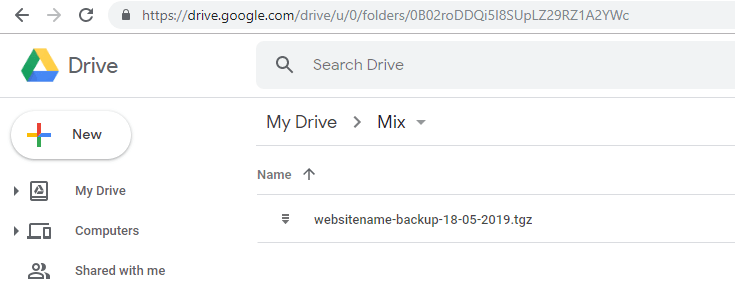
Go to your Google Drive and create a folder. Go to the folder. Now, look at the URL. At the end of the URL, you can see the folder’s path. Look at the screenshot to be clear:

So, 0B02roDDQi5I8SUpLZ29RZ1A2YWc is the Mix folder’s path. Copy this path.
Now create a file named “backup.sh” in any folder of your server. I’m writing on this page /var/www/domain-path/public_html/. Open the backup.sh using an editor and paste this code:
#!/bin/bash
# Md. Obydullah is here!
# Full backup script

# compress the directory
echo "Compressing directory..."
tar -zcvf "websitename-backup-$(date '+%d-%m-%Y').tgz" /var/www/domain-path/public_html/
echo "Directory compressed."
echo ""

# upload to google drive
echo "Uploading to Google Drive..."
drive upload --parent 1guFLCdSQxu9A3UXHuJ0UsKCeo127x218 "websitename-backup-$(date '+%d-%m-%Y').tgz"
echo "Uploaded to Google Drive."
echo

# remove the compressed file
echo "Clearing temporary files..."
sudo rm "websitename-backup-$(date '+%d-%m-%Y').tgz"
echo "Cleared temporary files."
echo ""
You can also take the backup of your database. If you want then you can add these lines before compressing the directory:
# export database
echo "Exporting database..."
sudo mysqldump -u DatabaseUsernameHere -pDatabasePasswordHere DatabaseName > /var/www/domain-path/public_html/database-backup.sql
echo "Database exported."
echo ""
To clear after taking the backup, add this line in the last paragraph of the code. sudo rm /var/www/domain-path/public_html/database-backup.sql. So the last para looks like:
# remove the database and compressed file
echo "Clearing temporary files..."
sudo rm /var/www/domain-path/public_html/database-backup.sql
sudo rm "websitename-backup-$(date '+%d-%m-%Y').tgz"
echo "Cleared temporary files."
echo ""
Step 3 : Test Backup
We have completed all the important tasks. Let’s test the newly created shell script. We can run the script by typing ./backup.sh. There are some ways to run a shell script. You can google it if the below methods don’t work on your server.
# method 1
sudo ./backup.sh
# method 2
sudo sh backup.sh
# method 3
sudo bash backup.sh
I have run the script and checked my drive. Here’s the result:
Step 4 : Make Schedule Backup
We can do it easily using CRON job. We need to change the permissions to allow only root to execute the script.
sudo chmod 500 /var/www/domain-path/public_html/backup.sh
Open cronjob file by typing this:
sudo crontab -eNow add this line to take backup daily at 12 AM:
0 0 * * * /var/www/domain-path/public_html/backup.sh >/dev/null 2>&1You can search ‘Cron Job CentOS 7‘ for more details.
We have successfully setup Google Drive in our server.
Md Obydullah
Software Engineer | Ethical Hacker & Cybersecurity...
Md Obydullah is a software engineer and full stack developer specialist at Laravel, Django, Vue.js, Node.js, Android, Linux Server, and Ethichal Hacking.