Laravel How to Display Social Media Share Icons
Hello Artisans, today I'll show you how to display social media share icons in your Laravel application. It'll take only 5 steps to complete today's tutorial. So, let's get started and see how we can easily integrate sharable social media icons in our Laravel application.
Note: Tested on Laravel 9.19
- Install jorenvanhocht/laravel-share package
- Create and Setup Controller
- Create and Setup View File
- Create Route
- Output
We'll use an awesome package called jorenvanhocht/laravel-share, which is easy to install and of course easy to use. So, let's fire the below command in the terminal.
composer require jorenvanhocht/laravel-shareThat's all we need to do for this package. Now we'll move to the next step.
First of all, create a controller so that we can write our logics or query to show the result. So, fire the below commands in the terminal.
php artisan make:controller SocialControllerIt'll create a controller under app\Http\Controllers called SocialController.php. Open the file and replace with below codes.
<?php

namespace App\Http\Controllers;

use Jorenvh\Share\ShareFacade;

class SocialController extends Controller
{
    public function index(): \Illuminate\Contracts\View\Factory|\Illuminate\Contracts\View\View|\Illuminate\Contracts\Foundation\Application
    {
        $shareComponent = ShareFacade::page(
            url()->current(),//or any url you want to share
            'Your share text comes here')
            ->facebook()
            ->twitter()
            ->linkedin()
            ->telegram()
            ->whatsapp()
            ->reddit();

        return view('post', compact('shareComponent'));
    }
}Now we'll create a blade file named post.blade.php and replace with below codes.
<!doctype html>
<html lang="en">
<head>
    <meta charset="UTF-8">
    <meta name="viewport"
          content="width=device-width, user-scalable=no, initial-scale=1.0, maximum-scale=1.0, minimum-scale=1.0">
    <meta http-equiv="X-UA-Compatible" content="ie=edge">
    <title>Document</title>
    <link rel="stylesheet" href="https://cdnjs.cloudflare.com/ajax/libs/font-awesome/5.15.3/css/all.min.css"/>

</head>
<body>
<div>
    <h1>Social Icons</h1>
    {!! $shareComponent !!}
</div>
</body>
</html>
Now we'll create routes so that we can access in our view file. So, put the below route in web.php file.
<?php

use Illuminate\Support\Facades\Route;

/*
|--------------------------------------------------------------------------
| Web Routes
|--------------------------------------------------------------------------
|
| Here is where you can register web routes for your application. These
| routes are loaded by the RouteServiceProvider within a group which
| contains the "web" middleware group. Now create something great!
|
*/

Route::get('/', [\App\Http\Controllers\SocialController::class,'index']);
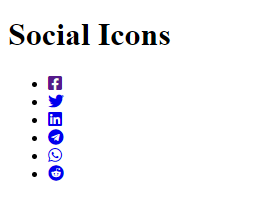
And finally we're ready with our setup. It's time to check our output. Now go to http://127.0.0.1:8000, If everything goes well you'll find a below output
That's it for today. I hope you've enjoyed this tutorial. You can also download this tutorial from GitHub. Thanks for reading. 🙂