How to Integrate File Manager in Laravel
Hello Artisans, today We'll discuss about how to integrate our own file manager in our Laravel application. For integrate our own file manager, we'll use alexusmai/laravel-file-manager package. It's a very beautiful package which gives all the facility that we need to had in the file manager. So, let's see how we can implement our own file manager in our Laravel Application.
Note: Tested on Laravel 9.11
Table of Contents
- Install and configure alexusmai/laravel-file-manager
- Define Routes
- Create and Setup Controller
- Create and Setup blade File
- Output
Install and Configure alexusmai/laravel-file-manager
In the very first step, we'll install the alexusmai/laravel-file-manager package. Fire the below command in your terminal.
composer require alexusmai/laravel-file-managerAfter successfully installing, we need to publish the configuration file. Fire the below command
php artisan vendor:publish --tag=fm-configAnd now we need to publish the assets file. So, fire the below command in your terminal.
php artisan vendor:publish --tag=fm-assetsDefine Routes
Now we need to put the below routes in our web.php
Route::get('filemanager', [App\Http\Controllers\FileManagerController::class, 'index']);Create and Setup Controller
First we need to create a controller from where we can return our file manager view. Fire the below command to create a controller
php artisan make:controller FileManagerControllerIt'll create a controller under app\Http\Controllers called FileManagerController.php. Open the file and replace with below codes.
<?php

namespace App\Http\Controllers;

use Illuminate\Http\Request;

class FileManagerController extends Controller
{
    public function index(): \Illuminate\Contracts\View\Factory|\Illuminate\Contracts\View\View|\Illuminate\Contracts\Foundation\Application
    {
        return view('filemanager');
    }
}
Create and Setup blade File
Now we need to create a blade file for viewing the file manager in our browser. So, create a file under resources\views named filemanager.blade.php. And open the file and replace with the following codes.
<!DOCTYPE html>
<html lang="{{ app()->getLocale() }}">
<head>
    <meta charset="utf-8">
    <meta name="viewport" content="width=device-width, initial-scale=1, shrink-to-fit=no">

    <!-- CSRF Token -->
    <meta name="csrf-token" content="{{ csrf_token() }}">

    <title>{{ config('app.name', 'File Manager') }}</title>

    <!-- Styles -->
    <link rel="stylesheet" href="https://cdn.jsdelivr.net/npm/[email protected]/dist/css/bootstrap.min.css">
    <link rel="stylesheet" href="https://cdn.jsdelivr.net/npm/[email protected]/font/bootstrap-icons.css">
    <link href="{{ asset('vendor/file-manager/css/file-manager.css') }}" rel="stylesheet">
</head>
<body>
<div class="container">
    <h2>Laravel File Manager - shouts.dev</h2>
    <div class="row">
        <div class="col-md-12" id="fm-main-block">
            <div id="fm" style="min-height: 800px"></div>
        </div>
    </div>
</div>

<!-- File manager -->
<script src="{{ asset('vendor/file-manager/js/file-manager.js') }}"></script>
<script>
    document.addEventListener('DOMContentLoaded', function() {
        document.getElementById('fm-main-block').setAttribute('style', 'height:' + window.innerHeight + 'px');

        fm.$store.commit('fm/setFileCallBack', function(fileUrl) {
            window.opener.fmSetLink(fileUrl);
            window.close();
        });
    });
</script>
</body>
</html>
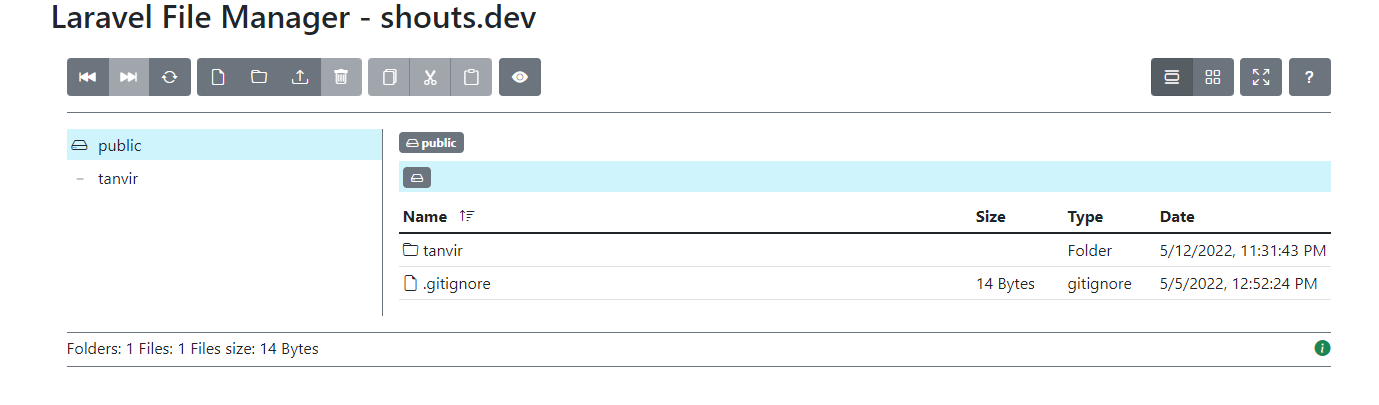
Output
Now we ready with our setup. It's time to check our output. Now go to http://127.0.0.1:8000/filemanager, If everything goes well you'll find a below output.
That's it for today. Hope you'll enjoy this tutorial. You can also download this tutorial from GitHub. Thanks for reading. 🙂