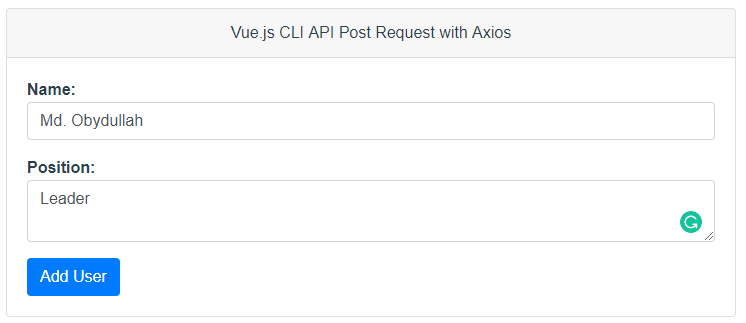
Vue.js CLI API Post Request with Axios
In this tutorial, we are going to learn how to send a post request to a third-party API using Axios.
Table of Contents
- Create a Vue CLI project
- Install Necessary Dependencies
- Add Bootstrap to Project
- Import Axios and Create Post Method
- The Final App.vue File
- Run and Test
Step 1 : Create a Vue CLI Project
Go to your projects directory and create a project by typing this:
vue create vuejs-cli-api-post-requestNavigate to the folder:
cd vuejs-cli-api-post-requestStep 2 : Install Necessary Dependencies
Let’s install Axios by typing this command:
npm install axios --saveFor front-end, we are going to install bootstrap, jQuery, and popper.js. We can install these three by one command:
npm install bootstrap jquery popper.js --saveStep 3 : Add Bootstrap to Project
We have already installed Bootstrap in our project. Open main.js from src folder using an editor and add these two lines:
import 'bootstrap'
import 'bootstrap/dist/css/bootstrap.min.css'
So, the main.js looks like:
import Vue from 'vue'
import App from './App.vue'

import 'bootstrap'
import 'bootstrap/dist/css/bootstrap.min.css'

Vue.config.productionTip = false

new Vue({
  render: h => h(App),
}).$mount('#app')
Step 4 : Import Axios and Create Post Method
Go to src folder and open App.vue file. We are going to import the axios and create a post method. We are going to take dummy data from
https://reqres.in/.
<script>
import axios from "axios";

export default {
  name: 'app',
  data () {
    return {
      name: '',
      position: '',
    }
  },
  methods: {
      formSubmit(e) {
          e.preventDefault();
          axios
          .post('https://reqres.in/api/users', {
                name: this.name,
                position: this.position
          })
          .then(response => (console.log(response.data)))
          .catch(error => console.log(error))
          .finally(() => this.loading = false)
      }
  }

}
</script>
Step 5 : The Final App.vue File
We have completed our javascript part. Let’s bind to html. I have created a simple form to send post request. So, the final App.vue looks like:
<template>
  <div id="app">
    <div class="container">
        <div class="row justify-content-center">
            <div class="col-md-8">
                <div class="card">
                    <div class="card-header text-center">Vue.js CLI API Post Request with Axios</div>
                      <div class="card-body">
                        <form @submit="formSubmit">
                          <div class="form-group">
                            <strong class="text-left">Name:</strong>
                            <input type="text" class="form-control" v-model="name">
                          </div>
                          <div class="form-group">
                            <strong>Position:</strong>
                            <textarea class="form-control" v-model="position"></textarea>
                          </div>
                          <button class="btn btn-primary">Add User</button>
                        </form>
                      </div>
                    </div>
                </div>
            </div>
        </div>
    </div>
  </div>
</template>

<script>
import axios from "axios";

export default {
  name: 'app',
  data () {
    return {
      name: '',
      position: '',
    }
  },
  methods: {
      formSubmit(e) {
          e.preventDefault();
          axios
          .post('https://reqres.in/api/users', {
                name: this.name,
                position: this.position
          })
          .then(response => (console.log(response.data)))
          .catch(error => console.log(error))
          .finally(() => this.loading = false)
      }
  }

}
</script>

<style>
#app {
  font-family: 'Avenir', Helvetica, Arial, sans-serif;
  -webkit-font-smoothing: antialiased;
  -moz-osx-font-smoothing: grayscale;
  color: #2c3e50;
  margin-top: 60px;
}
</style>
Step 6 : Run and Test
Now let’s run the app:
npm run serveVisit the project URL http://localhost:8080 and see the output:

I’ve printed the response in the console. Let’s see the response:

Md Obydullah
Software Engineer | Ethical Hacker & Cybersecurity...
Md Obydullah is a software engineer and full stack developer specialist at Laravel, Django, Vue.js, Node.js, Android, Linux Server, and Ethichal Hacking.