Send Custom Welcome Email on Registration in Laravel
In this tutorial, we are going to learn how to send a custom email on user registration in Laravel.
Table of Contents
Step 1 : Create an Email Template
Go to resources>views folder and create a blade file called welcome_email.blade.php. Then open the file and paste this demo template:
Hello {{ $name }},<br><br>

Welcome to MyNotePaper.<br><br>

Thank You,<br>
MyNotepaper
Step 2 : Set SMTP Credentials
Open .env file and set your SMTP details. I using mailtrap for testing purpose.
MAIL_DRIVER=smtp
MAIL_HOST=smtp.mailtrap.io
MAIL_PORT=2525
MAIL_USERNAME=48664********
MAIL_PASSWORD=6cfa6********
Step 3 : Update Registration Controller
Navigate to app>Http>Controllers>Controller and open RegisterController.php. We are going to modify create() method to send a custom email on registration. Modify the controller like this:
use Illuminate\Support\Facades\Mail;

protected function create(array $data)
{
    $user = User::create([
        'name' => $data['name'],
        'email' => $data['email'],
        'password' => Hash::make($data['password']),
    ]);

    // email data
    $email_data = array(
        'name' => $data['name'],
        'email' => $data['email'],
    );

    // send email with the template
    Mail::send('welcome_email', $email_data, function ($message) use ($email_data) {
        $message->to($email_data['email'], $email_data['name'])
            ->subject('Welcome to MyNotePaper')
            ->from('[email protected]', 'MyNotePaper');
    });

    return $user;
}
Step 4 : Lets’s Test
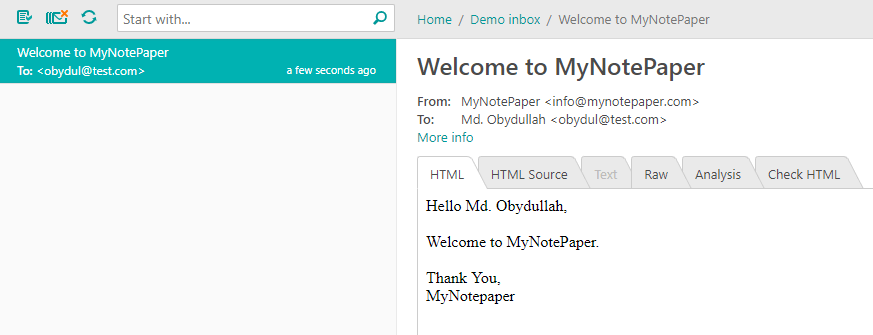
We have completed all the necessary tasks. Now run the project and test by signing up. I’ve received an email on registration:
We are done. Thanks for reading.
Md Obydullah
Software Engineer | Ethical Hacker & Cybersecurity...
Md Obydullah is a software engineer and full stack developer specialist at Laravel, Django, Vue.js, Node.js, Android, Linux Server, and Ethichal Hacking.