Laravel Advanced Search Filters with Optional Fields
Hello Artisan, Sometimes we need to implement the filters with some optional fields like email, username, age etc. In this todays' topic, I'll try to cover how you can easily implement it in your Laravel application.
Note: Tested on Laravel 8.65.
Table of Contents
- Modify The Users Table
- Setup Model
- Create Dummy Records
- Create and Setup Controller
- Create Route
- Setup Blade Template
- Output
Modify The Users Table
At first, we need to modify our users table. Put the below code in our users_migration file.
<?php

use Illuminate\Database\Migrations\Migration;
use Illuminate\Database\Schema\Blueprint;
use Illuminate\Support\Facades\Schema;

class CreateUsersTable extends Migration
{
    public function up()
    {
        Schema::create('users', function (Blueprint $table) {
            $table->id();
            $table->string('name');
            $table->string('email')->unique();
            $table->string('username')->unique();
            $table->string('age');
            $table->timestamp('email_verified_at')->nullable();
            $table->string('password');
            $table->rememberToken();
            $table->timestamps();
        });
    }

    public function down()
    {
        Schema::dropIfExists('users');
    }
}
Now migrate using the below command.
php artisan migrateSetup Model
Now open User.php file and replace the $fillable property with the blow code.
protected $fillable = [
        'name',
        'email',
        'password',
        'username',
        'age'
    ];
Create Dummy Records
In this step, first we will modify our Default UserFactory.php. Replace the definition() function with the following code.
public function definition()
    {
        return [
            'name' => $this->faker->name(),
            'email' => $this->faker->unique()->safeEmail(),
            'username' => $this->faker->unique()->userName,
            'age' => $this->faker->numberBetween(15,50),
            'email_verified_at' => now(),
            'password' => '$2y$10$92IXUNpkjO0rOQ5byMi.Ye4oKoEa3Ro9llC/.og/at2.uheWG/igi', // password
            'remember_token' => Str::random(10),
        ];
    }
Now, we will use Tinker to create dummy records. If you don't familiar with Tinker, I recommend you to see one of my short tutorial using Tinker . Now, lets run the below command, which will create 500 user.
php artisan tinker
App\Models\User::factory()->count(500)->create()
Create and Setup Controller
At first we need to create a controller where we can put our logic. So, let's fire the below command in your terminal
php artisan make:controller UserControllerThis will create a file under app\Http\UserController.php, open the file paste the below code
<?php

namespace App\Http\Controllers;

use App\Models\User;
use Illuminate\Http\Request;

class UserController extends Controller
{
    public function index()
    {
        $users = User::latest()->simplePaginate(20);

        return view('users',compact('users'));
    }

    public function filter(Request $request)
    {
        $users = User::query();

        $name = $request->name;
        $email = $request->email;
        $username = $request->username;
        $age = $request->age;

        if ($name) {
            $users->where('name','LIKE','%'.$name.'%');
        }
        if ($email) {
            $users->where('email','LIKE','%'.$email.'%');
        }

        if ($username) {
            $users->where('username','LIKE','%'.$username.'%');
        }

        if ($age) {
            $users->where('age',$age);
        }

        $data = [
            'age' => $age,
            'email' => $email,
            'name' => $name,
            'username' => $username,
            'users' => $users->latest()->simplePaginate(20),
        ];

        return view('users',$data);
    }
}
Create Route
Now put the below route in your web.php
Route::get('users',[\App\Http\Controllers\UserController::class,'index'])->name('users.index');
Route::get('users-filter',[\App\Http\Controllers\UserController::class,'filter'])->name('users.filter');
Setup Blade Template
In this step, first we need to create a blade file called users.blade.php and paste the below code
<html>
<head>
    <title></title>
    <link rel="stylesheet" href="https://maxcdn.bootstrapcdn.com/bootstrap/4.5.2/css/bootstrap.min.css">
</head>
<body>
<div class="container">
    <div class="row justify-content-center">
        <div class="col-md-12 mb-5">
            <div class="card">
                <div class="card-header">
                    <h2>Laravel 8 Advanced Search</h2>
                </div>
                <div class="card-body">
                    <form action="{{ route('users.filter') }}" method="GET">
                        <div class="row">
                            <div class="col-xl-3">
                                <label>Name</label>
                                <input type="text" name="name" class="form-control" value="{{ $name ?? '' }}">
                            </div>
                            <div class="col-xl-3">
                                <label>Email</label>
                                <input type="text" name="email" class="form-control" value="{{ $email ?? '' }}">
                            </div>
                            <div class="col-xl-3 mt-2">
                                <label>Username</label>
                                <input type="text" name="username" class="form-control" value="{{ $username ?? '' }}">
                            </div>
                            <div class="col-xl-3 mt-2">
                                <label>Age</label>
                                <input type="text" name="age" class="form-control" value="{{ $age ?? '' }}">
                            </div>
                            <div class="col-xl-12 text-right mt-2">
                                <button class="btn btn-primary" type="submit">Search</button>
                            </div>

                        </div>
                    </form>
                </div>
            </div>
            <table class="table table-bordered">
                <thead>
                <tr>
                    <th>#</th>
                    <th>Name</th>
                    <th>Email</th>
                    <th>Username</th>
                    <th>Age</th>
                </tr>
                </thead>
                <tbody>
                @foreach ($users as $key => $user)
            <tr>
            <td> {{ $key+1 }}</td>
            <td> {{ $user->name }}</td>
            <td>{{ $user->email }}</td>
            <td>{{ $user->username }}</td>
            <td>{{ $user->age }}</td>
            </tr>

        @endforeach
                </tbody>
            </table>
            {{ $users->links() }}
        </div>
    </div>
</div>

</body>
</html>
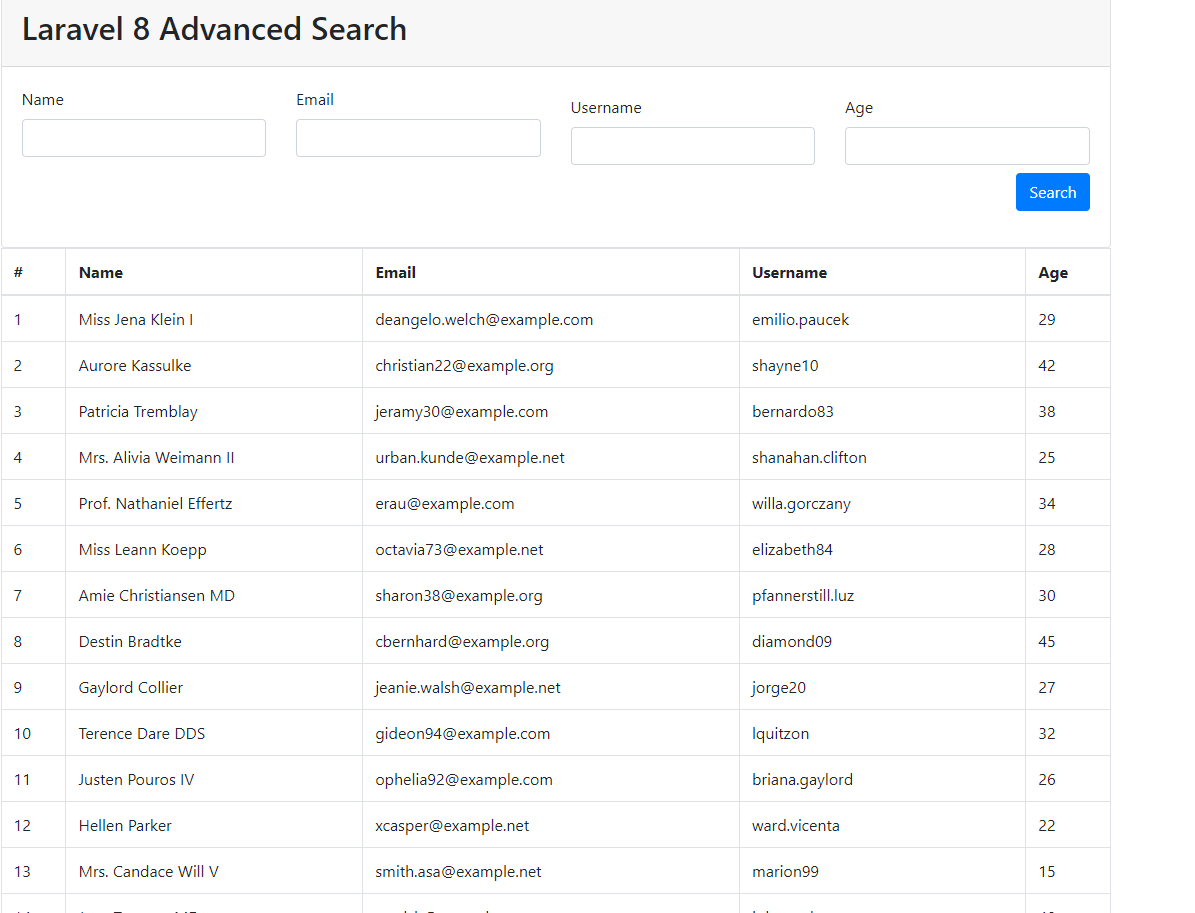
Output
Now we are ready to run our project. Go to http://127.0.0.1:8000/users . and you'll find the below output.
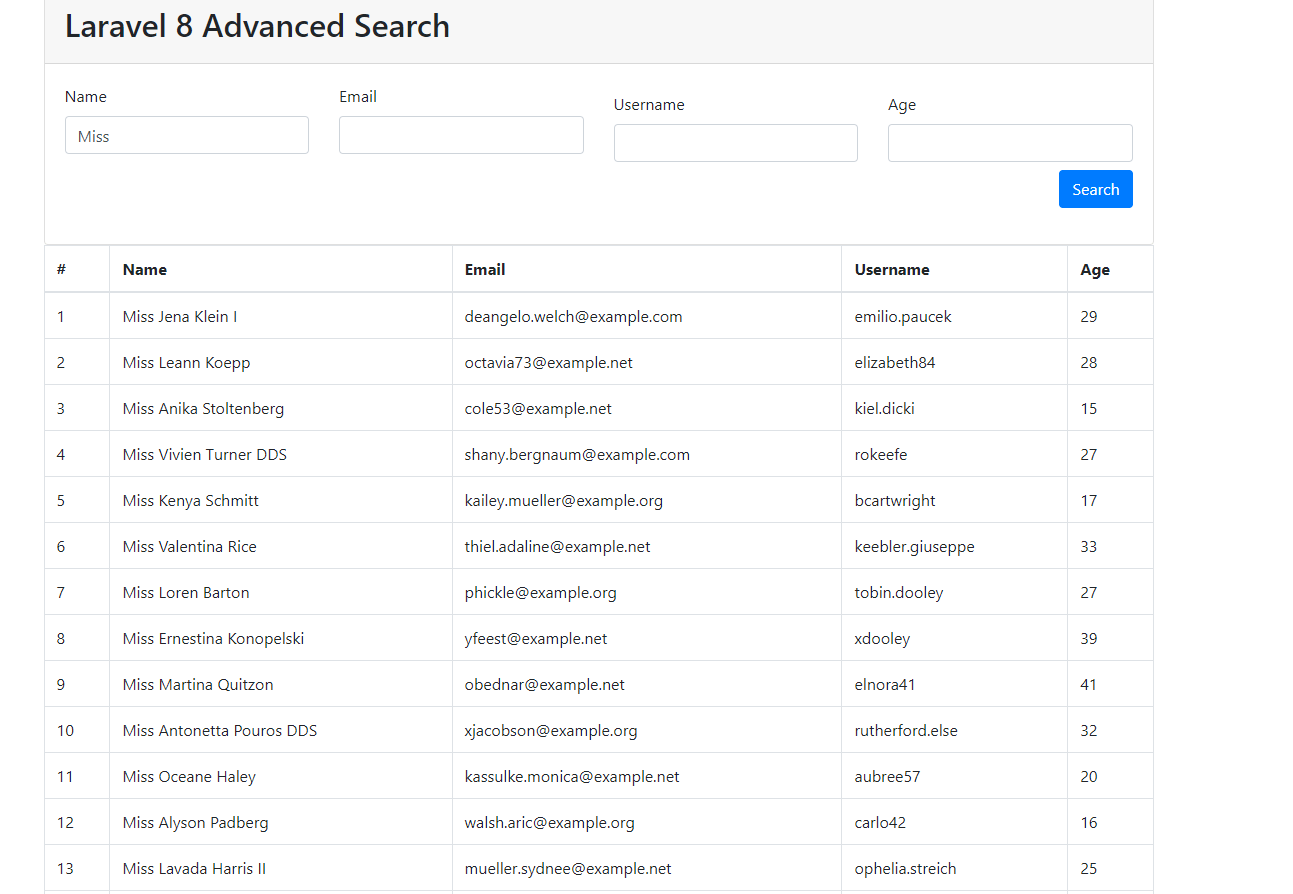
Now if you try to filter (by name, email, username or age) you will see it works. Look at the snippet of mine.
That's all for today. Hope you can enjoy this tutorial. You can download the project from GitHub also. Thanks for reading.