How to add Custom Domain and install SSL (HTTPS) on Localhost
We the developers like to use custom domain on localhost. Such as site.dev
Now I’m going to share an idea. Now we can use .dev, .test, .com domain with HTTPS on localhost very easily. Personally, I use this method for XAMPP. So, let’s start.
Just follow these simple steps:
Add a custom domain
- Open ‘Notepad’ as administrator.
- Edit C:\Windows\System32\drivers\etc\hosts
- Add this in a new line:
127.0.0.1 site.testNow add the site in httpd-vhosts.conf file. Edit this file
C:\xampp\apache\conf\extra\
## site.test
 <VirtualHost *:80>
     DocumentRoot "C:/xampp/htdocs/site.test"
     ServerName site.test
     ServerAlias *.site.test
 </VirtualHost>
 <VirtualHost *:443>
     DocumentRoot "C:/xampp/htdocs/site.test"
     ServerName site.test
     ServerAlias *.site.test
     SSLEngine on
     SSLCertificateFile "crt/site.test/server.crt"
     SSLCertificateKeyFile "crt/site.test/server.key"
 </VirtualHost>
If you don’t want to install SSL, then you can remove this code from the file.
<VirtualHost *:443>
     DocumentRoot "C:/xampp/htdocs"
     ServerName site.test
     ServerAlias *.site.test
     SSLEngine on
     SSLCertificateFile "crt/site.test/server.crt"
     SSLCertificateKeyFile "crt/site.test/server.key"
 </VirtualHost>
We have successfully added custom domain. Let’s install SSL.
Install SSL (HTTPS)
1. Go to Apache directory & create a folder
Regularly the location is C:\xampp\apache. Now create a folder named “crt”. Here we will store our certificates. Navigate to the crt directory. So now we are here C:\xampp\apache\crt.
2. Add 2 files
We need two files in
1. cert.conf
2. make-cert.bat
@echo off
set /p domain="Enter Domain: "
set OPENSSL_CONF=../conf/openssl.cnf

if not exist .\%domain% mkdir .\%domain%

..\bin\openssl req -config cert.conf -new -sha256 -newkey rsa:2048 -nodes -keyout %domain%\server.key -x509 -days 365 -out %domain%\server.crt

echo.
echo -----
echo The certificate was provided.
echo.
pause
3. Edit cert.conf and Run make-cert.bat
Open cert.conf file, search for “site.test” and replace with your domain. You will find “site.test” in two places ‘commonName_default’ and ”DNS.1′.
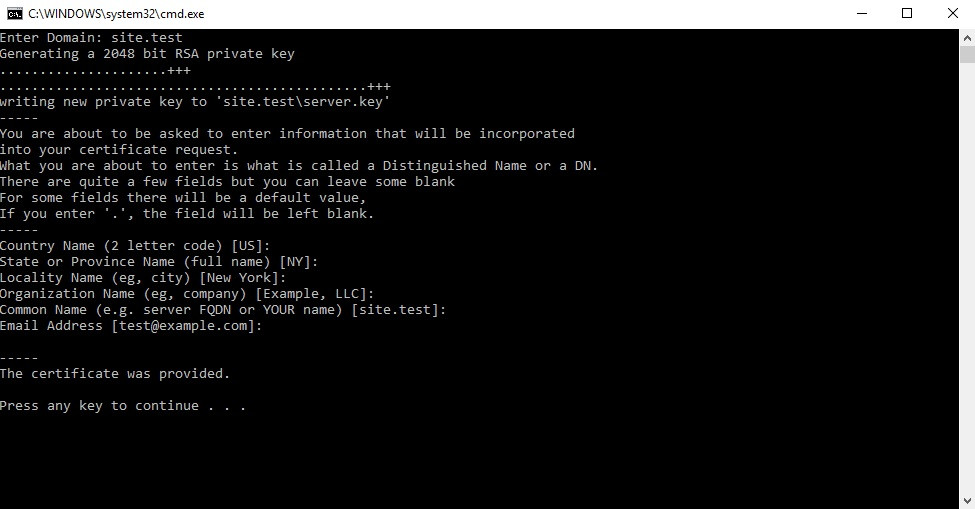
Double click on make-cert.bat file and you will see the terminal. Enter the domain (site.test), country, state etc. when prompted.
4. Install the cert in windows
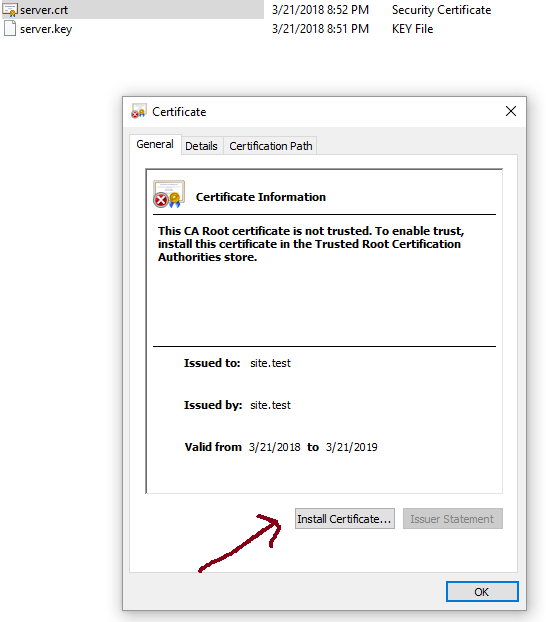
You can a folder named ‘site.test’. After opening this folder we will find two files server.crt and server.key. To install it on Windows, double click on the server.crt.
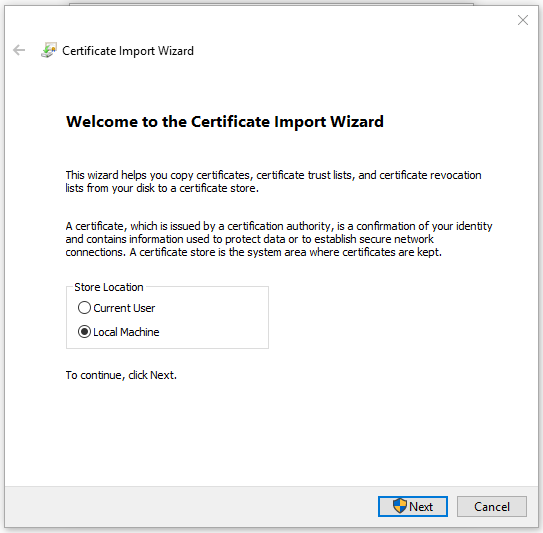
Click “Install Certificate” and select Local Machine.
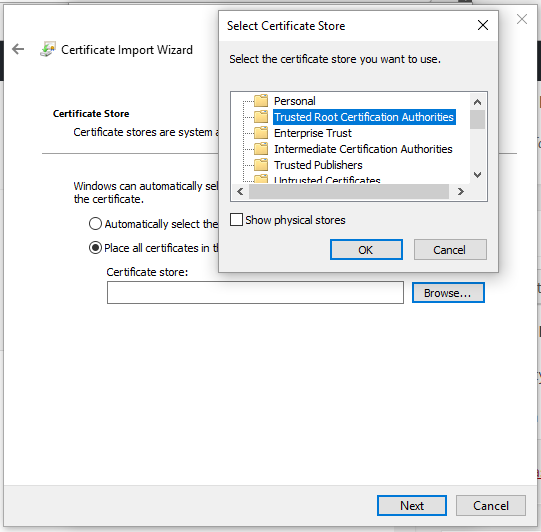
Then choose “Place all certificate in the following store“, browse and select Trusted Root Certification Authorities.
Click OK, Next and Finish. We have successfully installed SSL.
5. Restart Apache and Browser
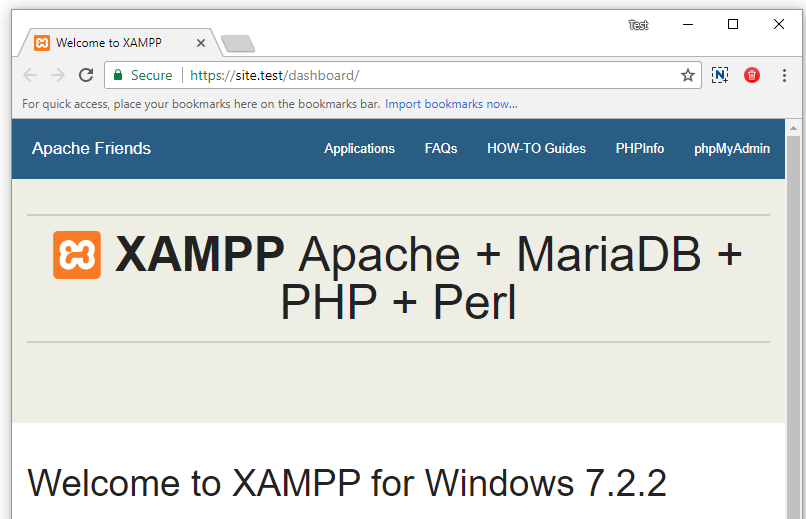
Finally, we need to restart the Apache. Just Stop and Start the Apache from Xampp panel. After doing this, restart your browser to see the green lock.
We have successfully added custom domain and installed SSL on location. I hope you enjoy this. I have learnt this method from
Md Obydullah
Software Engineer | Ethical Hacker & Cybersecurity...
Md Obydullah is a software engineer and full stack developer specialist at Laravel, Django, Vue.js, Node.js, Android, Linux Server, and Ethichal Hacking.