Install Nginx, MySQL, PHP, APCu on CentOS 7
In this tutorial, we are going to install Nginx, MySQL, PHP, APCu on CentOS 7.
Table of Contents
Let’s see the steps:
- Login to Server
- Install Nginx
- Install MySQL
- Install PHP with PHP-FPM
- Configure PHP-FPM
- Configure Nginx to Process PHP
- Test PHP Processing
- Install APCu (Cache)
Step 1 : Login to Server
At first, we need to login to our server via SSH. Open your terminal and run this command:
ssh root@IPaddress -p PORTStep 2 : Install Nginx
Make nginx.repo file:
sudo nano /etc/yum.repos.d/nginx.repoNow copy and paste this code to nginx.repo file (SHIFT+INS):
[nginx]
name=nginx repo
baseurl=http://nginx.org/packages/mainline/centos/7/$basearch/
gpgcheck=0
Run this command to install Nginx:
sudo yum install nginxStart Nginx server:
sudo systemctl start nginxEnable Nginx to start at boot:
sudo systemctl enable nginxNginx is installed. Visit your website by entering IP address on a browser: http://ip_address/
Step 3 : Install MySQL
Run this command to install MariaDB:
sudo yum install mariadb mariadb-serverStart MariaDB server:
sudo systemctl start mariadbEnable MariaDB to start at boot:
sudo systemctl enable mariadbRun the mysql_secure_installation the script which will perform several security-related tasks:
sudo mysql_secure_installationStep 4 : Install PHP with PHP-FPM
We need two repositories. The first one is: EPEL. Run this command:
sudo yum install https://dl.fedoraproject.org/pub/epel/epel-release-latest-7.noarch.rpmThe second one is: REMI. To install, run this command:
sudo yum install http://rpms.remirepo.net/enterprise/remi-release-7.rpmNow we need to install yum-utils package by running this command:
sudo yum install yum-utilsWe are going to install PHP 7.3. You can install another version too.
sudo yum-config-manager --enable remi-php73Now install PHP 7.3 with all necessary modules
sudo yum -y install php php-fpm php-mysqlnd php-zip php-devel php-gd php-mcrypt php-mbstring php-curl php-xml php-pear php-bcmath php-json php-pdo php-pecl-apcu php-pecl-apcu-develTo check the installed version of PHP, run this:
php -vStep 5 : Configure PHP-FPM
Open php.ini file:
sudo nano /etc/php.iniand add this line to the configuration file:
cgi.fix_pathinfo=0Save and close the file. Next, open www.conf file:
sudo nano /etc/php-fpm.d/www.confNow find user and group and change their values to centos.
user = centos
group = centos
Now find listen.owner and listen.group and change their values to centos.
listen.owner = centos
listen.group = centos
Last, find listen parameter and change the line to:
listen = /var/run/php-fpm/www.sockSave & close the file and start the PHP processor by typing:
sudo systemctl start php-fpmEnable php-fpm to start on boot:
sudo systemctl enable php-fpmStep 6 : Configure Nginx to Process PHP
Remove nginx.conf and re-create nginx.conf file by these commands :
# remove
sudo rm /etc/nginx/nginx.conf
# add again
sudo nano /etc/nginx/nginx.conf
Now paste this code (SHIFT+INS):
user centos;
worker_processes auto;

error_log  /var/log/nginx/error.log warn;
pid        /var/run/nginx.pid;

events {
    worker_connections  1024;
}

http {
    include       /etc/nginx/mime.types;
    default_type  application/octet-stream;

    log_format  main  '$remote_addr - $remote_user [$time_local] "$request" '
                      '$status $body_bytes_sent "$http_referer" '
                      '"$http_user_agent" "$http_x_forwarded_for"';

    access_log  /var/log/nginx/access.log  main;

    sendfile        on;
    #tcp_nopush     on;

    keepalive_timeout  65;

    #gzip  on;
    #
    include /etc/nginx/conf.d/*.conf;
}
Save and close the file. Now remove default.conf and re-create default.conf file:
# remove
sudo rm /etc/nginx/conf.d/default.conf
# add again
sudo nano /etc/nginx/conf.d/default.conf
Paste this code now (replace server IP):
server {
        listen 80;
        server_name 3.85.235.68;

        root /usr/share/nginx/html;
        index index.php index.htm index.html;

        location / {
            try_files $uri $uri/ /index.php?$query_string;
        }

        location ~ \.php$ {
            try_files $uri =404;
            fastcgi_pass unix:/var/run/php-fpm/www.sock;
            fastcgi_index index.php;
            fastcgi_param SCRIPT_FILENAME $document_root$fastcgi_script_name;
            include fastcgi_params;
        }

        location ^~ /.well-known/acme-challenge/ {
            allow all;
            default_type "text/plain";
        }

        location ~ /\. {
            deny all;
        }
}
Save and close the file. Restart Nginx to make the necessary changes:
sudo systemctl restart nginxStep 7 : Test PHP Processing
In CentOS 7, this directory is located at /usr/share/nginx/html/. Create a file by typing:
sudo nano /usr/share/nginx/html/info.phpWrite this code to the info.php:
<?php phpinfo(); ?>Save and close the file. Now the address you want to visit will be:
# Open in a web browser:
http://your_server_IP/info.php
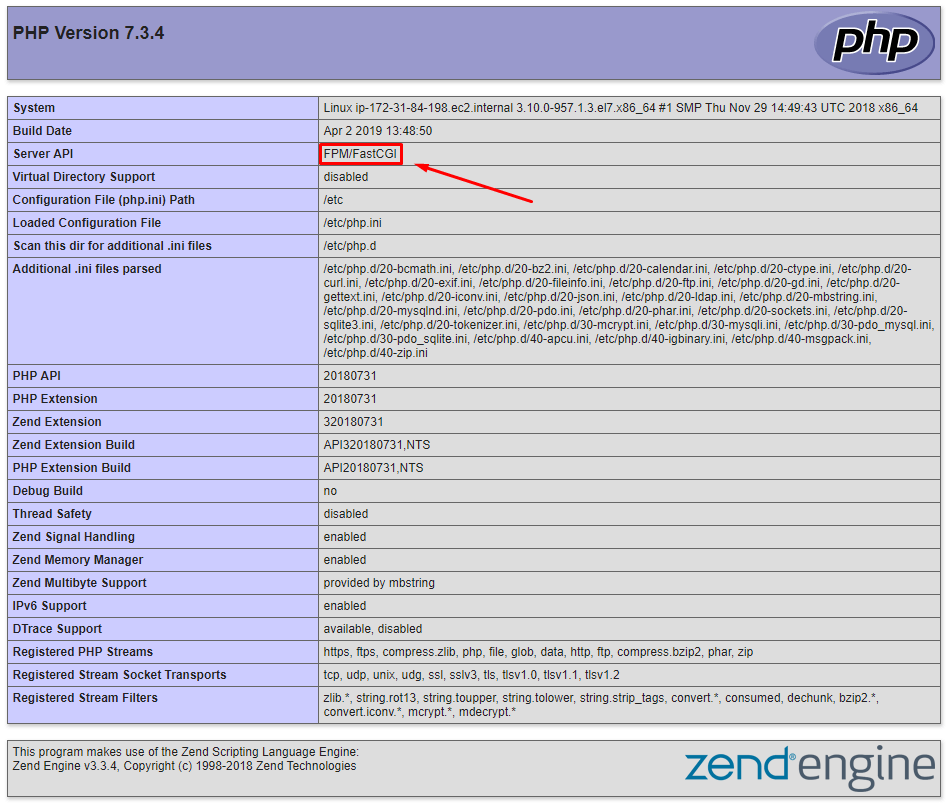
You will see like this:

Step 8 : Install APCu (Cache)
Run this command to install APCu:
sudo yum install php-pecl-apcuBy entering this command, you can install dependency packages for APCu:
sudo yum install php-pear php-devel httpd-devel pcre-devel gcc makeFinally, restart your web server to enable APCu:
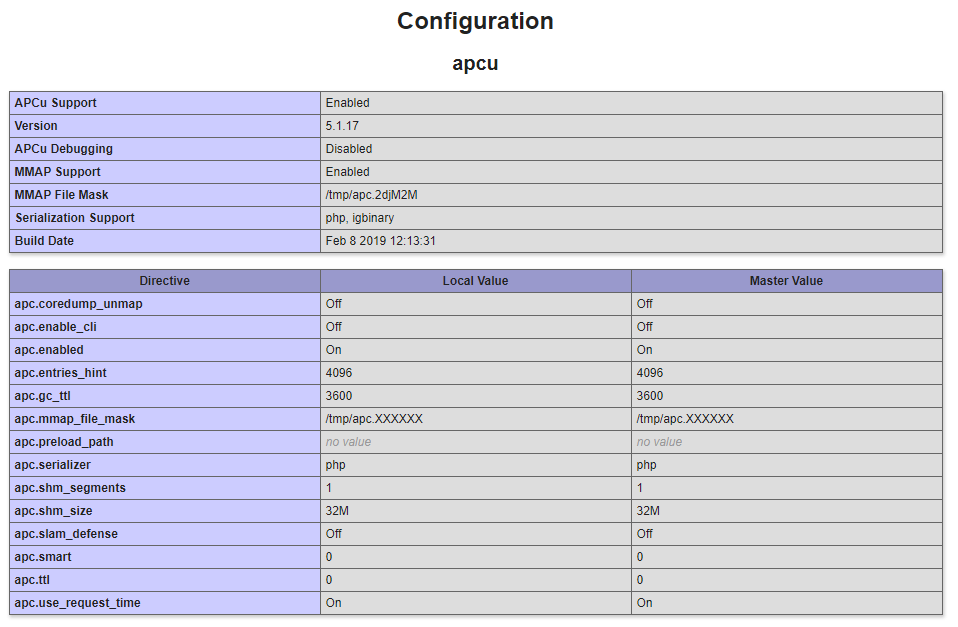
sudo systemctl restart php-fpmNow take a look at the info.php:

Read more about APCu: Install APCu (Alternative PHP Cache) on CentOS 7
I hope this article will help you. Thank you.
Md Obydullah
Software Engineer | Ethical Hacker & Cybersecurity...
Md Obydullah is a software engineer and full stack developer specialist at Laravel, Django, Vue.js, Node.js, Android, Linux Server, and Ethichal Hacking.